Brighten your day with the Amigurumi Daisy, a cheerful crochet bloom that’s full of sunshine and charm! 🌼🧶 With its soft white petals, sunny yellow center, and sweet little smile, this daisy is perfect for spring décor, thoughtful gifts, or simply adding a touch of floral joy to your amigurumi garden. Whether you’re crafting a single flower or a whole bouquet, this pattern is a lovely way to celebrate the beauty of handmade blossoms.
Perfect for crocheters who love quick, colorful projects and expressive details, this pattern invites you to play with petal shapes, add tiny accessories like bows or leaves, and personalize each daisy with embroidered touches. It’s a delightful make for beginners and seasoned stitchers alike. The Amigurumi Daisy is a fresh and friendly way to stitch up happiness—one petal at a time! 💛🧵
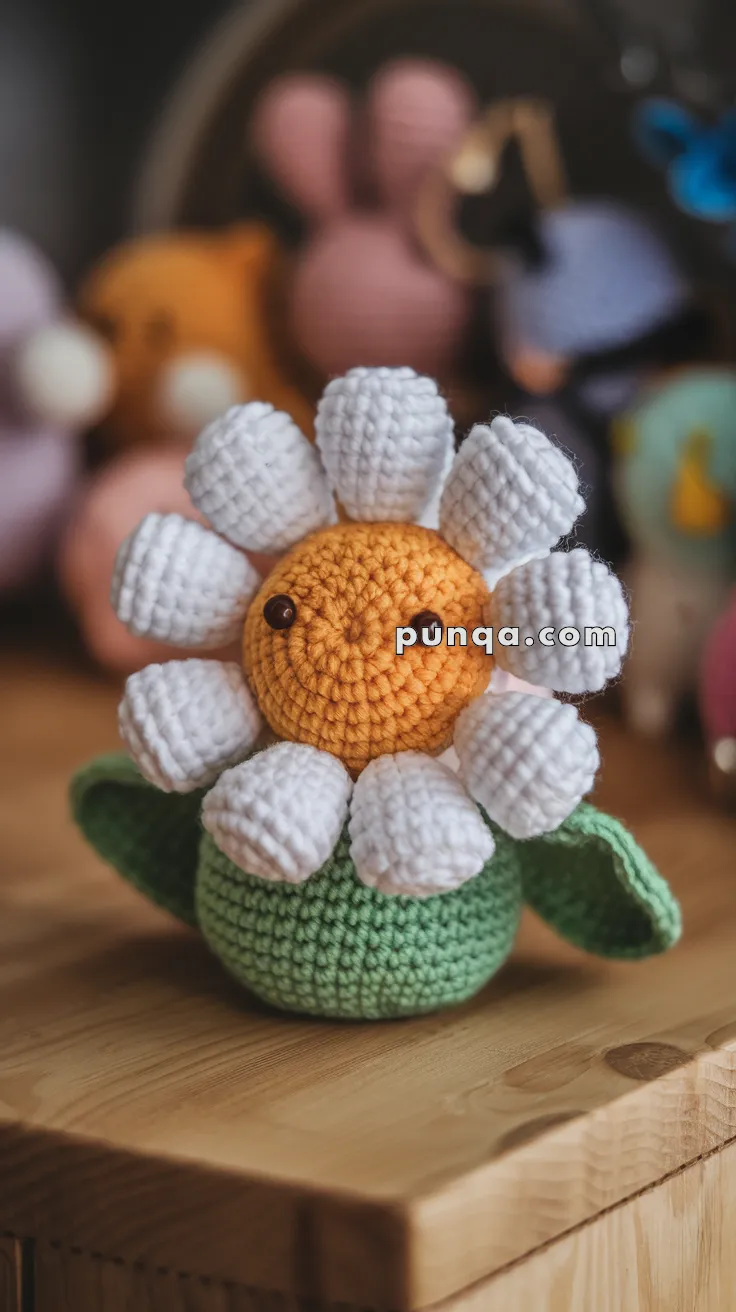
🌼Amigurumi Daisy Crochet Pattern
Brighten your day with this cheerful crochet daisy! With its round sunny face, puffy white petals, and a sturdy green base, this flower never fades. Perfect for spring décor, handmade gifts, or just adding a little sunshine to your home.
✨ Skill Level
Beginner to Intermediate – Basic amigurumi construction with a little shaping for petals and leaves.
📏 Finished Size
Approx. 12–15 cm (5–6 in) tall using DK or worsted yarn and a 2.5–3.0 mm hook.
🧵 Materials
- DK or worsted weight yarn:
- Yellow/Orange – flower face
- White – petals
- Green – base & leaves
- Black – for mouth/eyebrows (optional embroidery)
- Crochet hook: 2.5–3.0 mm
- 8–10 mm safety eyes (or black felt circles)
- Polyester fiberfill stuffing
- Yarn needle
- Stitch marker
- Scissors
- Optional: blush or fabric paint for cheeks
🔤 Abbreviations (US Terms)
- MR – Magic Ring
- sc – Single Crochet
- inc – Increase (2 sc in one stitch)
- dec – Decrease (sc 2 together)
- sl st – Slip Stitch
- ch – Chain
- st(s) – Stitch(es)
- FO – Fasten Off
🌞 Head (Yellow/Orange)
- MR, 6 sc (6)
- inc x6 (12)
- (sc, inc) x6 (18)
- (2 sc, inc) x6 (24)
- (3 sc, inc) x6 (30)
6–10. sc around (30) - (3 sc, dec) x6 (24)
- (2 sc, dec) x6 (18)
👉 Insert safety eyes between Rounds 6–7, about 6 stitches apart. Embroider a smile if desired. - (sc, dec) x6 (12)
- dec x6 (6)
FO, stuff firmly, weave to close.
🌼 Petals (Make 12 – White)
- MR, 6 sc (6)
2–7. sc around (6) ← longer tube for puffy petals
Flatten and sl st across to close.
FO, leave tail for sewing.
👉 Sew petals evenly around the head in a full circle.
🍃 Base Pot (Green)
- MR, 6 sc (6)
- inc x6 (12)
- (sc, inc) x6 (18)
- (2 sc, inc) x6 (24)
- (3 sc, inc) x6 (30)
6–12. sc around (30) ← extra rounds for taller pot shape
FO, stuff lightly, and sew to the bottom of the head.
🍀 Leaves (Make 2 – Green)
- Ch 12
- Row 1: sc, hdc, dc, dc, dc, dc, hdc, sc, sc, sc, sl st
- Row 2 (other side of chain): sl st, sc, hdc, dc, dc, dc, dc, hdc, sc, sc, sc
FO, leave tail. Pinch base and sew to each side of green pot.
👉 This creates wide, curved leaves like in the photo.
🪄 Final Assembly & Tips
- Attach petals firmly all around the yellow head.
- Sew head securely onto the green base.
- Position leaves at the sides of the pot.
- Add blush to cheeks for extra cuteness.
- For stability, insert a small cardboard circle inside the green base before stuffing.
🌸 Finishing Touches
Your adorable amigurumi daisy is now ready to bloom! 🌼 Place it on your desk, gift it to a friend, or add it to a bouquet of crochet flowers. This little daisy will brighten any space year-round.
💡 Pro Tip: Make multiple daisies in different petal colors (pink, lavender, sky blue) for a fun and colorful garden effect!