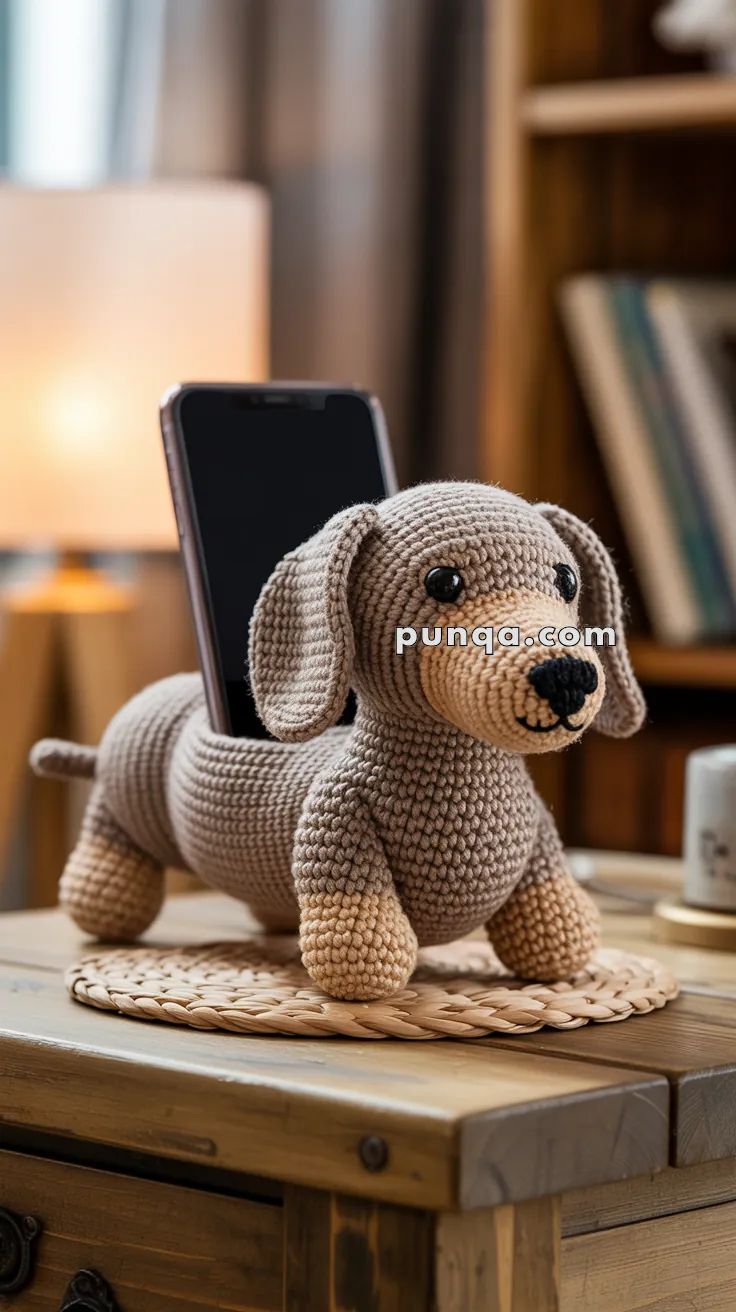
Keep your phone cozy and your heart full with this adorable Amigurumi Dachshund Phone Holder crochet pattern! Featuring a long-bodied pup with floppy ears and a sweet expression, this clever design doubles as both a charming desk companion and a practical phone stand. Whether you’re crafting for a dog lover, adding a playful touch to your workspace, or simply indulging in a fun and functional project, this dachshund is ready to hold your phone—and your attention—with style. 🧶🐶📱
Designed for cuteness and convenience, this pattern invites you to explore sculpted shaping, sturdy construction, and fun extras like a tiny collar, embroidered paws, or even a cozy sweater. Customize your dachshund with favorite colors or add a name tag for a personal touch. Whether perched on a nightstand, nestled on a desk, or starring in a handmade tech-friendly scene, this Dachshund Phone Holder Amigurumi is a joyful and satisfying project—perfect for stitching up a little handmade loyalty, one loop at a time! 💖✨🔌
🐶 Amigurumi Dachshund Phone Holder Crochet Pattern
This sweet sausage dog not only looks cute but also doubles as a phone stand! Designed with reinforced structure and a back cradle, it keeps your phone upright while bringing a smile to your workspace.
✨ Skill Level
Intermediate – Uses shaping, color changes, and structural construction.
📏 Finished Size
Approx. 8 inches (20 cm) long × 4 inches (10 cm) tall
🧶 Materials
- Worsted weight yarn
- Color A: Taupe or brown (main body)
- Color B: Beige or tan (snout, lower legs)
- Black: Nose and facial embroidery
- 3.0–3.5 mm crochet hook
- Polyester stuffing
- 8 mm safety eyes
- Tapestry needle
- Stitch marker
- Optional: Cardboard or plastic insert for phone cradle support
🧵 Abbreviations (US terms)
MR – Magic Ring
sc – single crochet
inc – increase
dec – decrease
ch – chain
st(s) – stitch(es)
sl st – slip stitch
BLO – back loop only
FO – fasten off
🧩 Construction Overview
- Body: Worked from rear to front, with front legs crocheted directly into the body.
- Cradle: Slot created mid-body by chaining and skipping stitches.
- Head: Separate and attached.
- Snout: Formed with color change early in head.
- Tail & ears: Sewn on after.
- Back legs: Still made separately and sewn on.
🐾 Body with Built-In Front Legs
Use Color A (Taupe/Brown):
- MR, 6 sc
- inc x6 (12)
- (sc, inc) x6 (18)
- (2 sc, inc) x6 (24)
- (3 sc, inc) x6 (30)
6–12. sc around (30) - sc 5, switch to Color B, sc 5 (first front leg section), switch back to Color A, sc 10, switch to Color B, sc 5 (second front leg), Color A, sc 5 (30)
🧶 Optional tip: carry unused yarn inside stitches to avoid cutting yarn when switching colors.
14–15. Repeat R13 (same color placements as above)
16. Using Color A, sc around (30)
17–18. sc around (30)
🔲 Cradle Hole (Back Slot)
- sc 9, ch 12, skip 12, sc 9
- sc 9, sc 12 into chain space, sc 9 (30)
21–25. sc around (30)
Add reinforcement here if desired by inserting flat plastic or cardboard.
26–30. Start tapering with:
- (3 sc, dec) x6 → (24)
- (2 sc, dec) x6 → (18)
- (sc, dec) x6 → (12)
- dec x6 → (6), FO and close
Stuff body firmly and shape flat base.
🐶 Head & Snout
Start with Color B (Snout):
- MR, 6 sc
- inc x6 (12)
- (sc, inc) x6 (18)
- (2 sc, inc) x6 (24)
5–6. sc around (24) - Switch to Color A for head
8–11. sc around (24) - (2 sc, dec) x6 (18)
- (sc, dec) x6 (12)
- dec x6 (6), FO and close
Add safety eyes between R8–9 about 6 sts apart.
Embroider nose and smile on the snout.
🦴 Back Legs (Make 2)
With Color B (Tan):
- MR, 6 sc
- inc x6 (12)
- sc around (12)
- Change to Color A, sc around (12)
5–7. sc around - dec x6 (6), FO and stuff lightly
Sew to lower back sides of the body.
🐕 Tail
With Color A:
- MR, 4 sc
2–8. sc around (4)
FO, stuff lightly
Sew to the rear.
👂 Ears (Make 2)
With Color A:
- Ch 6
- sc in 2nd ch from hook and across (5)
3–8. ch 1, turn, sc across (5) - sc around entire ear
FO and sew on sides of the head to let them hang freely.
📱 Phone Cradle Reinforcement (Optional)
- Insert a piece of cardboard or plastic canvas slightly smaller than the slot opening inside the body beneath the slot
- Adds structure for holding heavier phones
🧵 Final Assembly
- Sew head to front of body
- Attach back legs symmetrically
- Sew tail to back
- Attach ears to side of head
- Stuff body and shape flat base if necessary
🎉 Your Adorable Helper is Ready!
Your dachshund phone holder now sits proudly on your table, tail wagging, ready to cradle your phone in its back!