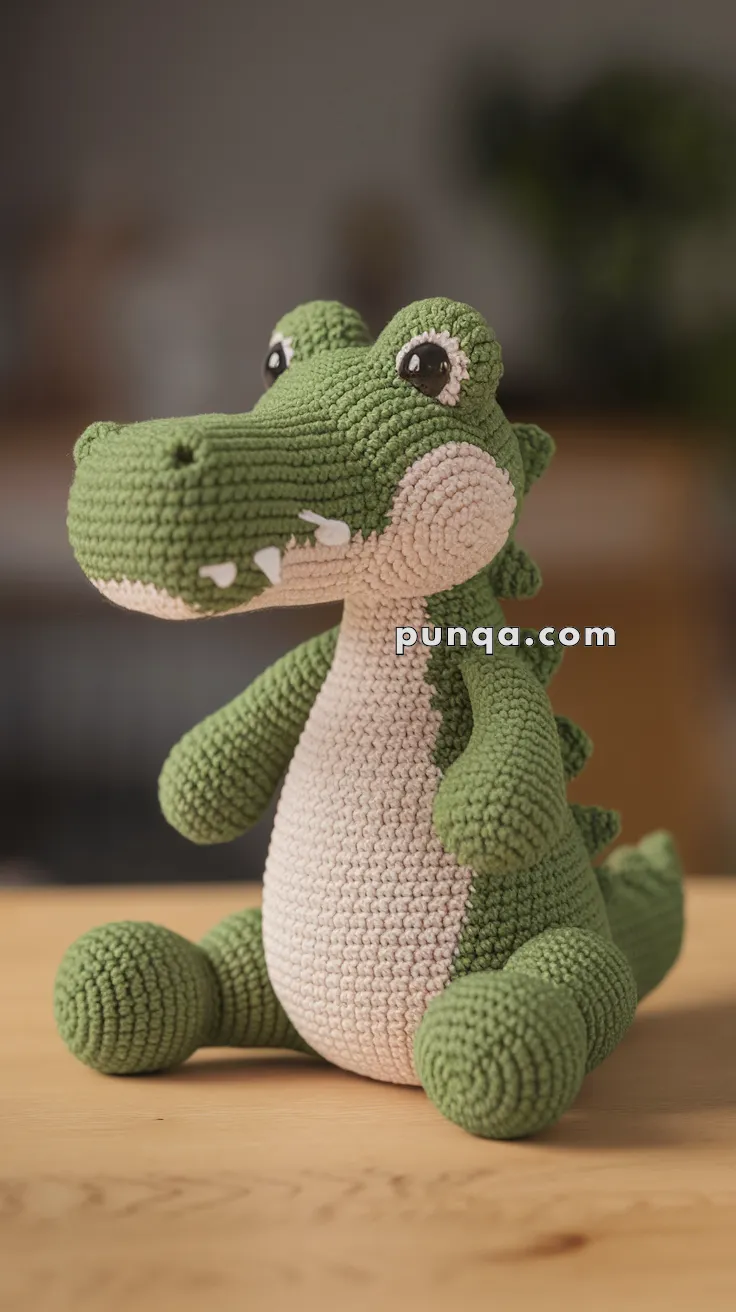
🐊 Amigurumi Crocodile Crochet Pattern
This seated amigurumi crocodile features a long rounded snout, raised eye bumps, a plump pear-shaped body with a soft belly panel, tiny curved arms, chunky seated legs, and a thick tapering tail with small back spikes. The shaping is designed so the crocodile naturally sits upright with a friendly, gentle expression and smooth sculpted contours.
✨ Skill Level
Intermediate — includes shaping, color transitions, and structured assembly.
📏 Finished Size
Approximately 25–28 cm (10–11 in) tall when seated
Using DK/light worsted yarn and a 3.0–3.5 mm hook
🧶 Materials
-
Medium green yarn — main body
-
Cream/light beige yarn — belly and lower jaw
-
Small amount white yarn or felt — teeth
-
10–12 mm safety eyes
-
Polyester fiberfill
-
3.0–3.5 mm crochet hook
-
Yarn needle
-
Stitch marker
-
Scissors
🧵 Abbreviations (US Terms)
MR — magic ring
sc — single crochet
inc — increase
dec — decrease
sl st — slip stitch
FO — fasten off
🐊 Snout & Head (Worked as One Piece)
Start with green yarn.
Snout
R1: MR 6 (6)
R2: inc ×6 (12)
R3: (1 sc, inc) ×6 (18)
R4: (2 sc, inc) ×6 (24)
R5–9: sc around (24)
Lower jaw color split
Switch to cream for the lower half stitches and keep green for the upper half.
R10–12: sc around (24)
Expand into head
R13: (2 sc, inc) ×8 (32)
R14: (3 sc, inc) ×8 (40)
R15–20: sc around (40)
Insert safety eyes between R17–18, spaced about 9 stitches apart.
R21: (3 sc, dec) ×8 (32)
R22: (2 sc, dec) ×8 (24)
Stuff head and snout firmly.
R23: (1 sc, dec) ×8 (16)
R24: dec ×8 (8)
FO and close.
👁 Eye Bumps (Make 2)
With green yarn:
R1: MR 6
R2: inc ×6 (12)
R3: sc around (12)
Lightly stuff and fasten off.
Sew above the eyes to create raised brow ridges.
🐊 Body
Start with cream yarn for belly.
R1: MR 6
R2: inc ×6 (12)
R3: (1 sc, inc) ×6 (18)
R4: (2 sc, inc) ×6 (24)
Switch to green.
R5: (3 sc, inc) ×6 (30)
R6: (4 sc, inc) ×6 (36)
R7–15: sc around (36)
Stuff firmly as you go.
R16: (4 sc, dec) ×6 (30)
R17: (3 sc, dec) ×6 (24)
R18: (2 sc, dec) ×6 (18)
R19: (1 sc, dec) ×6 (12)
R20: dec ×6 (6)
FO.
Sew head to body with a slight forward tilt.
🦵 Legs (Make 2)
With green yarn:
R1: MR 6
R2: inc ×6 (12)
R3: (1 sc, inc) ×6 (18)
R4–8: sc around (18)
Stuff firmly.
R9: (1 sc, dec) ×6 (12)
FO.
Flatten slightly and sew to the lower front of the body for a seated pose.
🙌 Arms (Make 2)
With green yarn:
R1: MR 6
R2: (1 sc, inc) ×3 (9)
R3–6: sc around (9)
Lightly stuff top only.
FO and sew high on the sides of the body.
🐊 Tail
With green yarn:
R1: MR 6
R2: inc ×6 (12)
R3: (1 sc, inc) ×6 (18)
R4–7: sc around (18)
R8: (1 sc, dec) ×6 (12)
R9–13: sc around (12)
R14: (1 sc, dec) ×4 (8)
R15–19: sc around (8)
Stuff lightly.
FO and sew to the back with a gentle upward curve.
🔺 Back Spikes (Make 6–7)
With green yarn:
Ch 5
Row 1: sc, hdc, dc, hdc
FO.
Sew evenly from the back of the head down the tail.
🦷 Teeth
Attach small white triangular stitches or felt pieces along the edge of the snout to create soft teeth.
🧵 Assembly
Sew eye bumps above the eyes.
Attach head to body.
Sew legs first to establish balance.
Attach arms slightly forward.
Sew tail centered at the back.
Add back spikes and teeth last.
Shape stuffing so the belly remains rounded and the crocodile sits upright.
🌿 Finishing
Adjust shaping with gentle hand molding and secure all loose ends. The finished crocodile should have a smooth elongated snout, rounded belly, and relaxed seated posture, giving it a friendly and playful personality perfect for display or cuddling.