Bring the elegance of classical music to life with this Amigurumi Classical Cellist crochet pattern! Inspired by the grace and artistry of a concert soloist, this refined doll features a flowing gown, poised posture, and a beautifully detailed miniature cello. Whether you’re crafting a tribute to your favorite musician, gifting a handmade treasure to a music lover, or adding a sophisticated character to your amigurumi ensemble, this pattern lets you stitch up a soulful celebration of melody and craftsmanship. 🎶🧶🎻
Designed for charm and intricacy, this pattern invites you to explore rich yarn tones, expressive features, and thoughtful extras like a tiny bow, music stand, or even sheet music tucked under her arm. Customize her look with elegant accessories or recreate a beloved performance outfit for a personal touch. Whether she’s center stage on a shelf or part of a musical-themed collection, this Classical Cellist Amigurumi is a joyful and satisfying project—perfect for stitching up a little handmade harmony, one note at a time! 💖✨🌟
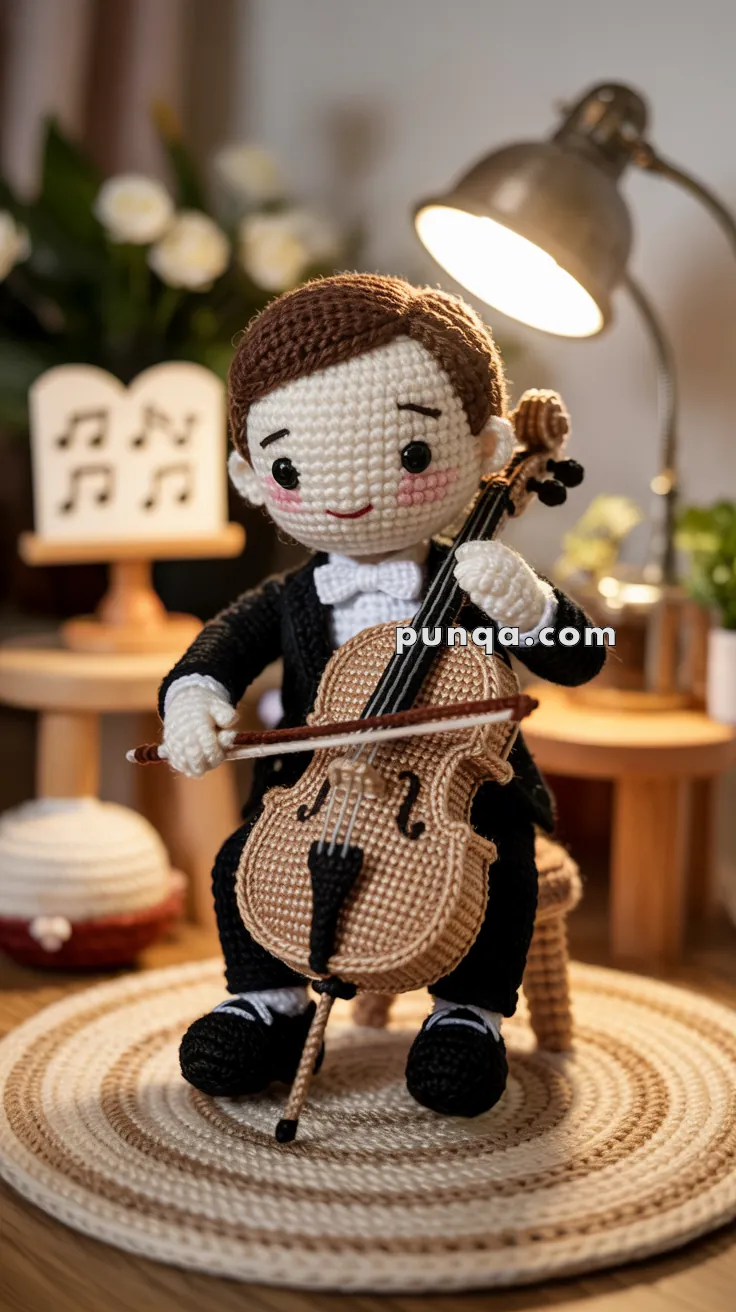
🎻 Amigurumi Classical Cellist Crochet Pattern
Bring the elegance of music into your handmade collection with this charming amigurumi cellist. This pattern includes the full doll, formal concert attire, detailed fingers, ears, nose, cello, and bow.
✨ Skill Level
Intermediate to Advanced – Includes shaping, color changes, fine details like fingers, and structured accessories.
📏 Finished Size
Approx. 25–28 cm (10–11 in) tall when seated, using DK yarn and a 2.5 mm hook.
🧶 Materials
- Yarn (DK weight):
- Skin tone (e.g. light beige)
- Brown (hair and cello body)
- Black (suit, shoes, cello neck, and details)
- White (shirt, socks, eyes)
- Pink (cheeks)
- Red (mouth)
- Crochet hook: 2.5 mm
- Black safety eyes (8 mm)
- Stitch markers
- Tapestry needle
- Polyester stuffing
- Craft wire (for cello support)
- Thin black yarn or embroidery floss (for eyebrows and mouth)
- Optional: Fabric stiffener for cello
🧵 Abbreviations (US Terms)
- MR – Magic Ring
- sc – Single Crochet
- inc – Increase
- dec – Decrease
- sl st – Slip Stitch
- ch – Chain
- hdc – Half Double Crochet
- dc – Double Crochet
- BLO – Back Loop Only
- FLO – Front Loop Only
- FO – Fasten Off
🧍♂️ Doll Pattern
👤 Head
Skin Tone Yarn
- MR, 6 sc
- inc in each (12)
- (sc, inc) x6 (18)
- (2 sc, inc) x6 (24)
- (3 sc, inc) x6 (30)
- (4 sc, inc) x6 (36)
- (5 sc, inc) x6 (42)
8-16. sc around (42) - (5 sc, dec) x6 (36)
- (4 sc, dec) x6 (30)
- (3 sc, dec) x6 (24)
Insert eyes between Rounds 11-12, about 6-7 sts apart.
Embroider nose (1–2 stitches, just below eyes), eyebrows, and mouth.
Add pink blush with yarn or embroidery. - (2 sc, dec) x6 (18)
- (sc, dec) x6 (12)
- dec x6 (6)
FO and close.
👂 Ears (x2)
- MR, 6 sc
- (sc, inc) x3 (9)
FO, flatten, sew to side of head between Rounds 10–12.
💇 Hair Cap
Brown Yarn
Repeat Rounds 1–7 of Head.
8–11. sc around (42)
FO and sew onto head. Embroider or surface-crochet hairline. Add swept side part.
🧍 Body
Skin Tone Yarn
- MR, 6 sc
- inc x6 (12)
- (sc, inc) x6 (18)
- (2 sc, inc) x6 (24)
5–8. sc around (24)
Switch to white yarn for shirt:
9–12. sc around (24)
Switch to black yarn (suit):
13–20. sc around (24)
Stuff well. - (2 sc, dec) x6 (18)
- (sc, dec) x6 (12)
FO, leave long tail for sewing head.
🖐 Arms (x2, make fingers)
Start with Skin Tone Yarn – Fingers
Make 4 fingers (mini tubes)
- MR, 4 sc
2–3. sc (4)
FO 3, do not cut 4th.
Join fingers side by side: - sc around all 4 fingers (16)
5–7. sc around (16) - dec x2, sc to end (14)
Switch to black for sleeve
9–16. sc around (14)
FO, stuff lightly, sew to body.
👞 Legs (x2) and Shoes
Start with Black for Shoes
- MR, 6 sc
- inc x6 (12)
- (sc, inc) x6 (18)
4–5. sc around - (2 sc, dec) x4, sc to end (14)
Switch to white for socks
7–8. sc around
Switch to skin tone for upper thigh
9–14. sc around (12)
FO and sew to bottom of body.
👔 Tuxedo Details
- Crochet a small bowtie in white: ch 6, hdc across 2 rows, sew in center to pinch and attach.
- Add jacket lapels with surface crochet in black.
- Optional: embroider shirt buttons and seams with thin thread.
🎻 Cello Pattern
Body
Brown Yarn
- MR, 6 sc
- inc x6 (12)
- (sc, inc) x6 (18)
- (2 sc, inc) x6 (24)
5–8. sc around
Begin shaping: - (2 sc, dec) x6 (18)
- (sc, dec) x6 (12)
- dec x6 (6)
Stuff well, FO.
Make 2 small panels for the cello curves (sewn on sides), and a flat circular back if preferred.
Neck & Headstock
Black Yarn
- ch 10, turn
- sc in each, then ch 4, roll to form peg box.
Embroider or surface crochet fine tuners.
Tailpiece & Bridge
- Tailpiece: black yarn, triangle shape flat. Sew to bottom of cello.
- Bridge: stitch on top of body bulge.
Strings & Fretboard
Use dark thread or embroidery floss and secure 4 strands from headstock to bottom.
Cello Stand Pin
Wrap craft wire with yarn and insert in bottom to act as cello endpin.
🎼 Bow
- ch 12, hdc in each
- Wrap brown yarn at both ends to mimic frog and tip.
🪑 Chair (Optional)
Make a flat circle base for the seat, add 4 short cylinders for legs. Can be stiffened with pipe cleaner or wire.
✅ Assembly
- Sew head to body.
- Attach arms slightly forward-facing.
- Position cello between legs, fix with light thread if needed.
- Place bow between hands.
- Add music stand and notes from felt or crochet for full scene.
🎵 Whether displayed on a shelf or gifted to a classical music fan, this little maestro adds a sophisticated note to your handmade collection.