Creating an amigurumi chinchilla pattern is a delightful adventure that combines artistry, patience, and a touch of whimsy. 🧶 From the moment I begin, I’m filled with excitement as I picture the finished creation—a tiny, cuddly chinchilla with oversized ears and an adorable fluffy tail. This process is like sculpting with yarn, where each stitch contributes to bringing the little character to life. The selection of yarn colors is crucial, and I often find myself gravitating towards soft grays and whites to capture the chinchilla’s natural charm. The magic truly happens as I crochet, loop by loop, watching the yarn transform into something huggable and full of personality.
The creative journey doesn’t stop at the crocheting; it continues with the intricate details that make each amigurumi chinchilla unique. Crafting the facial features requires a gentle touch—embroidering tiny eyes and a playful smile can turn any yarn creation into a lovable companion. 😊 It’s a process that demands creativity and a keen eye for detail, ensuring every feature is perfectly placed to evoke the chinchilla’s mischievous spirit. As I weave in the final stitches and step back to admire my work, there’s a profound sense of accomplishment and joy. The amigurumi chinchilla isn’t just a project; it’s a piece of art that tells a story, a tangible representation of creativity and dedication.

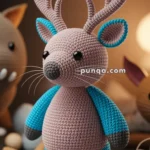
🐭 Amigurumi Chinchilla Pattern
This chubby little chinchilla features big expressive ears, a plush tail, and tiny pink paws. It’s ideal as a soft toy or decor for nature lovers.
📏 Finished Size:
Approx. 20 cm (8 inches) tall using worsted yarn and a 2.5–3.0 mm hook
🧶 Skill Level:
Intermediate (requires shaping and sewing small parts)
✂️ Materials:
-
Worsted weight yarn in:
-
Dusty blue (main body)
-
Light pink (feet, hands, inner ears, nose)
-
White or cream (tail accents, optional fluff)
-
-
Crochet hook: 2.5 mm or 3.0 mm
-
8–10 mm safety eyes
-
Toy stuffing
-
Yarn needle
-
Stitch marker
-
Thin wire (optional for ears or whiskers)
-
Embroidery floss (for whiskers and mouth)
🧵 Abbreviations (US Terms):
-
MR – Magic Ring
-
sc – Single crochet
-
inc – Increase (2 sc in one stitch)
-
dec – Decrease (sc 2 together)
-
sl st – Slip stitch
-
ch – Chain
-
st(s) – Stitch(es)
🧍 Body
With dusty blue yarn:
-
MR, 6 sc
-
inc x6 (12)
-
sc, inc x6 (18)
-
2 sc, inc x6 (24)
-
3 sc, inc x6 (30)
-
4 sc, inc x6 (36)
-
5 sc, inc x6 (42)
8–22. sc in each st (42) -
5 sc, dec x6 (36)
-
4 sc, dec x6 (30)
-
3 sc, dec x6 (24)
-
2 sc, dec x6 (18)
Stuff firmly.
-
sc, dec x6 (12)
-
dec x6 (6)
Fasten off and sew closed.
🐾 Feet (Make 2)
With pink yarn:
-
MR, 6 sc
-
inc x6 (12)
-
sc in each st (12)
-
2 sc, dec x3 (9)
-
sc in each st (9)
Stuff and flatten slightly. Sew to bottom sides of body.
🖐 Arms (Make 2)
With pink yarn:
-
MR, 6 sc
-
inc x6 (12)
-
sc in each st (12)
Switch to blue yarn:
4–9. sc in each st (12)
Do not stuff. Flatten and sew to sides just below the neck.
🧠 Head
With dusty blue yarn:
-
MR, 6 sc
-
inc x6 (12)
-
sc, inc x6 (18)
-
2 sc, inc x6 (24)
-
3 sc, inc x6 (30)
-
4 sc, inc x6 (36)
7–14. sc in each st (36)
Insert safety eyes between Rounds 10–11, spaced ~7 stitches apart.
Embroider nose with pink yarn and small smile underneath.
-
4 sc, dec x6 (30)
-
3 sc, dec x6 (24)
-
2 sc, dec x6 (18)
-
sc, dec x6 (12)
-
dec x6 (6)
Fasten off and sew to body.
👂 Ears (Make 2)
Inner (pink):
-
MR, 6 sc
-
inc x6 (12)
-
sc, inc x6 (18)
-
2 sc, inc x6 (24)
Fasten off.
Outer (blue): Repeat same as above. Don’t fasten off.
Place inner and outer ear together, wrong sides touching.
Sc around both layers (24). Fold and sew to head sides.
Optional: Add a thin wire or stiffening to help ears stay upright. Add faux-fur or brushed yarn for fuzziness.
🦊 Tail
With dusty blue yarn:
-
MR, 6 sc
-
inc x6 (12)
-
sc, inc x6 (18)
-
2 sc, inc x6 (24)
5–12. sc around (24) -
2 sc, dec x6 (18)
-
sc around (18)
-
sc, dec x6 (12)
Stuff lightly and sew to back of body.
Add brushed white yarn or faux fur at tip for fluffy effect.
💡 Final Touches
-
Whiskers: Use transparent nylon thread or embroidery floss; insert with yarn needle on either side of nose.
-
Blush cheeks: Light pink yarn or blush powder.
-
Add tiny accessories like a leaf, acorn, or scarf.