Creating amigurumi brings me endless joy, especially when I get to design a charming chicken pattern! 🐔 There’s something wonderfully whimsical about crafting these tiny, soft sculptures that can be as simple or complex as your imagination allows. The appeal of amigurumi lies in its ability to transform simple yarn into adorable companions. Whether you’re crafting for yourself or gifting to a friend, each stitch is like a brushstroke in a painting, adding character and charm. The process of making an amigurumi chicken combines creativity, patience, and a touch of humor, resulting in a delightful handmade treasure that spreads smiles wherever it goes.
Starting an amigurumi project is like embarking on a delightful adventure. I usually begin by choosing vibrant yarn colors that capture the essence of a cheerful chicken. Selecting the right hook size is crucial to ensure the stitches are tight and the stuffing doesn’t peek through. As I crochet, I enjoy watching my chicken take shape, starting from the little beak and working my way through its delightful round body and tiny wings. 🧶 Each step is a joyful process of trial, error, and eventual triumph, as the personality of the little chicken comes to life in my hands, ready to enchant anyone who encounters it.
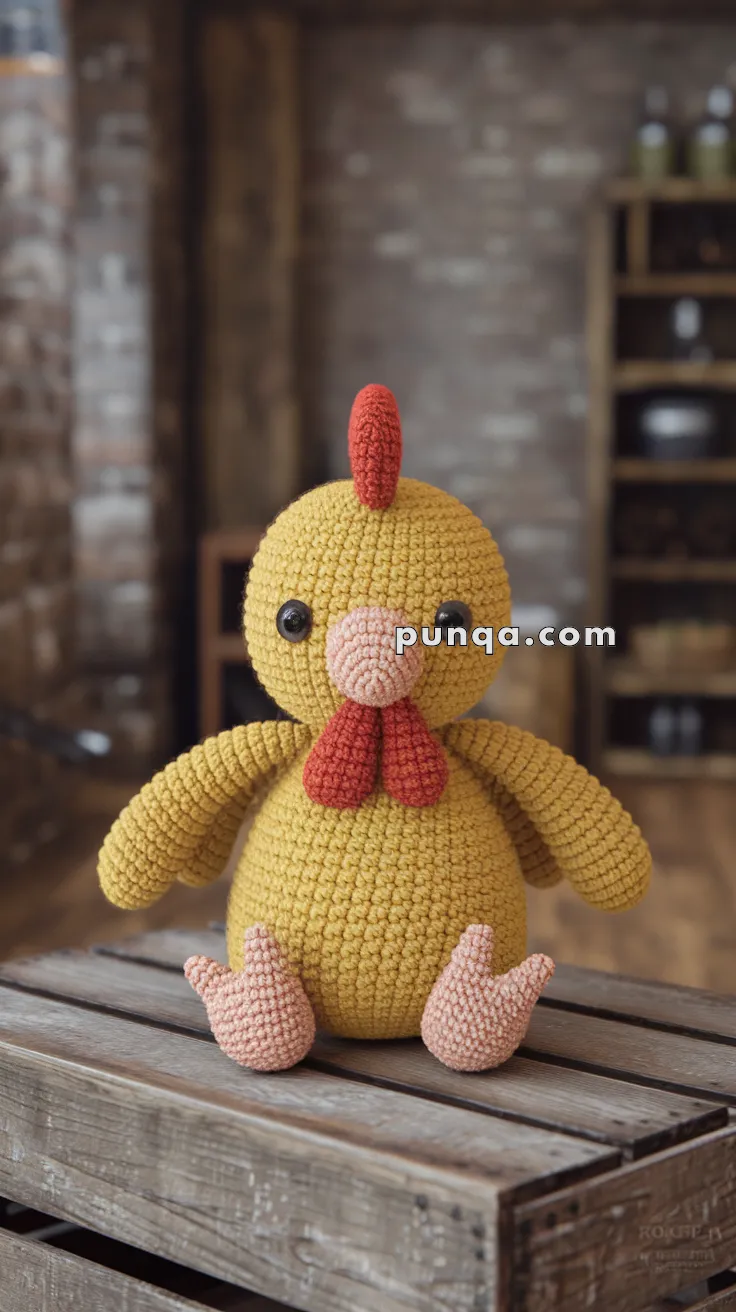
🐥 Amigurumi Chicken – FREE Crochet Pattern
This cuddly amigurumi chicken with chubby cheeks, a plump belly, and a sweet expression is perfect for spring decor, farm-themed nurseries, or Easter baskets! Whether you’re an experienced maker or an ambitious beginner, this pattern brings barnyard charm to your hook!
🧶 Materials
-
Worsted weight yarn in:
-
Mustard yellow (body and arms)
-
Pale peach or light pink (beak and feet)
-
Red (comb and wattles)
-
-
2.5 mm or 3.0 mm crochet hook
-
12 mm safety eyes
-
Yarn needle
-
Fiberfill stuffing
-
Stitch marker
-
Scissors
✨ Abbreviations (US Terms)
-
MR – Magic Ring
-
sc – Single Crochet
-
inc – Increase (2 sc in one stitch)
-
dec – Decrease (single crochet 2 together)
-
ch – Chain
-
sl st – Slip Stitch
-
FO – Fasten Off
🧠 Skill Level
Beginner to Intermediate – Simple shapes and assembly; great for practicing shaping and working in the round.
🐔 Pattern Instructions
🔸 Head & Body (Work as One Piece)
With mustard yellow yarn:
Head:
-
MR, sc 6
-
[inc] x6 (12)
-
[sc, inc] x6 (18)
-
[2 sc, inc] x6 (24)
-
Continue increasing to 42 sts
-
Rounds 7–14: sc evenly around
-
Insert safety eyes between rounds 9 and 10, about 7 stitches apart
-
Begin decreasing: [5 sc, dec] x6 → [4 sc, dec] x6 until 24 sts
Body:
-
Continue from head; increase back to 36, then 48, and 54 sts
-
Work even for ~14 rounds to build body
-
Begin decreasing gradually for base
-
Stuff firmly as you go
-
FO and close with a needle
🧡 Beak (Peach Yarn)
-
MR, sc 6
-
[sc, inc] x3 (9)
-
2 rounds of sc
-
FO and sew between eyes
🔴 Comb (Top Red Crest)
-
Ch 5
-
In 2nd ch from hook: sc, hdc, dc, sl st
-
Repeat for 3 bumps
-
FO and sew to top of head
🔻 Wattles (Red – Make 2)
-
MR, sc 6
-
Work 2 more rounds of 6 sc
-
FO and sew below the beak, letting them hang freely
🟨 Arms (Make 2 – Mustard Yellow)
-
MR, sc 6
-
Increase to 12 sts
-
Work even for 10–12 rounds
-
Stuff lightly
-
FO and sew to the sides of the body
🦶 Feet (Make 2 – Peach)
-
MR, sc 6
-
Inc to 12
-
Create three toes:
-
Toe 1: ch 4, sc back
-
Toe 2: ch 4, hdc, sc
-
Toe 3: ch 3, sc
-
-
FO and sew flat to the front base of the body
🧵 Assembly
-
Sew beak, wattles, and comb to the head
-
Attach arms low on the side of the body
-
Position and sew feet with toes forward
-
Weave in all yarn ends securely
🌾 Finishing Touches
-
Blush the cheeks with a touch of pink pastel or blush
-
Add a tiny crocheted egg or chick beside it for a fun farm scene
-
Perfect for Easter baskets or rustic farmhouse shelves!