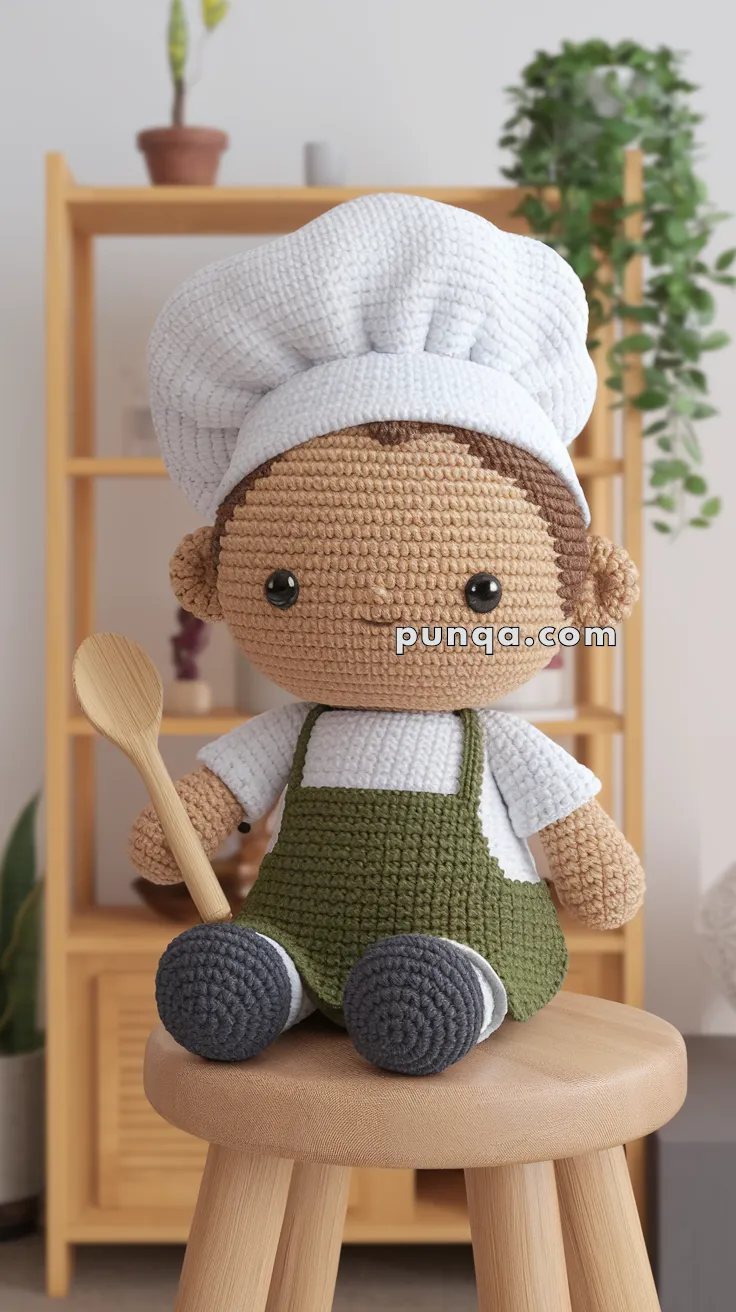
Whip up some handmade charm with the Amigurumi Chef Doll, a delightful crochet creation that’s full of personality and culinary flair! 👨🍳🧶 Complete with a soft, oversized chef’s hat, an olive apron, and a warm, welcoming smile, this adorable figure is ready to stir up joy in your kitchen décor or gift-giving lineup. Whether displayed on a shelf, tucked into a food-themed gift basket, or made for a little aspiring cook, this chef is sure to serve up smiles.
Perfect for crocheters who love character-driven designs and playful details, this pattern invites you to stitch up a figure that’s both decorative and heartwarming. Add tiny utensils, customize the apron, or create a whole kitchen crew for a fun display. The Amigurumi Chef Doll is a joyful way to stitch up creativity, warmth, and a sprinkle of handmade culinary magic—one loop at a time! 🧵🍲✨
👨🍳 Amigurumi Chef Doll Crochet Pattern
A delightful crochet chef who’s ready to serve smiles! This cozy kitchen companion features a plush white chef hat, olive apron, round grey shoes, and a friendly expression. Perfect for cooks, bakers, or handmade gift lovers. 🍞🥣
✨ Skill Level
Intermediate — includes basic shaping, color changes, and structured hat assembly.
📏 Finished Size
Approx. 10–12 in (25–30 cm) tall when made with worsted or velvet-style yarn and a 3.0–3.5 mm hook.
🧶 Materials
Yarn (Worsted Weight / Soft Cotton Blend):
-
Light brown – skin (head, hands, legs, ears) – 40 g
-
Dark brown – hair – 15 g
-
White – shirt and chef hat – 60 g
-
Olive green – apron – 25 g
-
Grey – shoes – 25 g
-
Black embroidery thread – facial details or buttons
Other Supplies:
-
3.0–3.5 mm crochet hook
-
10–12 mm safety eyes
-
Fiberfill stuffing
-
Yarn needle
-
Stitch marker
-
Optional: small wooden spoon or felt utensil
🧵 Abbreviations (US Terms)
MR – Magic Ring
sc – Single Crochet
inc – Increase (2 sc in same stitch)
dec – Decrease (sc2tog)
sl st – Slip Stitch
ch – Chain
FLO – Front Loop Only
BLO – Back Loop Only
FO – Fasten Off
👶 Head (Light Brown)
R1 – MR, 6 sc (6)
R2 – inc ×6 (12)
R3 – (1 sc, inc) ×6 (18)
R4 – (2 sc, inc) ×6 (24)
R5 – (3 sc, inc) ×6 (30)
R6 – (4 sc, inc) ×6 (36)
R7–14 – sc around (36)
→ Place safety eyes between R10–11, about 7 stitches apart.
R15 – (4 sc, dec) ×6 (30)
R16 – (3 sc, dec) ×6 (24)
Stuff firmly.
R17 – (2 sc, dec) ×6 (18)
R18 – (1 sc, dec) ×6 (12)
R19 – dec ×6 (6)
FO and close.
💇 Hair (Dark Brown)
Follow head pattern up to R12 (36 sts).
R13 – sc around (36).
FO, flatten slightly and sew onto head, covering top and sides.
Shape into a soft curved hairline (slightly “M”-shaped) using surface slip stitches or embroidery.
🍳 Chef Hat (White)
Hat Band
Ch 42, join with sl st to form ring.
R1–4 – sc around (42).
FO, leave tail for sewing.
Puffy Top
R1 – MR, 6 sc (6)
R2 – inc ×6 (12)
R3 – (1 sc, inc) ×6 (18)
R4 – (2 sc, inc) ×6 (24)
R5 – (3 sc, inc) ×6 (30)
R6 – (4 sc, inc) ×6 (36)
R7 – (5 sc, inc) ×6 (42)
R8–10 – sc around (42)
R11 – (5 sc, dec) ×6 (36)
R12 – (4 sc, dec) ×6 (30)
Lightly stuff to create the soft puff.
Sew puff to the hat band, allowing gentle gathers for volume.
Attach securely to head with a backward tilt.
👕 Body (White Shirt)
R1 – MR, 6 sc (6)
R2 – inc ×6 (12)
R3 – (1 sc, inc) ×6 (18)
R4 – (2 sc, inc) ×6 (24)
R5–11 – sc around (24)
R12 – (3 sc, inc) ×6 (30)
R13–15 – sc around (30)
R16 – (3 sc, dec) ×6 (24)
R17 – sc around (24)
Stuff firmly. FO, leaving a long tail for sewing the head.
🦵 Legs (x2 – Grey Shoes + Skin Legs)
Start with grey yarn.
R1 – MR, 6 sc (6)
R2 – inc ×6 (12)
R3 – (1 sc, inc) ×6 (18)
R4–5 – sc around (18)
Switch to light brown.
R6–12 – sc around (18)
Stuff legs. Flatten top and sew to lower body.
💪 Arms (x2 – Light Brown + White Sleeves)
Start with light brown.
R1 – MR, 6 sc (6)
R2 – inc ×6 (12)
R3–5 – sc around (12)
Switch to white yarn.
R6–10 – sc around (12)
Stuff lightly and FO.
Sew to sides of body at shoulder height.
🧤 Apron (Olive Green)
Ch 13.
R1 – sc in 2nd ch from hook and across (12).
R2–11 – ch 1, turn, sc across (12).
Border – sc around entire piece.
Straps – ch 15 from each top corner.
Neck loop – ch 20 and sew to top edges to form a curve.
Sew apron front to body, leaving lower edge loose for natural drape.
🪵 Wooden Spoon (Optional)
With tan yarn:
R1 – MR, 6 sc (6)
R2 – (1 sc, inc) ×3 (9)
R3–4 – sc around (9)
R5 – dec ×3 (6)
Ch 10 for handle, sc back up the chain to the spoon top.
FO and secure into hand.
🪡 Assembly
1️⃣ Sew head to body securely.
2️⃣ Attach arms symmetrically at shoulder line.
3️⃣ Sew legs to the bottom, slightly angled forward for a sitting pose.
4️⃣ Add hair piece and position chef hat on top.
5️⃣ Sew apron in place.
6️⃣ Optional: embroider two small black “buttons” on shirt front.
🎨 Finishing Touches
-
Embroider a small smile or leave minimal for cute simplicity.
-
Lightly blush cheeks with pink pastel.
-
Adjust hat puff for symmetry.
-
Add mini spoon accessory to one hand.
🧁 Final Result
Your chef doll is ready to take charge of the kitchen!
With a soft puffed hat, warm brown skin tone, crisp white shirt, olive apron, and cozy grey shoes, he’s an adorable tribute to every little cook’s dream. 🍳❤️