Step into a world of whimsy with this Amigurumi Cat in the Hat crochet pattern! Inspired by the beloved Dr. Seuss character, this mischievous feline comes complete with his iconic red-and-white striped hat, bow tie, and playful grin. Whether you’re crafting for a storybook fan, adding to a literary-themed display, or simply love bringing classic characters to life in yarn, this cat is ready to leap off the page and into your handmade collection—one stitch at a time. 🧶🎩🐱
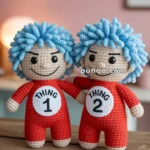
Designed for personality and flair, this pattern invites you to explore bold colorwork, expressive features, and fun extras like a tiny book, umbrella, or even Thing 1 and Thing 2 companions. Customize his look with your favorite yarns or add embroidered details to reflect your own Seussian style. Whether perched on a shelf, nestled in a gift basket, or starring in a handmade reading nook, this Cat in the Hat Amigurumi is a joyful and satisfying project—perfect for stitching up a little handmade mischief, one loop at a time! 💖✨📚
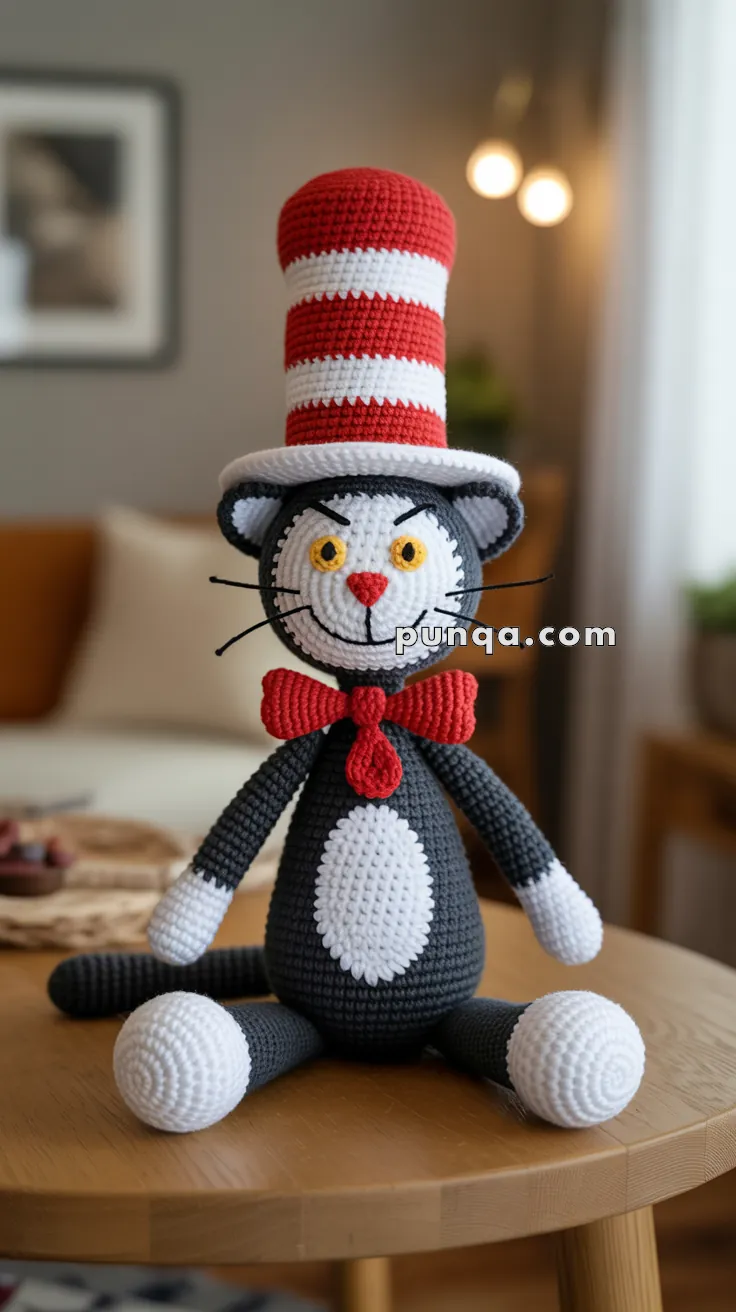
🎩🐱 Amigurumi Cat in the Hat Crochet Pattern
Step into a world of whimsy with this adorable Cat in the Hat–inspired amigurumi! With its tall striped hat, bright yellow eyes, cheeky whiskers, soft round paws, and bold red bow tie, this charming character brings joy and nostalgia to any crochet collection.
Perfect as a display piece, a playful gift, or a keepsake for Dr. Seuss fans, this amigurumi is fun to make and delightful to show off. 💕✨
🧶 Materials
Yarn (Worsted Weight / #4):
🖤 Dark Gray – 100 g (body, limbs, outer ears, tail)
🤍 White – 80 g (face patch, inner ears, hands, feet, hat brim, belly patch, hat stripes)
❤️ Red – 60 g (hat stripes, bow tie)
💛 Yellow – small amount (eyes)
💗 Pink or Red – small amount (nose)
🖤 Black – embroidery thread or stiff whisker material (nylon line / zip ties)
Tools & Notions:
• Crochet hook 3.0–3.5 mm
• Fiberfill stuffing
• Tapestry needle
• Stitch marker
• Scissors
🔤 Abbreviations (US Terms)
MR – Magic Ring
sc – Single Crochet
inc – Increase
dec – Decrease
sl st – Slip Stitch
ch – Chain
FLO – Front Loop Only
BLO – Back Loop Only
FO – Fasten Off
🐱 Head
🧵 Head Base
Start with white:
R1: MR, 6 sc
R2: inc around (12)
R3: (sc, inc) × 6 = 18
R4: (2 sc, inc) × 6 = 24
R5: (3 sc, inc) × 6 = 30
R6: (4 sc, inc) × 6 = 36
R7–9: sc around (36)
Switch to dark gray:
R10–16: sc around (36)
R17: (4 sc, dec) × 6 = 30
R18: (3 sc, dec) × 6 = 24
Stuff firmly
R19: (2 sc, dec) × 6 = 18
R20: (1 sc, dec) × 6 = 12
R21: dec × 6 = 6
FO and close.
🤍 Face Patch
With white:
R1: MR, 6
R2: inc around (12)
R3: (1 sc, inc) × 6 = 18
R4: (2 sc, inc) × 6 = 24
R5–6: sc around (24)
FO and sew centered onto the front of the head.
👁 Eyes
Make 2 eyes:
With yellow:
R1: MR, 6
R2: inc × 6 = 12
FO, sew above the nose area.
Add black embroidery:
• eyelids
• pupils
• tiny outline (optional)
👃 Nose & 😺 Face Details
• Embroider a small pink/red triangle nose.
• Add a curved black smile.
• Insert 3 whiskers on each side using stiff nylon thread.
🐾 Body (Dark Gray)
R1: MR, 6
R2: inc × 6 = 12
R3: (1 sc, inc) × 6 = 18
R4: (2 sc, inc) × 6 = 24
R5: (3 sc, inc) × 6 = 30
R6: (4 sc, inc) × 6 = 36
R7–15: sc around (36)
R16: (4 sc, dec) × 6 = 30
R17–20: sc around (30)
R21: (3 sc, dec) × 6 = 24
R22–23: sc around (24)
R24: (2 sc, dec) × 6 = 18
Stuff firmly.
FO with long tail for sewing.
🤍 Belly Patch
With white:
R1: MR, 6
R2: inc × 6 = 12
R3: (1 sc, inc) × 6 = 18
R4: (2 sc, inc) × 6 = 24
R5: (3 sc, inc) × 6 = 30
R6–7: sc around (30)
FO, sew to front body center.
🐾 Arms (Make 2)
White Hands
R1: MR, 6
R2: inc × 6 = 12
R3: (1 sc, inc) × 6 = 18
R4–5: sc around (18)
R6: (1 sc, dec) × 6 = 12
R7: sc around (12)
Switch to dark gray:
R8–22: sc around (12)
Stuff lightly.
Flatten opening and FO.
🐾 Legs (Make 2)
Big White Feet
R1: MR, 6
R2: inc × 6 = 12
R3: (1 sc, inc) × 6 = 18
R4: (2 sc, inc) × 6 = 24
R5: (3 sc, inc) × 6 = 30
R6–8: sc around (30)
R9: (3 sc, dec) × 6 = 24
R10: (2 sc, dec) × 6 = 18
Switch to dark gray:
R11: (4 sc, dec) × 3 = 15
R12–20: sc around (15)
Stuff firmly and FO.
🐈 Tail
With dark gray:
R1: MR, 6
R2–30: sc around (6)
Lightly stuff, FO.
👂 Ears (Make 2)
Outer Ear (Gray)
R1: MR, 4
R2: (1 sc, inc) × 2 = 6
R3: (2 sc, inc) × 2 = 8
R4: (3 sc, inc) × 2 = 10
R5: sc around (10)
FO.
Inner Ear (White)
R1: MR, 4
R2: (1 sc, inc) × 2 = 6
R3: sc around (6)
FO.
Sew inner onto outer.
Flatten and attach to head sides.
🎀 Bow Tie
Bow Sides (Make 2)
Ch 11
R1: sc in 2nd ch, across (10)
R2–5: sc across (10)
FO both pieces.
Center Knot
Ch 8 → join
R1–2: sc around (8)
Wrap around bow center.
Hanging Tie
Ch 8
R1–3: sc across (7)
FO.
Sew bow at the neck.
🎩 Tall Striped Hat
Hat Body
Start with red:
R1: MR, 6
R2: inc × 6 = 12
R3: (1 sc, inc) × 6 = 18
R4: (2 sc, inc) × 6 = 24
R5: (3 sc, inc) × 6 = 30
R6–9: sc (30) – red
R10–12: sc (30) – white
R13–15: sc (30) – red
R16–18: sc (30) – white
R19–24: sc (30) – red (taller final section)
Lightly stuff.
Hat Brim (White)
R1: BLO inc × 6 (36)
R2: (5 sc, inc) × 6 = 42
R3: (6 sc, inc) × 6 = 48
R4–6: sc around (48)
FO.
🪡 Assembly
- Sew belly patch to body.
- Attach legs angled forward for a seated pose.
- Add arms to upper body sides.
- Sew tail to back of body.
- Attach head securely to body.
- Sew ears to head sides.
- Add bow tie to neck.
- Sew hat onto top of head.
- Insert whiskers & finish facial embroidery.
🌟 Final Touches
Your Cat in the Hat is ready to steal the show!
With its expressive eyes, soft round paws, and iconic striped hat, this playful crochet friend is perfect for bookshelves, nurseries, reading corners, and photo displays. 📚❤️