Creating an amigurumi C-3PO is like embarking on a delightful journey to a galaxy far, far away, where crocheting meets fandom! 🎉 As a die-hard Star Wars enthusiast and a crochet lover, there’s nothing more exciting than bringing one of the most iconic droids to life through yarn and creativity. The process itself is a thrilling adventure, starting with choosing just the right golden yarn to capture C-3PO’s shiny metallic look, followed by crafting each piece with love and precision. Watching him come together stitch by stitch is nothing short of magical, as he evolves from a simple skein of yarn into a charming, handheld replica of the beloved droid.✨
What’s truly fantastic about making an amigurumi C-3PO is that it’s not just about the end product, but the journey of creativity and patience. Picking up the crochet hook and diving into the pattern feels like gearing up for a fun mission. The pattern typically involves working in rounds to form the head, body, and limbs, carefully sewing each piece together, and adding those signature details that make C-3PO instantly recognizable. It’s such a joy to see his expressive face and iconic features take shape. Plus, it provides a great opportunity to relax and unwind while paying homage to a character that has captured hearts for decades.😊 Whether you’re crafting for a fellow Star Wars fan or for your own collection, each stitch is a testament to your passion for both the craft and the saga.
🤖 Amigurumi C-3PO Crochet Pattern
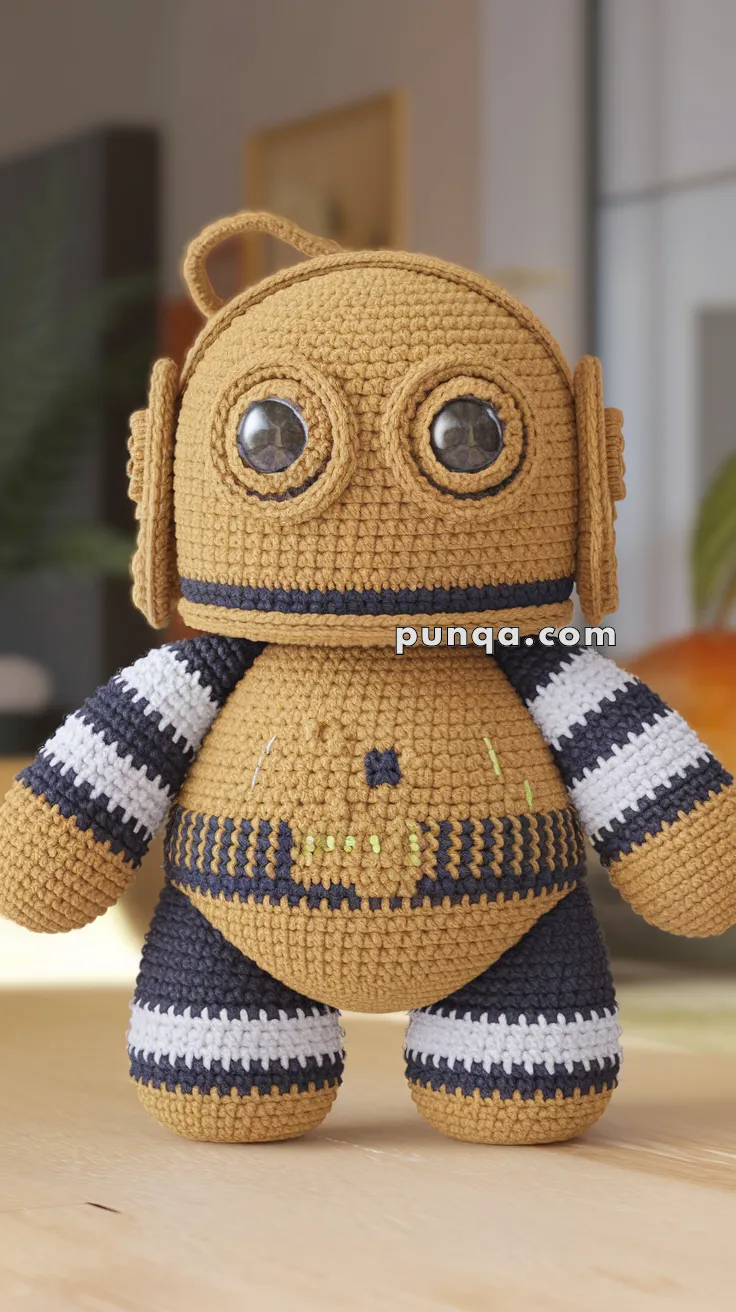
Craft a charming version of your favorite golden protocol droid with this stylized amigurumi pattern! This plush C-3PO features oversized eyes, contrasting mechanical details, and striped limbs inspired by his classic design.
🧶 Skill Level
Intermediate – Requires color changes, detail shaping, embroidery, and basic sewing.
📏 Finished Size
Approximately 22 cm (8.5 inches) tall using worsted-weight yarn and a 3.0 mm hook.
✂️ Materials Needed
-
Worsted weight yarn in:
-
Mustard yellow (main body)
-
Black (arm/leg stripes, torso panel)
-
White (arm/leg stripes)
-
Small amounts of light green, purple, red (for wires)
-
-
3.0 mm crochet hook
-
10 mm safety eyes or domed buttons
-
Tapestry needle
-
Stuffing fiberfill
-
Stitch marker
-
Embroidery needle for details
🧵 Abbreviations (US)
-
MR – Magic Ring
-
sc – Single Crochet
-
inc – Increase
-
dec – Decrease
-
sl st – Slip Stitch
-
ch – Chain
-
FO – Fasten Off
👤 Head
With mustard yellow yarn:
-
MR, 6 sc
-
inc x6 (12)
-
(sc, inc) x6 (18)
-
(2 sc, inc) x6 (24)
-
(3 sc, inc) x6 (30)
-
(4 sc, inc) x6 (36)
7–13. sc around (36) -
(4 sc, dec) x6 (30)
-
(3 sc, dec) x6 (24)
-
(2 sc, dec) x6 (18)
Insert safety eyes or attach flat round domes at R7–R9 -
(1 sc, dec) x6 (12)
-
dec x6 (6)
Stuff firmly, FO.
👁 Eye Details (Make 2)
With mustard yellow:
-
MR, 6 sc
-
inc x6 (12)
-
sl st around. FO, leave tail for sewing.
Attach over the safety eyes, giving a ringed droid appearance.
🪖 Helmet Side Panels (Make 2)
-
ch 4, turn
-
sc in 2nd ch and across (3)
3–6. ch 1, sc across (3)
FO and sew to each side of head at eye level.
🧍 Body
With mustard yellow:
-
MR, 6 sc
-
inc x6 (12)
-
(sc, inc) x6 (18)
-
(2 sc, inc) x6 (24)
-
(3 sc, inc) x6 (30)
6–10. sc around (30) -
Change to black: sc around (30)
-
Change to mustard yellow: sc around (30)
-
Repeat color changes to stripe torso:
-
Rows 13–14: black
-
Rows 15–16: mustard
-
Add embroidery on front panel using small yarn lengths in green, red, purple.
-
(3 sc, dec) x6 (24)
-
(2 sc, dec) x6 (18)
-
(1 sc, dec) x6 (12)
Stuff and FO.
✋ Arms (Make 2)
Start with mustard yellow:
-
MR, 6 sc
-
(sc, inc) x3 (9)
3–4. sc around (9)
5–6. switch to black
7–8. white
9–10. black
11–12. white -
black
14–15. mustard
FO. Stuff lightly and sew to sides.
🦵 Legs (Make 2)
Start with mustard yellow:
-
MR, 6 sc
-
inc x6 (12)
3–4. sc around
5–6. switch to black
7–8. white
9–10. black
11–12. mustard -
flatten top and sew to bottom of body at angle.
✨ Belly Panel Decoration
Use yarn needle and embroidery thread to add short stitches in green, red, yellow across the black panel in the front of torso for the “wiring” effect.
🧵 Assembly & Finishing Touches
-
Attach head to body with reinforced stitching.
-
Sew arms to upper sides of the body.
-
Sew legs underneath body, slightly apart.
-
Embroider a small “belly button” dot and eyebrow arcs for personality.
-
Add loop at top if making into a keychain.
Your friendly golden droid is ready for adventure in any galaxy far, far away!