Welcome to the romantic and timeless world of amigurumi! 🌹✨ Today, I’m excited to share my free crochet pattern for a Bouquet of Red Roses—a stunning and elegant creation perfect for heartfelt gifts, floral décor, or anyone who enjoys crafting expressive and symbolic plush designs! 💖 Whether you love stitching up delicate flowers, creating textured and lifelike petals, or simply want to add a beautiful rose bouquet to your handmade collection, this pattern will guide you through crafting a sculpted arrangement with soft blooms, graceful stems, and a touch of everlasting charm! 🌿
This design embraces rich hues, intricate shaping, and floral elegance to bring a sense of romance and beauty to your crochet projects! 🧶✨ I’ve carefully outlined each step to ensure your Amigurumi Bouquet of Red Roses turns out just right—ready to brighten up your space or become a treasured handmade gift! 🎁 So grab your hooks, pick out deep reds, lush greens, or soft pinks, and let’s stitch up a breathtaking bouquet! 🌹
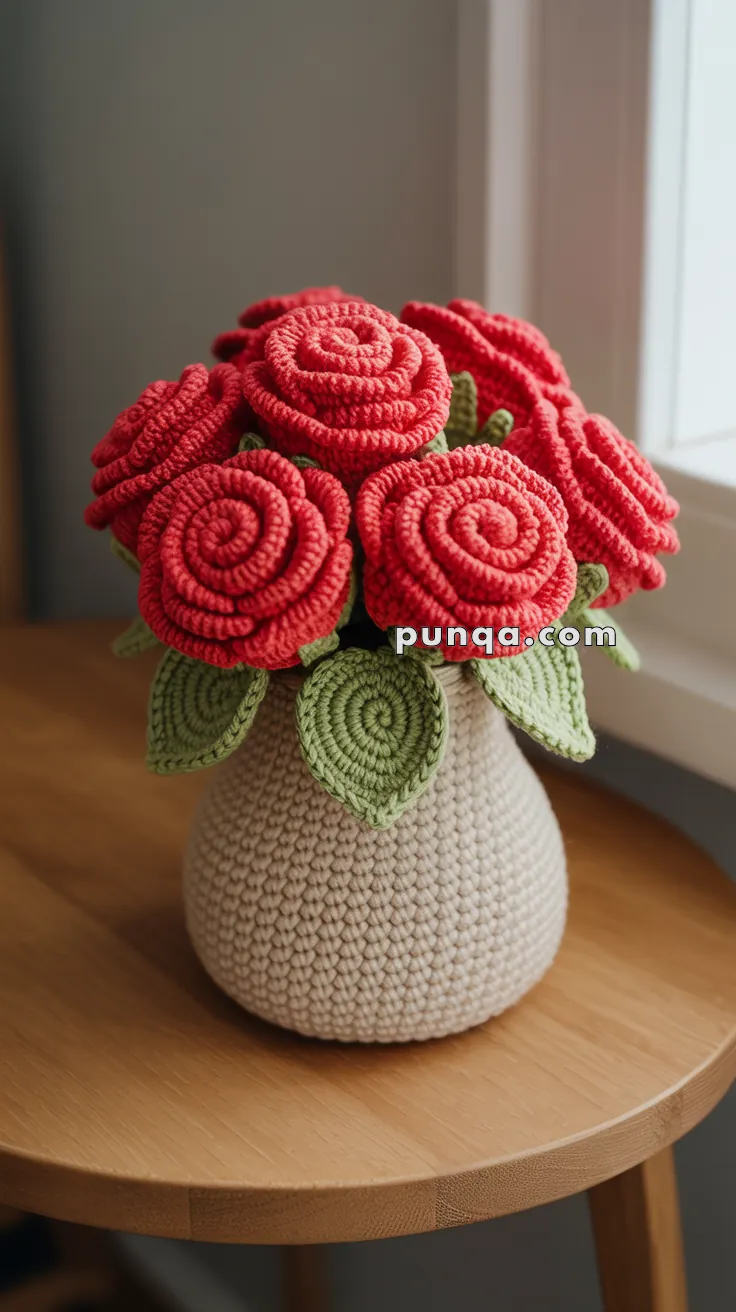
🌹 Amigurumi Bouquet of Red Roses with Vase Crochet Pattern
Bring timeless beauty into your home with this lovely crochet rose bouquet displayed in a soft vase. Each rose features rich spiraled petals and sturdy green stems arranged inside a rounded cream vase, creating a charming handmade centerpiece that lasts forever. Perfect as a gift or a piece of decor, this project combines classic crochet artistry with an elegant floral touch. 🌸💕
✨ Skill Level
Intermediate – includes shaping, spiral construction, stem wiring, and vase assembly.
📏 Finished Size
Approx. 10–12 inches (25–30 cm) tall when assembled with vase.
🧶 Materials and Yarn Amounts
Use 100% cotton or cotton-blend worsted-weight yarn.
Red (roses) – 40–50 g
Green (leaves and stems) – 25–30 g
Cream or beige (vase) – 50–60 g
Crochet hook: 3.5–4.0 mm
Floral wire or pipe cleaners for stems
Polyfill stuffing for vase
Tapestry needle
Scissors
Stitch markers
Optional: hot glue for securing stems
🧵 Abbreviations (US Terms)
MR – Magic Ring
sc – Single Crochet
inc – Increase (2 sc in same stitch)
dec – Decrease (sc2tog)
ch – Chain
sl st – Slip Stitch
hdc – Half Double Crochet
dc – Double Crochet
FO – Fasten Off
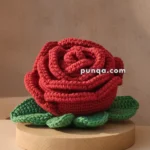
🌹 Roses (Make 8)
With red yarn:
Ch 55
In 2nd ch from hook, repeat (sc, hdc, dc, dc, hdc, sc) across.
FO, leaving a long tail for sewing.
To form the rose, roll the strip tightly from one end to create the center. As you roll, stitch the lower edge together to secure each layer. Adjust petal curls slightly outward as you go.
Each finished rose should be dense and rounded with overlapping petals.
🍃 Leaves (Make 10–12)
With green yarn:
Ch 13
sc in 2nd ch, hdc in next, dc in next 7, hdc, sc
Turn and mirror back along opposite side of chain: sc, hdc, dc 7, hdc, sc
FO, leaving a long tail for sewing.
This shape produces long, slightly pointed leaves with soft edges that resemble real rose foliage.
🌿 Stems (Make 8)
With green yarn:
Ch 30
sc in each ch (30)
FO, leaving a long tail.
Insert floral wire through the stem, then wrap the crocheted piece around it tightly.
Use a tapestry needle to stitch the seam closed along the length.
Attach one rose head at the top and sew or wrap two leaves near the upper third of the stem.
For sturdier stems, double the floral wire before wrapping.
🪴 Vase
With cream or beige yarn:
Round 1: MR, 6 sc
Round 2: inc x6 (12)
Round 3: (1 sc, inc) x6 (18)
Round 4: (2 sc, inc) x6 (24)
Round 5: (3 sc, inc) x6 (30)
Round 6: (4 sc, inc) x6 (36)
Rounds 7–14: sc around (36) – this forms a rounded lower body
Round 15: (5 sc, dec) x6 (30)
Rounds 16–20: sc around (30)
Round 21: (4 sc, dec) x6 (25) – creates a narrower neck
Rounds 22–24: sc around (25)
FO and weave in ends.
Stuff the vase firmly with polyfill. For added stability, place a small weighted pouch (such as rice or small pebbles in a fabric bag) at the base before closing.
🌼 Assembly
- Arrange the stems into the vase, starting with the tallest roses at the center and shorter ones around the edges.
- Add leaves between flowers for a natural, full look.
- Use hot glue or tight stitches to secure stems to the bottom interior of the vase.
- Shape the bouquet by bending stems gently into place.
Optional: crochet a small ribbon or bow and tie around the vase’s neck for an extra decorative touch.
💡 Finishing Touches
- For variety, create a few extra roses in pale pink or cream to mix into the bouquet.
- Add a few drops of rose-scented essential oil to the stuffing for a soft fragrance.
- For a modern display, place the finished vase on a wooden tray or windowsill with natural lighting to highlight its handmade charm.
Your crochet red rose bouquet is now complete! 🌹✨
This elegant arrangement captures the essence of blooming roses — everlasting, vibrant, and full of handmade warmth. Whether displayed on a table or gifted to someone special, it’s a beautiful reminder of how simple stitches can create something truly timeless.