Welcome to the cozy and festive world of amigurumi! 🦌✨ Today, I’m excited to share my free crochet pattern for a Baby Rattle Reindeer—a sweet and playful creation perfect for little hands, holiday gifts, or anyone who loves crafting adorable plush toys! 🎄 Whether you enjoy stitching up charming baby accessories, creating textured and soothing designs, or simply want to add a lovable reindeer to your handmade collection, this pattern will guide you through crafting a beautifully sculpted plush rattle with soft antlers, a gentle jingle, and a touch of winter magic! ❄️
This design embraces soft textures, rounded shaping, and warm earthy tones to bring a comforting and joyful touch to your crochet projects! 🧶🤎 I’ve carefully outlined each step to ensure your Amigurumi Baby Rattle Reindeer turns out just right—ready to delight little ones or become a treasured handmade keepsake! 🎁 So grab your hooks, pick out cozy browns, creamy whites, or festive reds, and let’s stitch up an irresistibly cute reindeer rattle! ✨
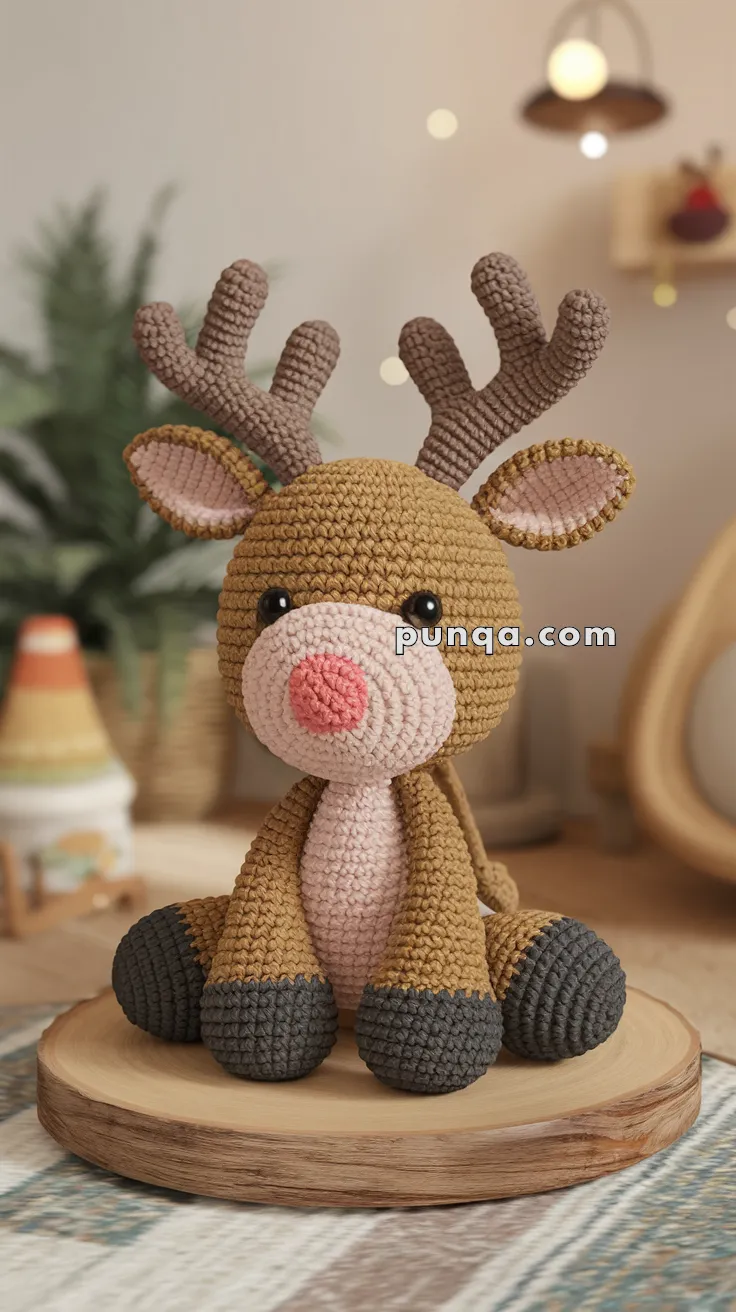
🦌 Baby Rattle Reindeer Crochet Pattern
Bring some holiday magic to your home with this adorable Baby Rattle Reindeer! With its sweet round face, big pink nose, upright antlers, and chubby hooves, this little cutie will make the perfect handmade gift for Christmas.
✨ Skill Level
Intermediate – requires knowledge of working in rounds, color changes, and sewing parts.
📏 Finished Size
Approx. 25 cm (10″) tall when using worsted weight yarn and a 2.5 mm hook.
🧶 Materials
-
Yarn:
-
Light Brown (Main body, legs, head, ears)
-
Cream/Light Beige (Belly, muzzle, inner ears)
-
Pink (Nose, inner belly)
-
Dark Brown (Hooves, antlers)
-
-
Crochet hook: 2.5 mm (or smaller than recommended to keep stitches tight)
-
Stuffing: Polyester fiberfill
-
2 Safety eyes (12–14 mm)
-
Yarn needle & stitch marker
-
Scissors
-
Optional for antlers:
-
Armature/floral wire or pipe cleaners
-
Masking tape to cover wire ends
-
📝 Abbreviations (US Terms)
MR = Magic Ring
ch = Chain
sc = Single crochet
inc = Increase (2 sc in one stitch)
dec = Decrease (sc 2 together)
sl st = Slip stitch
FO = Fasten off
🦌 Pattern Instructions
Head (Light Brown)
-
MR, 6 sc (6)
-
inc in each st (12)
-
(sc, inc) x 6 (18)
-
(2 sc, inc) x 6 (24)
-
(3 sc, inc) x 6 (30)
-
(4 sc, inc) x 6 (36)
7–12. sc around (36) -
(5 sc, inc) x 6 (42)
14–20. sc around (42) -
(5 sc, dec) x 6 (36)
-
(4 sc, dec) x 6 (30)
-
(3 sc, dec) x 6 (24)
-
(2 sc, dec) x 6 (18)
Stuff firmly. -
(sc, dec) x 6 (12)
-
dec x 6 (6) FO, weave in.
👉 Attach safety eyes between Rounds 12–13, spaced about 10 sts apart.
Muzzle (Cream)
-
MR, 6 sc (6)
-
inc in each st (12)
-
(sc, inc) x 6 (18)
4–6. sc around (18)
Stuff lightly. FO, leave tail.
Nose (Pink)
Work same as muzzle but stop at Round 3 (18 sts). Sew onto muzzle.
Ears (Make 2 – Light Brown)
-
MR, 6 sc (6)
-
(sc, inc) x 3 (9)
-
(2 sc, inc) x 3 (12)
4–6. sc around (12)
Flatten, do not stuff. FO.
Inner Ears (Make 2 – Cream)
Work same as ears but only to Round 3 (12 sts). Flatten and sew inside brown ears.
Antlers (Dark Brown – Make 2)
Main Trunk:
-
MR, 6 sc (6)
-
sc around (6)
-
(sc, inc) x 3 (9)
4–9. sc around (9)
FO trunk after 6–7 cm long.
Branches (Make 2 per antler):
-
MR, 5 sc (5)
2–4. sc around (5)
FO and sew onto trunk at different heights.
Support Tip:
-
Insert wire through the trunk before sewing branches. Cover ends with tape. Stuff around the wire.
-
If child-safe: overstuff firmly with fiberfill and use a smaller hook for tighter stitches.
Body (Light Brown with Cream Belly)
-
MR, 6 sc (6)
-
inc in each st (12)
-
(sc, inc) x 6 (18)
-
(2 sc, inc) x 6 (24)
-
(3 sc, inc) x 6 (30)
6–12. sc around (30) -
Change to cream (for belly), sc around (30)
14–18. sc around (30) -
(3 sc, dec) x 6 (24)
-
(2 sc, dec) x 6 (18)
-
(sc, dec) x 6 (12)
Stuff firmly. FO.
Arms (Make 2 – Light Brown with Dark Hooves)
Start with dark brown:
-
MR, 6 sc (6)
-
inc in each st (12)
3–4. sc around (12)
Switch to light brown:
5–10. sc around (12)
Stuff lightly. Flatten and sew closed.
Legs (Make 2 – Light Brown with Dark Hooves)
Start with dark brown:
-
MR, 6 sc (6)
-
inc in each st (12)
-
(sc, inc) x 6 (18)
4–5. sc around (18)
Switch to light brown:
6–12. sc around (18)
Stuff firmly. FO, leave tail for sewing.
Tail (Light Brown)
-
MR, 6 sc (6)
2–4. sc around (6)
FO, leave tail.
🧵 Assembly
-
Sew muzzle centered low on face. Add pink nose.
-
Position safety eyes above muzzle. Embroider small brows if desired.
-
Attach ears to sides of head.
-
Sew antlers firmly on top—insert wire for upright look OR stuff extra firmly if child-safe.
-
Attach head to body.
-
Sew arms to sides, slightly angled forward.
-
Attach legs to bottom of body.
-
Sew tail to back.
🪄 Antler Upright Support
-
For Decorative Reindeer: Insert armature wire inside antlers, bend into shape, and stuff around. This guarantees the upright position.
-
For Baby/Child Toy: Avoid wire. Instead:
-
Use tighter stitches (smaller hook).
-
Overstuff firmly.
-
Stitch the antlers down into the head with extra anchoring threads.
-
✨ And there you have it—your sweet Baby Rattle Reindeer, ready for Christmas cuddles or to decorate under the tree.