Rev up your crochet skills with this Amigurumi Armored Truck pattern! Whether you’re fascinated by rugged, heavy-duty vehicles or just love crafting unique designs, this free pattern brings a bold and adventurous touch to your handmade collection. With its sturdy shape, detailed accents, and unmistakable armored style, this little truck is ready for action! Perfect for display, gifting, or adding a fun twist to your crochet lineup, this project combines creativity with a touch of industrial charm.
Designed for versatility and customization, this pattern lets you choose classic security vehicle colors or experiment with playful hues to make your armored truck stand out. Add details like embroidered doors, tiny wheels, or even a logo-inspired embellishment to give your creation extra personality. Whether it’s rolling onto a toy shelf, being gifted to a vehicle enthusiast, or simply serving as a fun crochet challenge, this amigurumi armored truck is a one-of-a-kind project that brings craftsmanship and creativity together! 🚛🧶✨
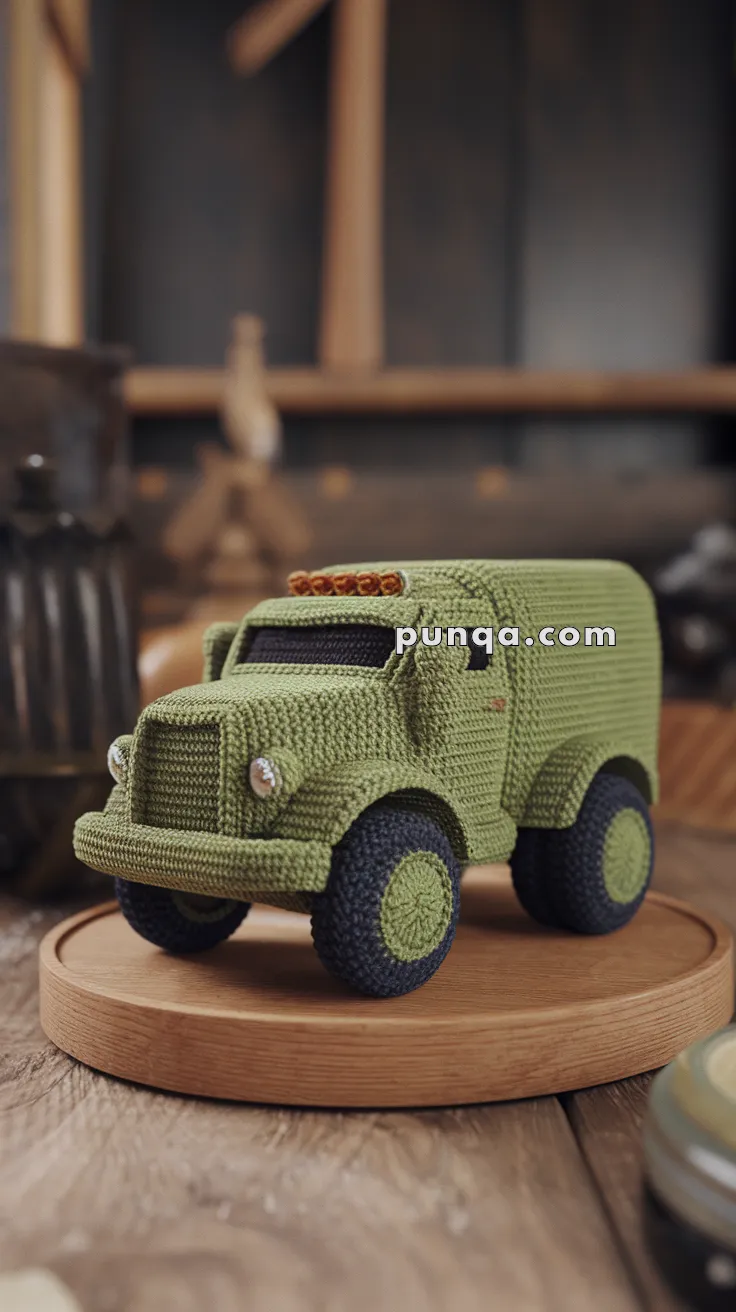
🚛 Amigurumi Armored Truck – FREE Crochet Pattern
Build your own rugged and ready amigurumi armored truck! Featuring realistic contours, round headlights, detailed tires, and a sturdy body, this crochet vehicle is a perfect gift for little drivers or a fun desk display for grown-up collectors.
✨ Skill Level
Advanced – Includes shaping, sewing many parts together, and structural stuffing. Great for confident crocheters who enjoy vehicle builds.
📏 Finished Size
Approx. 6–7 inches (15–18 cm) long using DK or worsted weight yarn and a 2.5–3.5 mm hook.
🧶 Materials
-
DK or Worsted weight yarn in:
-
Color A: Army Green (main truck body)
-
Color B: Black or Dark Charcoal (tires, windshield)
-
Color C: Olive/Light Green (hubcaps)
-
Color D: Orange (roof lights)
-
Color E: White (headlights)
-
-
2.5–3.0 mm crochet hook
-
Tapestry needle
-
Stuffing
-
Stitch marker
-
Scissors
-
Plastic canvas/cardboard (optional, for structure)
-
Hot glue (for lights/trim)
🧵 Abbreviations (US Terms)
MR – Magic Ring
sc – Single Crochet
inc – Increase
dec – Decrease
ch – Chain
sl st – Slip Stitch
FO – Fasten Off
st – Stitch
🧱 Truck Body Base (Color A – Army Green)
Work as a rectangular box:
-
Ch 25
-
Row 1: sc in 2nd ch and across (24)
-
Rows 2–12: ch 1, turn, sc across (24)
➡️ You now have the bottom base.
Now work sides in the round:
-
sc around the rectangle (make 1 sc per st, 3 sc in each corner) – total approx. 60–66 sts
5–20. sc around (height of box)
FO, stuff with fiberfill. Optionally line the inside with cardboard.
🚚 Hood (Front Cab Section – Color A)
-
Ch 16
-
Row 1: sc in 2nd ch and across (15)
3–8. ch 1, turn, sc across (15)
9–12. dec at beginning and end of each row for sloped hood look
➡️ Optional: Round the edges slightly on final row by sc-dec across the corners.
FO and sew to front center of body.
🧼 Windshield & Side Windows (Color B)
Windshield Panel:
-
Ch 13
-
Row 1: sc in 2nd ch and across (12)
3–5. sc across
FO, sew to top of hood.
Side Windows (Make 2):
-
Ch 5, sc 4 rows
FO and sew on each side of cab.
🔄 Wheel Wells / Arches (Color A)
Make 4:
-
MR, 6 sc
-
inc x6 (12)
-
(1 sc, inc) x6 (18)
-
Fold in half and sew to side of body where each tire will go.
🛞 Tires (Make 4 – Outer in Color B, Inner in Color C)
Tire Treads (Color B):
-
MR, 6 sc
-
inc x6 (12)
-
(1 sc, inc) x6 (18)
-
(2 sc, inc) x6 (24)
-
sc around
-
(2 sc, dec) x6 (18)
-
sc around
Stuff lightly
Hubcaps (Color C):
-
MR, 6 sc
-
inc x6 (12)
-
(1 sc, inc) x6 (18)
Flatten and sew to one side of each tire.
Sew tires to truck under arches.
🔆 Headlights (Make 2 – Color E)
-
MR, 6 sc
-
sl st to close, FO
Sew to front of hood.
🔶 Roof Lights (Make 3–5 – Color D)
-
MR, 5 sc
-
sl st, FO
Sew to roof in a row.
✂️ Final Details & Assembly
-
Sew hood to front of main body with whip stitch
-
Attach windshield and windows with invisible sewing
-
Place tires beneath arches and sew firmly
-
Add a black yarn trim line or bumper along bottom edge if desired
-
Optional: Add red brake lights to the rear or an embroidered license plate
💡 Customization Ideas
-
Stitch initials or a badge on the doors
-
Make a matching tow truck or fire truck set
-
Add surface stitch “grill” or door lines
-
Insert wire inside for movable wheels
This sturdy amigurumi truck is built for fun adventures, play, or display – the perfect vehicle for your handmade fleet! 🚚🧵