✨ Skill Level
Intermediate – includes 3D shaping, structured assembly, and color placement.
📏 Finished Size
Approx. 22–25 cm (8.5–10 in) long
🧶 Materials & Yarn Amount
Worsted weight yarn:
- Olive green: 150 g (body, cab, truck bed)
- White / cream: 45 g (windows, bumper, details)
- Black: 45 g (tires)
- Light blue / pale grey: 15 g (headlights, wheel centers)
Tools:
- 3.5–4.0 mm hook
- Fiberfill stuffing
- Yarn needle
- Stitch marker
- Optional: plastic canvas for structure
🔤 Abbreviations
MR – magic ring
sc – single crochet
inc – increase
dec – invisible decrease
ch – chain
sl st – slip stitch
BLO – back loop only
FO – fasten off
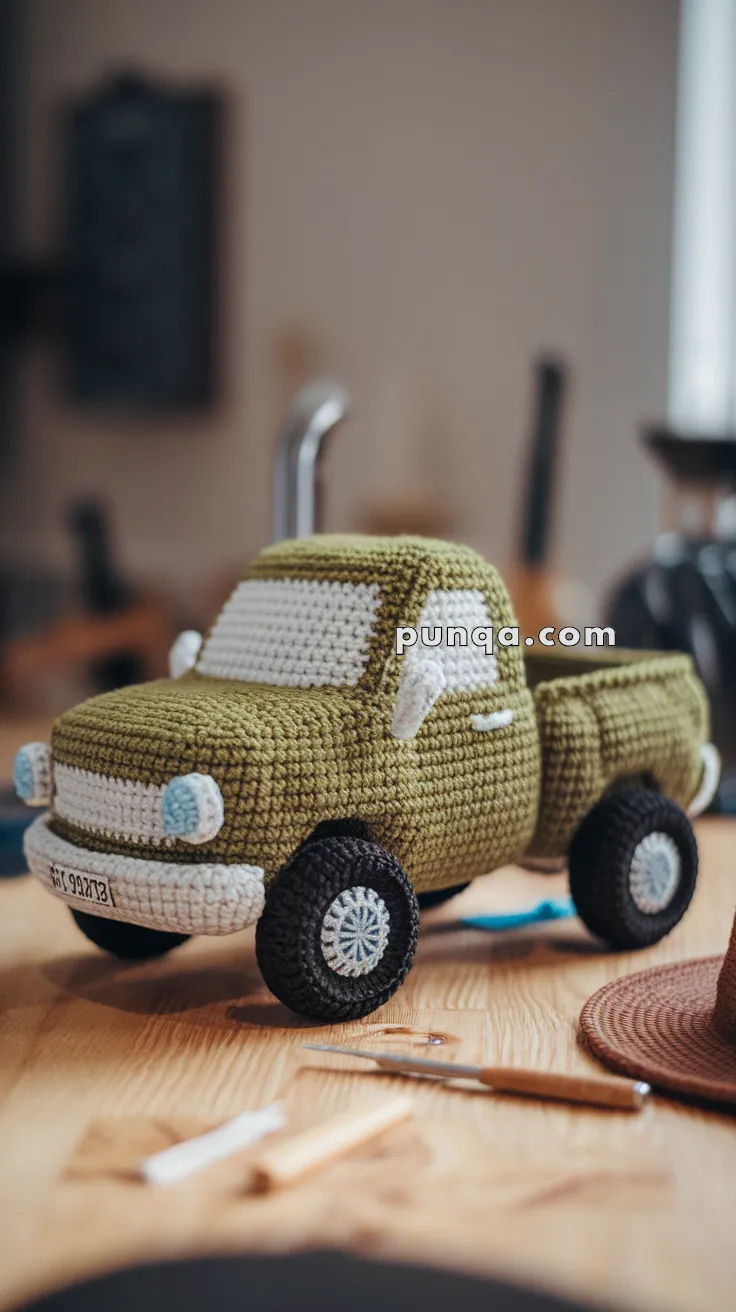
🚛 Main Body (Cab + Base in One Piece)
This piece creates the rounded front, flat base, and soft cab shape.
With olive yarn:
Base Oval
R1: ch 25, starting in 2nd ch:
sc 23, 3 sc in last st, sc 22, inc (50)
R2: inc, sc 22, inc ×3, sc 22, inc ×2 (58)
R3: (sc 8, inc) ×6 (64)
Raise Sides
R4: BLO sc around (64)
R5–9: sc around (64)
Shape Front Hood (slight rounding, not steep)
R10: sc 48, (dec) ×8 (56)
R11: sc around (56)
R12: sc 44, (dec) ×6 (50)
R13: sc around (50)
Cab Upper Section
R14: (sc 8, dec) ×5 (45)
R15–17: sc around (45)
Lightly stuff front section only.
Truck Bed Opening
R18: sc 30, ch 12, skip 12 sts, sc 3 (45)
👉 This forms a clean rectangular opening for the bed.
Bed Walls
R19–25: sc around (45)
Do not stuff the bed.
FO.
🪟 Windows (Wide Band Style)
Front Windshield
With white yarn:
Ch 18
Row 1: sc across (17)
Row 2: dec, sc 13, dec (15)
Row 3: sc across (15)
Row 4: dec, sc 11, dec (13)
FO.
Sew centered across front cab as a wide horizontal band.
Side Windows (Make 2)
Ch 10
Row 1–4: sc across (9)
FO.
Attach directly behind windshield.
🚛 Truck Bed Insert (Optional Interior)
With olive yarn:
Ch 20
Rows 1–5: sc across (19)
FO and sew inside base of bed.
⚫ Tires (Make 4 – Thick & Rounded)
With black yarn:
R1: MR, 6 sc (6)
R2: inc ×6 (12)
R3: (1 sc, inc) ×6 (18)
R4: (2 sc, inc) ×6 (24)
R5–9: sc around (24)
Inner shaping
R10: BLO sc (24)
R11: (2 sc, dec) ×6 (18)
R12: (1 sc, dec) ×6 (12)
Lightly stuff center.
FO.
Wheel Centers (Make 4)
With light blue:
R1: MR, 6 sc
R2: inc ×6 (12)
R3: sc around (12)
FO and sew onto tires.
💡 Headlights (Make 2 – Raised)
With light blue:
R1: MR, 6 sc
R2: inc ×6 (12)
R3: (1 sc, inc) ×6 (18)
R4: sc around (18)
Lightly stuff.
FO.
Attach symmetrically on front.
🤍 Front Bumper (Rounded Bar)
With white yarn:
Ch 20
Row 1: sc across (19)
Rows 2–3: sc across
FO.
Slightly curve before sewing under headlights.
🔙 Rear Bumper
Ch 14
Rows 1–2: sc across
FO and attach at back.
🔍 Side Mirrors (Make 2)
With white yarn:
R1: MR, 6 sc
R2: (sc, inc) ×3 (9)
FO.
Flatten slightly and sew to cab sides.
🔢 License Plate
Ch 8
Rows 1–2: sc across
FO.
Sew centered on front bumper and embroider detail.
🪡 Assembly
- Attach wheels evenly under body
- Sew windshield and side windows
- Attach headlights slightly raised
- Sew bumpers in place
- Add mirrors and license plate
- Stuff cab firmly, keep bed open
✨ Shaping Tips
- Keep front slightly rounded, not flat
- Maintain gentle roof curve
- Ensure wheels sit evenly for balance
- Keep edges soft for handmade look
🎉 Final Thoughts
This crochet pickup truck stands out with its smooth shaping, balanced proportions, and nostalgic charm. The wide windshield, rounded hood, chunky tires, and open truck bed all come together to create a cohesive and realistic miniature vehicle 🚙
Take your time assembling and shaping—those small details make all the difference in bringing this little truck to life.
Happy crocheting 🧶✨