Hey there! I’m absolutely thrilled to dive into the charming world of amigurumi with you. If you haven’t encountered it yet, amigurumi is the delightful Japanese art of crocheting small, stuffed yarn creatures. One of the most endearing creations you can tackle is the armadillo baby amigurumi. 🦔✨ There’s something undeniably adorable about crafting these little critters, with their segmented shells and cute little faces. The process can be both meditative and rewarding, allowing your creativity to flow right from your fingertips into each stitch. Plus, once you’ve completed your armadillo, it makes for the perfect cuddly companion or a thoughtful handmade gift!
Creating an armadillo baby amigurumi pattern starts with choosing your yarn and hook size, usually opting for colorful threads to add a touch of whimsy. I love the anticipation that builds as I gather my materials and imagine the personality my little armadillo will have. 🎨🧶 From crocheting the smooth, rounded body to assembling the armor-like segments, every step is like piecing together a cute puzzle. Don’t worry if you’re a beginner; this project is fantastic for practicing basic stitches and techniques! As you shape the tiny limbs and sew them onto the main body, you can’t help but smile imagining the final result—a tiny armadillo that brings joy to anyone who beholds it.
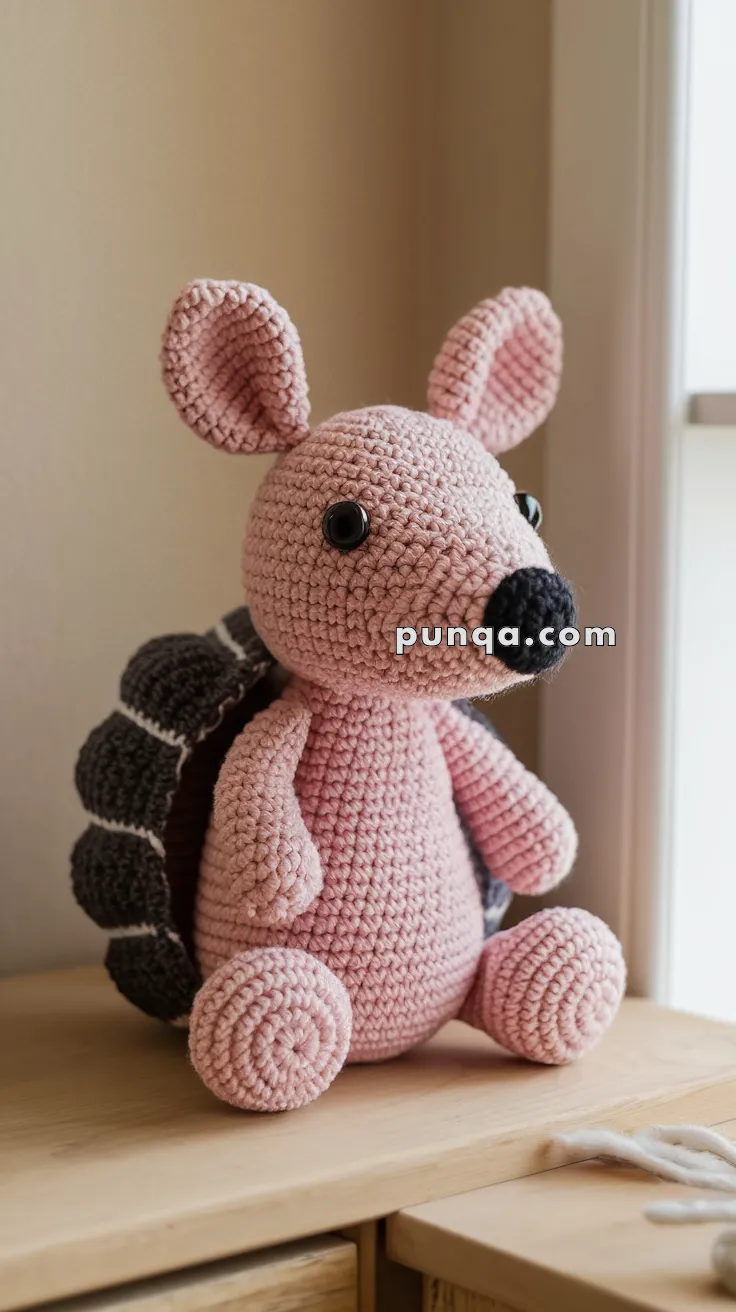
This adorable baby armadillo is a cuddly twist on the tough-shelled creature! With oversized ears, a round belly, and a textured shell, it’s perfect for woodland nurseries or animal-themed gifts.
✨ Skill Level
Easy to Intermediate – Simple shaping with some layered shell construction.
📏 Finished Size
Approx. 7–9 inches (18–23 cm) when using worsted yarn and a 2.5–3.5 mm hook.
🧶 Materials
Yarn (Worsted or DK weight):
Soft pink (body, limbs, ears)
Black (nose)
Dark gray (shell)
Light gray or white (shell stripe accents)
8–10 mm safety eyes
Crochet hook (2.5 mm – 3.5 mm)
Polyester fiberfill stuffing
Stitch marker
Tapestry needle
🧵 Abbreviations (US Terms)
MR – Magic Ring sc – Single Crochet inc – Increase dec – Decrease ch – Chain sl st – Slip Stitch FO – Fasten Off
🐽 Head (Pink)
MR, 6 sc
inc x6 (12)
(1 sc, inc) x6 (18)
(2 sc, inc) x6 (24)
(3 sc, inc) x6 (30)
(4 sc, inc) x6 (36) 7–11. sc (36) – Place safety eyes between R7–8, approx. 7 sts apart
(4 sc, dec) x6 (30)
(3 sc, dec) x6 (24) – Begin stuffing
(2 sc, dec) x6 (18)
(1 sc, dec) x6 (12)
dec x6 (6), FO and close
🐽 Nose (Black)
MR, 6 sc
sc (6)
inc x6 (12)
sc (12), FO and sew to front of face
👂 Ears (Make 2 – Pink)
MR, 6 sc
inc x6 (12)
(1 sc, inc) x6 (18)
(2 sc, inc) x6 (24)
sc (24) – FO, fold slightly and sew to top sides of head
🐾 Body (Pink)
MR, 6 sc
inc x6 (12)
(1 sc, inc) x6 (18)
(2 sc, inc) x6 (24)
(3 sc, inc) x6 (30)
(4 sc, inc) x6 (36) 7–13. sc (36)
(4 sc, dec) x6 (30)
(3 sc, dec) x6 (24) – Begin stuffing
(2 sc, dec) x6 (18)
(1 sc, dec) x6 (12)
dec x6 (6), FO and close
🐾 Arms (Make 2 – Pink)
MR, 6 sc
(1 sc, inc) x3 (9) 3–7. sc (9), FO and lightly stuff – Sew to sides of body
🐾 Legs (Make 2 – Pink)
MR, 6 sc
inc x6 (12)
sc (12)
(1 sc, dec) x4 (8) 5–7. sc (8), FO and stuff – Sew under body at front
🐚 Shell (Dark Gray with Light Gray Accents)
Main Shell Piece:
MR, 6 sc
inc x6 (12)
(1 sc, inc) x6 (18)
(2 sc, inc) x6 (24)
(3 sc, inc) x6 (30)
(4 sc, inc) x6 (36)
(5 sc, inc) x6 (42)
(6 sc, inc) x6 (48)
sc (48), FO and leave long tail – Lightly stuff and sew to back
Shell Ridges:
With light gray yarn, surface slip stitch across the shell in 2–3 horizontal lines
You can also chain separate lines and sew them down if preferred
🧵 Tail (Pink)
MR, 6 sc 2–6. sc (6) – FO, stuff lightly, and sew to lower back