Take your crochet skills out of this world with this Amigurumi Alien pattern! Inspired by classic extraterrestrial designs, this adorable little space visitor features big eyes, tiny antennae, and a playful personality in every stitch. Whether you’re crafting for sci-fi fans, adding a quirky touch to your collection, or simply enjoy making unique amigurumi designs, this pattern lets you stitch up a miniature alien bursting with charm! Perfect for space lovers and imaginative creators, this crochet alien is sure to bring a cosmic twist to your handmade projects. 👽✨
Designed for customization, this pattern allows you to experiment with different shades of green, embroidered details, or even tiny accessories like a miniature UFO or space helmet for extra flair. Craft a classic alien with its signature glowing eyes, create a whimsical version with pastel tones, or even stitch up a full set of space-inspired amigurumi for an intergalactic display! Whether gifted as a fun keepsake, displayed as a quirky accent, or made simply for the joy of crafting, this Amigurumi Alien is a creative and entertaining project—perfect for bringing a touch of handmade cosmic magic to every stitch! 🧶🚀
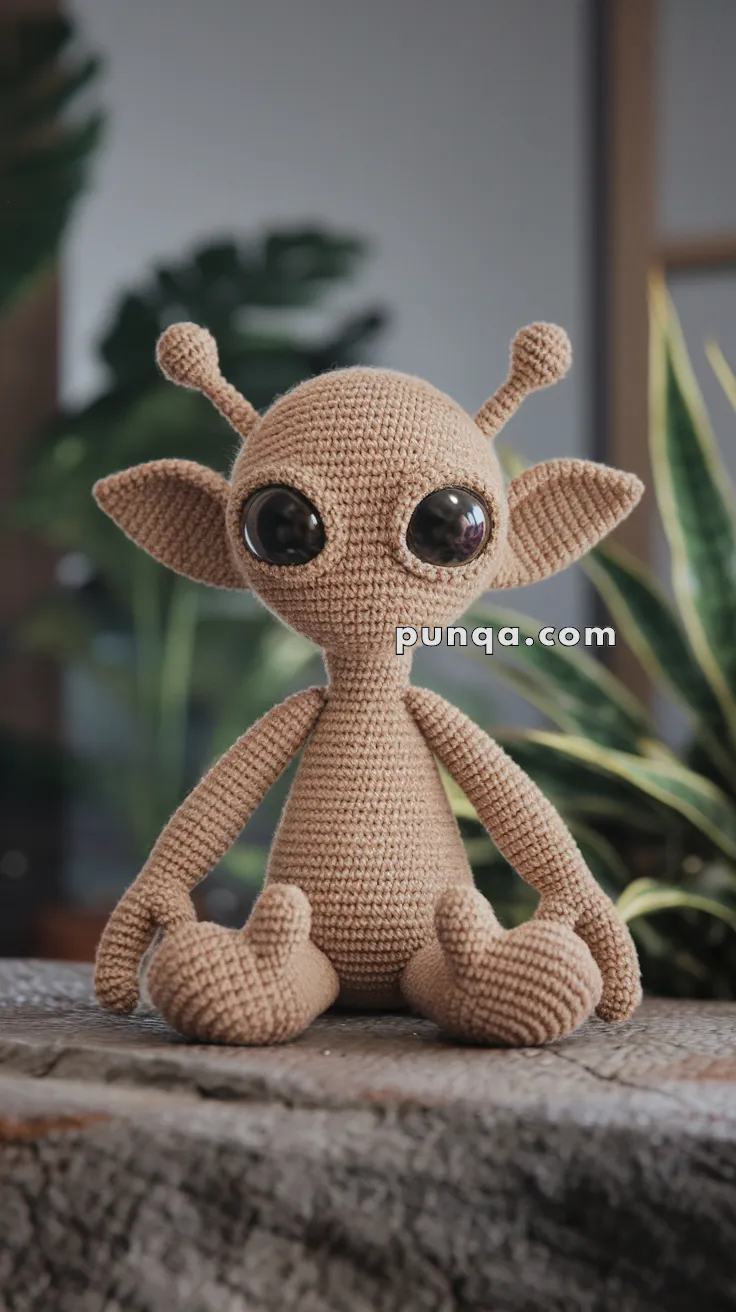
👽 Amigurumi Alien Crochet Pattern
Meet your new intergalactic buddy! This wide-eyed alien features an oversized head, giant black eyes, rounded hands and feet, wide elf-like ears, and adorable antennas. With simple shaping and thoughtful assembly, you’ll bring this otherworldly creature to life in no time.
Perfect as a gift, decoration, or playtime companion, this alien is guaranteed to charm earthlings of all ages. 🛸✨
✨ Skill Level
Intermediate – involves shaping, attaching parts, and working in the round.
📏 Finished Size
Approx. 10–12 inches (25–30 cm) tall using worsted weight yarn and a 3.0–3.5 mm hook.
🧶 Materials
-
Worsted weight yarn in taupe, tan, or light brown (entire body)
-
3.5 mm crochet hook
-
14–16 mm black safety eyes (large size for exaggerated look)
-
Polyfill stuffing
-
Stitch marker
-
Tapestry needle & scissors
-
Optional: pipe cleaners for poseable antennas
🧵 Abbreviations (US Terms)
-
MR – Magic Ring
-
sc – Single crochet
-
inc – Increase (2 sc in one stitch)
-
dec – Decrease (sc2tog)
-
ch – Chain
-
sl st – Slip stitch
-
FO – Fasten off
🧠 Head (Large & Round)
With body color yarn:
-
MR, 6 sc (6)
-
inc x6 (12)
-
(1 sc, inc) x6 (18)
-
(2 sc, inc) x6 (24)
-
(3 sc, inc) x6 (30)
-
(4 sc, inc) x6 (36)
-
(5 sc, inc) x6 (42)
-
(6 sc, inc) x6 (48)
9–22. sc around (48) ← extra rounds for oversized head -
(6 sc, dec) x6 (42)
-
(5 sc, dec) x6 (36)
-
(4 sc, dec) x6 (30)
-
(3 sc, dec) x6 (24) – insert safety eyes between Rounds 14–15, about 12 stitches apart
Stuff firmly. -
(2 sc, dec) x6 (18)
-
(1 sc, dec) x6 (12)
-
dec x6 (6), FO and weave closed.
🦻 Ears (Make 2)
-
MR, 6 sc (6)
-
(1 sc, inc) x3 (9)
-
(2 sc, inc) x3 (12)
-
(3 sc, inc) x3 (15)
5–7. sc around (15)
Flatten piece, sc across opening. FO.
👉 Sew ears wide on head, angled slightly outward and upward.
🧍 Body
-
MR, 6 sc (6)
-
inc x6 (12)
-
(1 sc, inc) x6 (18)
-
(2 sc, inc) x6 (24)
-
(3 sc, inc) x6 (30)
6–10. sc around (30) -
(4 sc, inc) x6 (36)
12–18. sc around (36) -
(4 sc, dec) x6 (30)
20–21. sc around (30) -
(3 sc, dec) x6 (24)
-
(2 sc, dec) x6 (18)
-
sc around (18)
Stuff firmly. FO with long tail. Sew to head.
💪 Arms (Make 2 – Rounded Hands)
-
MR, 6 sc (6)
-
inc x6 (12)
3–5. sc around (12) ← rounded hand -
(2 sc, dec) x3 (9)
7–20. sc around (9)
Lightly stuff, leaving arms flexible. FO.
Sew slightly below neckline.
🦶 Legs (Make 2 – Rounded Feet)
-
MR, 6 sc (6)
-
inc x6 (12)
-
(1 sc, inc) x6 (18)
4–6. sc around (18) ← forms rounded foot -
(1 sc, dec) x6 (12)
8–22. sc around (12)
Stuff firmly. FO.
Attach to bottom of body, angled for a sitting position.
👾 Antennas (Make 2)
-
MR, 4 sc (4)
2–7. sc around (4) -
inc x4 (8)
-
sc around (8)
-
dec x4 (4)
Stuff lightly (or insert pipe cleaner). FO.
Sew to top of head.
✂️ Assembly
-
Attach body to head securely.
-
Sew arms to upper sides of body.
-
Attach legs to base of body, slightly spread.
-
Sew ears wide and outward, angled slightly upward.
-
Sew antennas symmetrically on head.
-
Adjust safety eyes so they sit deeply into head for large, round appearance.
🌟 Finishing Touches
-
Embroider a tiny smile or leave plain for neutral alien expression.
-
Add optional accessories: a mini scarf, backpack, or even a tiny UFO.
-
For a unique twist, try glow-in-the-dark or velvety yarn.
👽 Your amigurumi alien is ready — with a huge head, giant eyes, simple rounded hands/feet, wide ears, and antennas just like in the picture. A cuddly little extraterrestrial straight out of space! 🚀✨