Oh, the whimsical world of amigurumi! 🧶 There’s an undeniable charm in crafting these adorable, crocheted creatures, and when they come in the form of circus dolls, the magic is doubled! There’s something wonderfully nostalgic and playful about creating a mini acrobat, a pint-sized clown, or a tiny ringmaster, each with its own vibrant personality. The process of bringing these lively characters to life is as joyful as a day under the big top. With every stitch, you can feel the excitement of the circus, as if you’re weaving in the laughter, the applause, and the dazzling lights of the big tent.
Creating an amigurumi circus doll pattern is like painting with yarn. 🎨 It starts with an idea, a vision of the character you want to bring to life. From choosing the perfect color palette to deciding on the tiniest details, like the size of a clown’s nose or the angle of a juggler’s hat, each step is filled with creative decisions. The best part? There are no mistakes, only unique interpretations! You don’t have to be a crochet expert to dive into this delightful craft—each loop and pull draws you into a world of imaginative play. It’s a joyful journey of creativity and a celebration of the enchanting circus spirit! 🎪
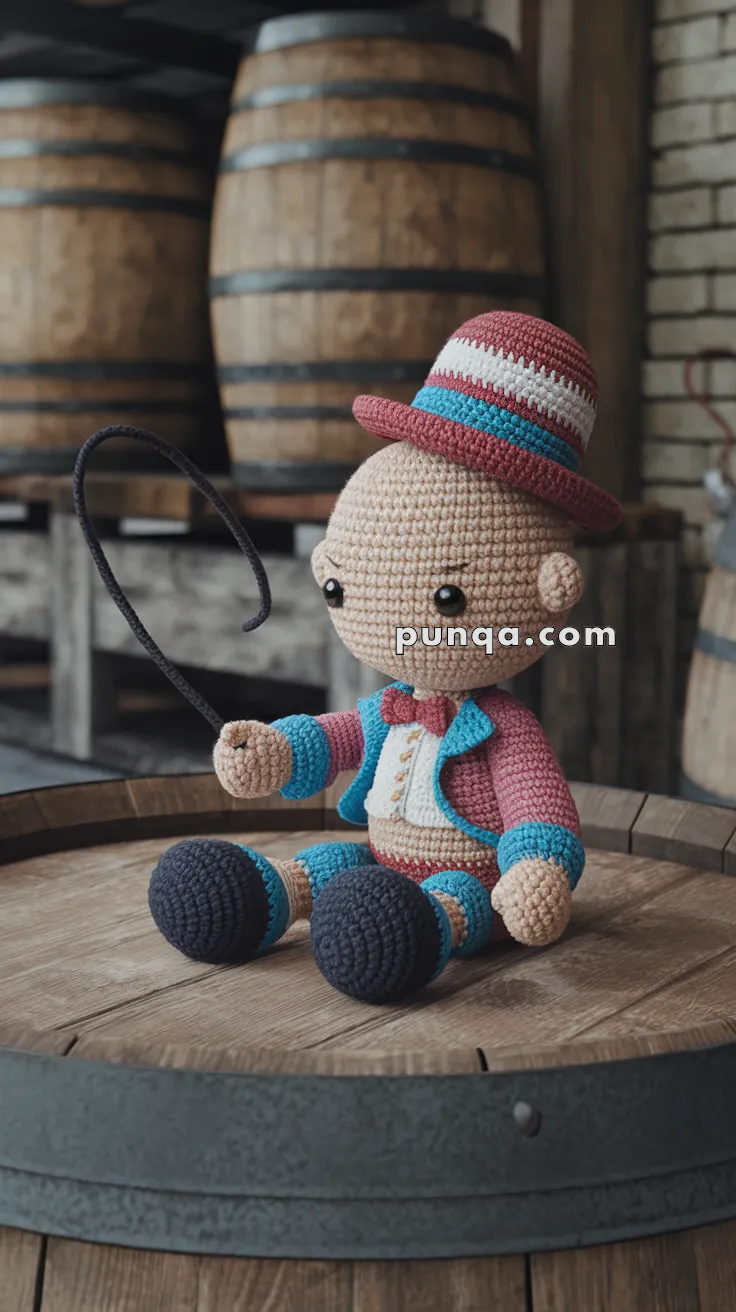
🎪 Amigurumi Circus Doll Crochet Pattern
Step right up! Create your own charming circus performer complete with a bowtie, dapper jacket, top hat, and even a coiled whip. This character is perfect for display, storytelling, or gifting to a little showman or showgirl.
🧶 Skill Level
Intermediate – Includes color changes, clothing attachment, hat construction, and whip detail.
📏 Finished Size
Approximately 25–28 cm (10–11 in) tall with DK yarn and a 2.75 mm hook.
✂️ Materials
-
DK yarn in the following:
-
Beige (skin)
-
Red, turquoise, white, navy (hat and clothing)
-
Black (whip)
-
-
2.75 mm crochet hook
-
10 mm safety eyes
-
Fiberfill stuffing
-
Yarn needle
-
Stitch marker
-
Craft wire or pipe cleaner for the whip (optional)
🧵 Abbreviations (US Terms)
-
MR – Magic ring
-
sc – Single crochet
-
inc – Increase
-
dec – Decrease
-
ch – Chain
-
sl st – Slip stitch
-
BLO – Back loop only
-
FO – Fasten off
🧑🎪 Head
With beige:
-
MR, 6 sc
-
inc x6 (12)
-
(sc, inc) x6 (18)
-
(2 sc, inc) x6 (24)
-
(3 sc, inc) x6 (30)
-
(4 sc, inc) x6 (36)
7–14. sc around (36) -
(4 sc, dec) x6 (30)
-
(3 sc, dec) x6 (24)
Place safety eyes between Rounds 10–11, 6 stitches apart -
(2 sc, dec) x6 (18)
-
(sc, dec) x6 (12)
-
dec x6 (6)
FO and close
👔 Body (with Shirt & Jacket)
Start with beige (belly):
-
MR, 6 sc
-
inc x6 (12)
-
(sc, inc) x6 (18)
-
(2 sc, inc) x6 (24)
-
(3 sc, inc) x6 (30)
6–8. sc (30)
Switch to white (shirt):
9–11. sc (30)
Add 3 red embroidered “buttons” down the center later
Switch to jacket base color (turquoise):
12–16. sc (30)
Stuff firmly
17. (3 sc, dec) x6 (24)
18. (2 sc, dec) x6 (18)
19. (sc, dec) x6 (12)
FO, leave long tail for sewing
🦵 Legs (Make 2)
Start with navy:
-
MR, 6 sc
-
inc x6 (12)
3–4. sc (12)
Switch to turquoise (pants):
5–9. sc (12)
Stuff lightly
FO one leg
Do not FO second leg; ch 3 and join to first leg to begin round body base.
🦴 Arms (Make 2)
With beige:
-
MR, 6 sc
-
inc x6 (12)
3–4. sc (12)
Switch to jacket color (red):
5–10. sc (12)
11. (2 sc, dec) x3 (9)
12. sc (9)
Add turquoise cuff on last round
Stuff lightly
FO and leave tail for sewing
🎩 Hat
With red yarn (base):
-
MR, 6 sc
-
inc x6 (12)
-
(sc, inc) x6 (18)
-
(2 sc, inc) x6 (24)
-
BLO sc (24)
-
sc (24)
Change colors every 2 rounds for stripes: white, turquoise, red
7–12. sc (24) -
FLO: (3 sc, inc) x6 (30)
-
sc (30)
FO and sew to head
🤹 Jacket Lining & Bowtie (Optional)
Bowtie:
Ch 8, sl st to first to form ring, sc in each, sew centered under head on chest.
Lapel trims (turquoise):
Ch 14, sc across, sew around chest in a “V” shape for open jacket effect.
🐍 Whip
With black yarn:
Ch 40 (or longer if desired), sl st back along chain
Make two rows for thickness if desired
Optional: Insert craft wire inside chain before sl st for shape
Sew to right hand
🧷 Assembly
-
Sew head to body
-
Attach arms to sides
-
Position and sew legs under body
-
Stitch hat slightly tilted for flair
-
Add bowtie and jacket trim
-
Stitch whip securely to one hand
🎪 You’re Done! 🎩🐾
Congratulations! Your circus doll is ready to perform! Place him center stage, and let him delight in your collection or gift him to someone who loves magic, flair, and fun! 🎉🤹♂️💫