Take your crochet skills to new heights with this Amigurumi Jet Plane pattern! Inspired by the sleek and powerful design of real jets, this miniature creation captures the excitement of aviation in every stitch. With its streamlined shape, detailed wings, and bold accents, this crochet jet is perfect for adding a dynamic touch to your handmade collection. Whether you’re crafting for aviation enthusiasts, creating a fun decor piece, or simply enjoy making unique amigurumi designs, this pattern lets you stitch up a high-flying jet bursting with personality! ✈️✨
Designed for customization, this pattern allows you to experiment with different shades of blue, gray, or even vibrant colors for a unique twist. Add embroidered details, tiny accessories like a miniature pilot or landing gear, or even stitch up a full fleet of crochet jets for an impressive display! Whether gifted as a cherished keepsake, displayed as a playful accent, or made simply for the joy of crafting, this Amigurumi Jet Plane is a fun and creative project—perfect for bringing a touch of handmade aviation magic to every stitch! 🧶💖
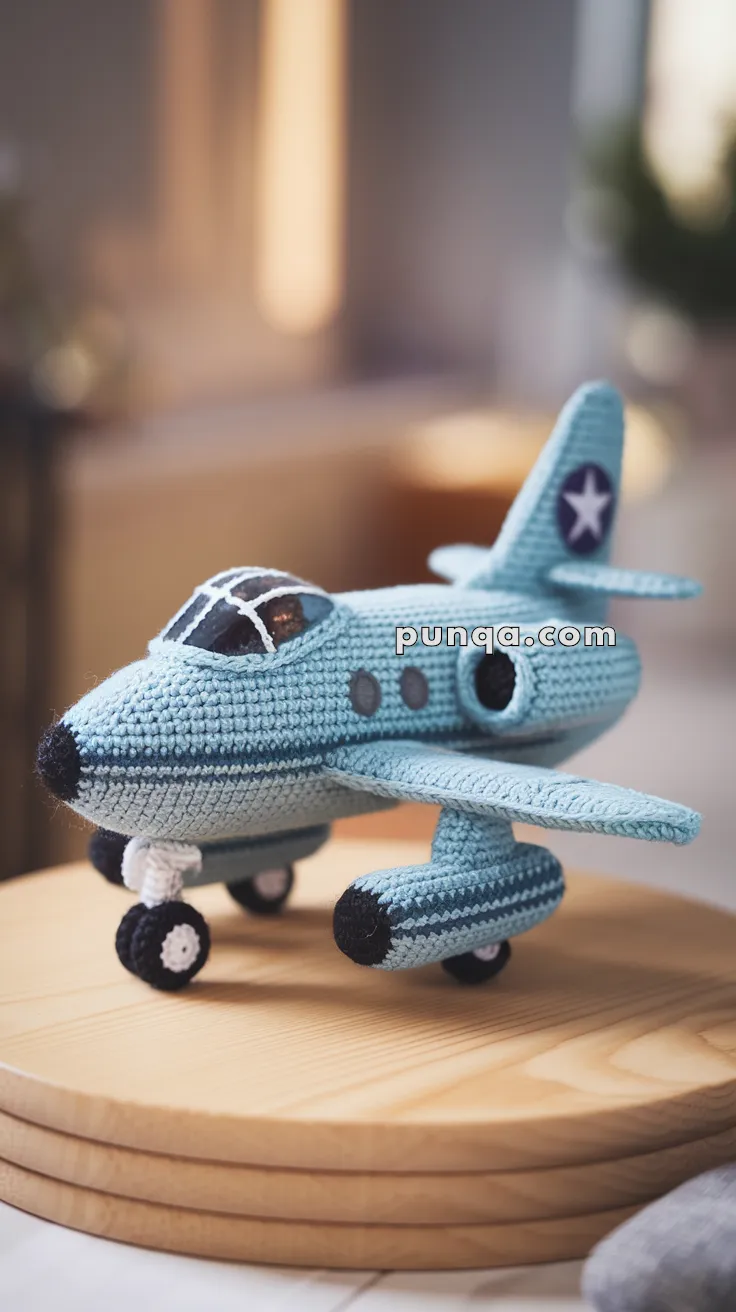
✈️ Amigurumi Jet Plane Crochet Pattern
Take off with this sleek amigurumi jet plane, complete with sculpted wings, turbines, wheels, cockpit windows, and embroidered details. Perfect as a toy, display piece, or pilot-themed gift. 🛫💙
✨ Skill Level
Advanced Beginner to Intermediate – Shaping, flat pieces, simple assembly, and optional embroidery.
📏 Finished Size
Approx. 10–12 inches (25–30 cm) long using DK or worsted yarn and a 2.5–3.5 mm hook.
🧶 Materials
Yarn (DK or Worsted):
-
Color A: Light Blue (Main Body)
-
Color B: Black (Turbines, Nose, Tires)
-
Color C: White (Cockpit, Wheels)
-
Color D: Dark Blue or Gray (Cockpit, Windows, Details)
-
Color E: Purple/Blue (Tail Badge Circle with Star)
Other supplies:
-
Crochet hook (2.5–3.5 mm depending on yarn)
-
Fiberfill stuffing
-
Safety eyes (for turbines, optional)
-
Stitch marker
-
Tapestry needle
-
Stiff felt or plastic canvas (for optional cockpit reinforcement)
-
Fabric glue (optional)
-
Thin wire or pipe cleaner (optional for wheel supports)
🧵 Abbreviations (US Terms)
MR – Magic Ring
sc – Single Crochet
inc – Increase
dec – Decrease
ch – Chain
sl st – Slip Stitch
st – Stitch
FO – Fasten Off
🛩️ Fuselage (Main Body – Color A)
Stuff as you go.
Round 1: MR, 6 sc
Round 2: inc x6 (12)
Round 3: (1 sc, inc) x6 (18)
Round 4: (2 sc, inc) x6 (24)
Round 5: (3 sc, inc) x6 (30)
Rounds 6–28: sc around (30)
Round 29: (3 sc, dec) x6 (24)
Round 30: (2 sc, dec) x6 (18)
Round 31: (1 sc, dec) x6 (12)
Round 32: dec x6 (6)
FO, close and weave in.
🛫 Wings (Make 2 – Color A)
Work flat:
Row 1: Ch 16
Row 2: sc across (15)
Rows 3–4: sc across
Row 5: dec, sc 11, dec (13)
Row 6: sc across
Row 7: dec, sc 9, dec (11)
Row 8: sc across
Row 9: dec, sc 7, dec (9)
FO and leave a long tail for sewing.
Lightly stuff or insert a strip of felt before closing if you want rigidity.
🌀 Engines (Make 2 – Color A + B)
Back to front:
Round 1: With Color B, MR, 6 sc
Round 2: inc x6 (12)
Round 3–4: sc around (12)
Switch to Color A
Rounds 5–9: sc around (12)
Stuff and FO. Sew under wings.
👃 Nose (Black Tip)
Same as fuselage start, worked in Color B:
MR, 6 sc
Round 2: inc x6 (12)
Round 3: (1 sc, inc) x6 (18)
FO and sew to front of fuselage.
🪟 Cockpit Window Section (Color C + D)
White Base:
Ch 10, sc across for 3–4 rows to form a dome shape.
Dark Windows:
Using Color D, surface crochet lines or embroider window panes.
You may also cut small felt pieces for clean edges and glue them on.
Sew the finished cockpit section near the front.
🔘 Round Windows (Sides – Make 4–6)
With Color D or felt:
MR, 6 sc, sl st to join, FO
Sew evenly on both sides of the fuselage.
🛬 Tail Fin (Color A)
Row 1: Ch 9
Row 2: sc in 2nd ch and across (8)
Row 3–6: sc across
Row 7: dec, sc 4, dec (6)
Row 8: dec, sc 2, dec (4)
FO, shape into triangle and sew vertically to back of plane.
🟣 Star Circle Badge (Tail Decoration)
Cut a felt circle in dark blue/purple
Use white embroidery or cut felt to make a small star
Glue or sew onto the tail.
🛞 Wheels (Make 3)
Outer Tire (Color B):
MR, 6 sc
Round 2: inc x6 (12)
Round 3: sc around
Inner Hub (Color C):
MR, 6 sc
FO and sew center on the black disc
Sew 2 under wings and 1 under nose (optional: insert wire supports)
✂️ Assembly Instructions
-
Stuff and shape fuselage firmly.
-
Attach wings to sides (slightly downward angle)
-
Sew engines under wings.
-
Sew tail fin to the top-rear of the fuselage.
-
Add cockpit dome and embroider window lines.
-
Add side windows and badge.
-
Attach wheels (lightly stuff if needed), or reinforce with wire for standing models.
💡 Customization Tips
-
Add embroidered stripes, airline logos, or flags
-
Use safety eyes for turbines
-
Add pilot face inside cockpit using felt or yarn
-
Insert bell or rattle inside for toddlers
This crocheted jet plane soars with personality and precision—perfect for play, decor, or gifting to aviation fans! 🛫🧶