Welcome to the rugged and adventurous world of amigurumi! 🚜✨ Today, I’m excited to share my free crochet pattern for an Amigurumi Tractor Trailer—a sturdy and playful creation perfect for farm lovers, vehicle enthusiasts, or anyone who enjoys crafting detailed and structured plush designs! 🧶 Whether you love stitching up miniature trucks, experimenting with bold color schemes, or simply want to add a charming tractor trailer to your handmade lineup, this pattern will guide you through crafting a beautifully sculpted plush with sturdy wheels, a classic trailer, and a touch of countryside charm! 🌾
This design embraces vibrant hues, precise shaping, and thoughtful details to bring a dynamic and hardworking presence to your crochet projects! 🧶✨ I’ve carefully outlined each step to ensure your Amigurumi Tractor Trailer turns out just right—ready to roll into your collection or become a treasured handmade gift! 🎁 So grab your hooks, pick out classic greens, deep reds, or sleek grays, and let’s stitch up a fantastic tractor trailer! 🚜
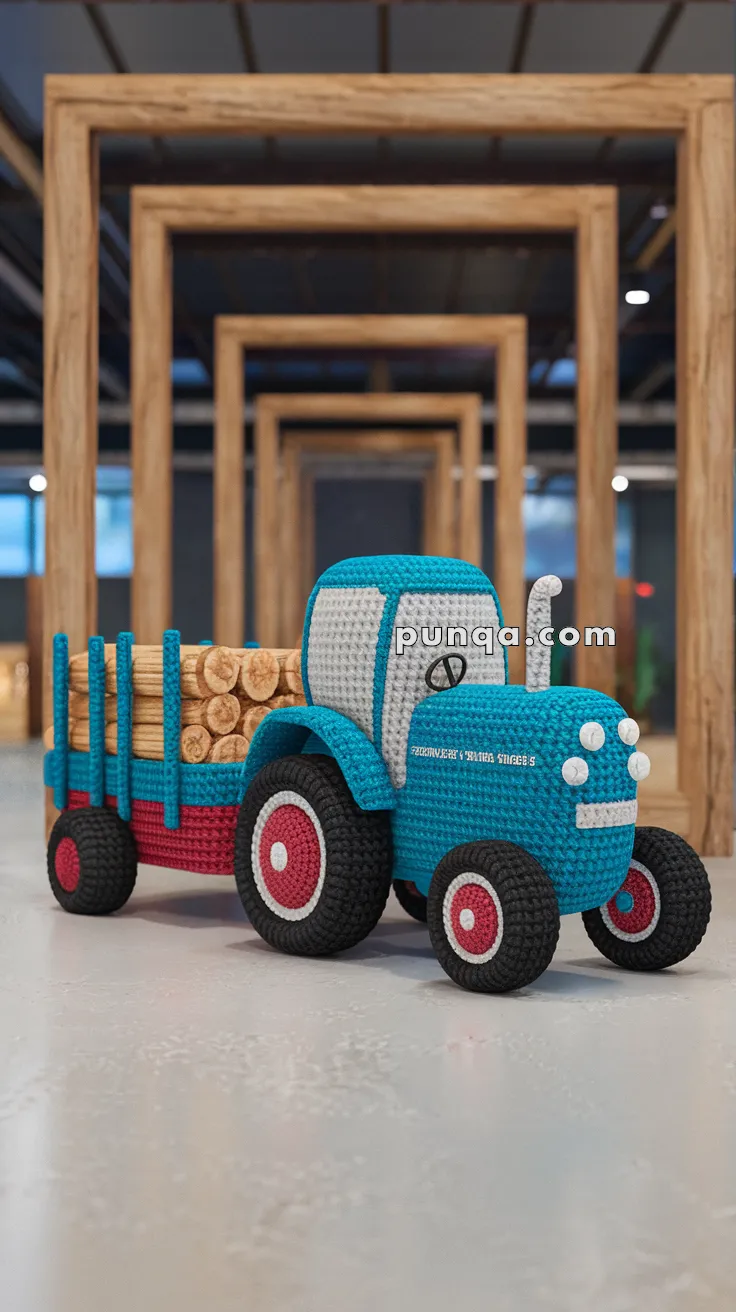
🚜 Amigurumi Tractor Trailer – Free Crochet Pattern
Bring farm life to your crochet collection with this adorable amigurumi tractor and log trailer! Featuring a detailed cab, oversized tires, and a detachable cargo trailer loaded with crocheted logs, this project is perfect for imaginative play or rustic decor. 🧶🌾
✨ Skill Level
Intermediate to Advanced – Includes shaping, structural assembly, and some non-yarn techniques for form retention.
📏 Finished Size
Approx. 10–12 inches (25–30 cm) long from front to back using worsted weight yarn and a 3.5 mm hook.
🧶 Materials
-
Yarn (Worsted Weight):
-
Blue (tractor body, trailer sides)
-
Grey (windows, grille, fenders)
-
White (lights, trim)
-
Red (rims, trailer base)
-
Black (tires)
-
Beige or brown (logs)
-
-
Crochet hook: 3.5 mm
-
Tapestry needle
-
Stitch marker
-
Polyfill stuffing
-
Plastic canvas/cardboard for flat base shaping
-
Optional: pipe cleaners or felt backing for added stiffness
-
Optional: black thread for window detailing
🧵 Abbreviations (US Terms)
MR – Magic Ring
sc – Single Crochet
inc – Increase
dec – Decrease
ch – Chain
sl st – Slip Stitch
FO – Fasten Off
BLO – Back Loop Only
🚜 Tractor Body
With blue yarn:
-
MR, 6 sc
-
inc x6 (12)
-
(1 sc, inc) x6 (18)
-
(2 sc, inc) x6 (24)
5–8. sc around (24) -
ch 6, turn to begin rectangular shaping
10–24. Work in rows to create a box shape (approx. 6 rows tall and 8–10 rows long)
Stuff and shape into a firm block
🚘 Cab Top
With blue yarn:
-
ch 10, sc across
2–6. sc across (form a rectangular box top)
Switch to grey yarn for windows:
7–9. sc around with grey
Stuff and attach to top front of tractor body
🪟 Windows & Details
With grey yarn:
-
ch 7, sc in rows (approx. 4 rows)
-
Sew to sides of cab
-
Embroider or surface crochet black outlines for window panes
-
For grille: ch 5, sc 3 rows in grey, sew to front of body
-
For exhaust pipe: ch 8, roll into tube, sew to top right front
🔘 Headlights (Make 4)
With white yarn:
-
MR, 6 sc
-
sl st and FO
Attach two to front and two on side near hood
🛞 Front Tires (Make 2)
With black yarn:
-
MR, 6 sc
-
inc x6 (12)
-
(1 sc, inc) x6 (18)
Switch to red: -
sc BLO (18)
-
sc 2 rounds
Stuff lightly
Sew under front corners
🛞 Rear Tires (Make 2)
With black yarn:
-
MR, 6 sc
-
inc x6 (12)
-
(1 sc, inc) x6 (18)
-
(2 sc, inc) x6 (24)
Switch to red: -
sc BLO (24)
6–7. sc around
Stuff and attach to rear sides
🛻 Trailer Bed
With red yarn:
-
ch 18
-
sc back and forth for 8 rows
Switch to blue: -
sc around outer edge
-
ch 6, sc back for each railing post
Attach 6–8 vertical rails evenly
Stuff trailer base with cardboard/plastic canvas to stiffen
🪵 Logs (Make 5–6)
With beige or brown yarn:
-
MR, 6 sc
-
inc x6 (12)
3–10. sc around
Stuff lightly
Sew or place neatly on trailer bed
🛞 Trailer Tires (Make 2)
Same as front tires
Attach under rear of trailer
🔗 Trailer Hitch
With blue yarn:
-
ch 8, roll into a tube
-
Attach end of tube to rear of tractor and front of trailer
-
Use small hook or loop for functional hitching/unhitching
💡 Customization Ideas
-
Embroider a farm logo or license plate on the side
-
Use wood-look yarn or felt for more realistic logs
-
Make a detachable trailer gate
This cheerful amigurumi tractor trailer is ready to roll! Whether you’re crafting for a child, decorating a country-themed room, or just love vehicles, this is a fun and fulfilling project. 🚜🧵🌾