Oh, the joy of diving into the world of amigurumi! 🌟 If you haven’t heard of it yet, amigurumi is the delightful Japanese art of knitting or crocheting small stuffed creatures. It’s like bringing imagination to life with just a hook and some yarn! One of the most thrilling projects that I’ve embarked on lately is making a Darth Vader amigurumi. Yes, you heard that right! The ultimate Star Wars villain just got a whole lot cuddlier. Crafting this iconic character lets me blend my love for the epic saga with my passion for creating handmade treasures.
Creating a Darth Vader amigurumi involves an exciting blend of creativity and precision. I start by gathering my materials: black and gray yarn, a crochet hook, some stuffing, and those all-important safety eyes to give him that intense gaze. The process begins with crocheting his head and body, then moving on to his cape and helmet, each stitch adding to his imposing stature. The most fun part? Adding those tiny details that make him unmistakably Vader, like his iconic chest panel and flowing cape. Not only do I end up with a fantastic collectible, but the joy of making it is a craft lover’s dream come true! 🎨✨
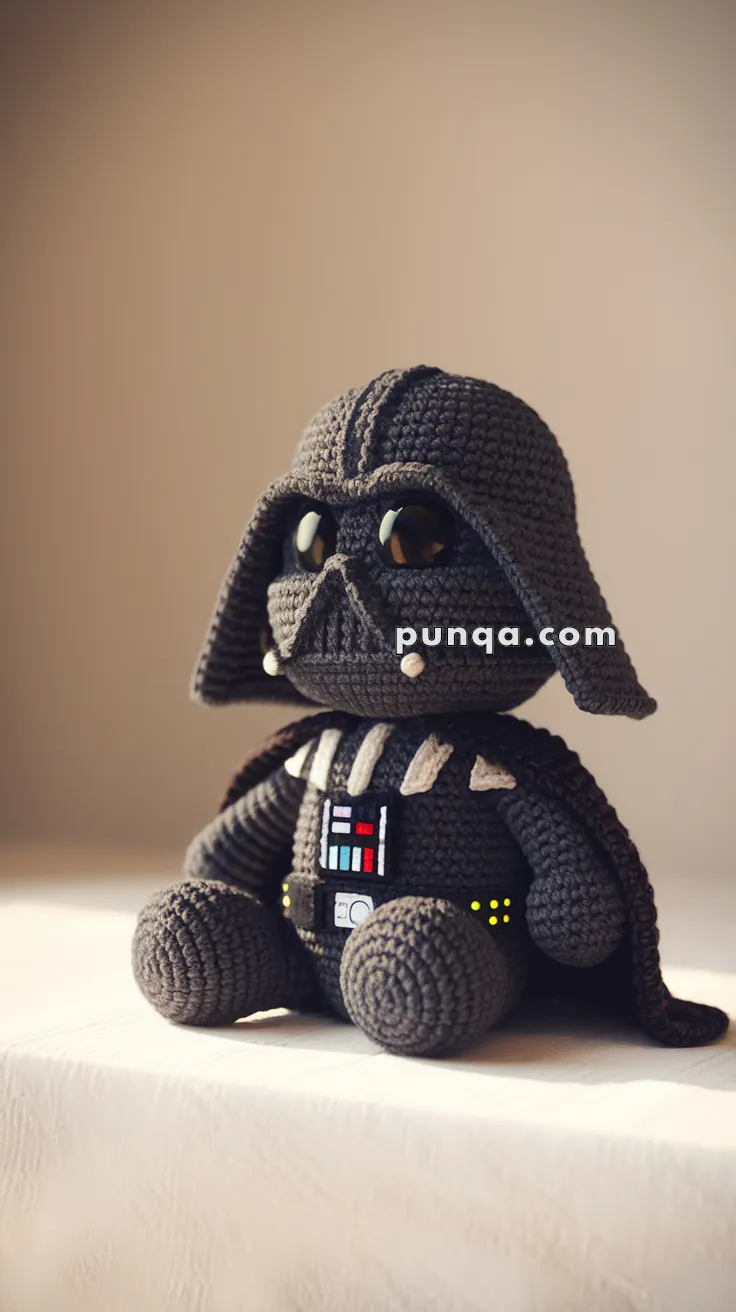
Amigurumi Darth Vader Pattern
Skill Level: Intermediate
Finished Size: Approximately 7 inches tall
Materials
– Black worsted weight yarn
– Grey worsted weight yarn
– Small amounts of red, blue, and white yarn (for chest details)
– Size C (2.75 mm) crochet hook
– 12 mm black safety eyes
– Fiberfill stuffing
– Tapestry needle
– Stitch marker
Abbreviations (US Terminology)
– ch: chain
– sc: single crochet
– inc: increase (2 sc in one stitch)
– dec: decrease (sc two stitches together)
– sl st: slip stitch
– st(s): stitch(es)
– FO: finish off
Pattern Instructions
Head
1. With black yarn, make a magic ring, 6 sc in the ring. (6 sts)
2. Inc in each st around. (12 sts)
3. *Sc in next st, inc in next st* around. (18 sts)
4. *Sc in next 2 sts, inc in next st* around. (24 sts)
5. *Sc in next 3 sts, inc in next st* around. (30 sts)
6. *Sc in next 4 sts, inc in next st* around. (36 sts)
7-12. Sc in each st around. (36 sts)
13. *Sc in next 4 sts, dec* around. (30 sts)
14. *Sc in next 3 sts, dec* around. (24 sts)
15. *Sc in next 2 sts, dec* around. (18 sts)
16. *Sc in next st, dec* around. (12 sts)
– Insert safety eyes between Rounds 10 and 11, about 8 sts apart.
– Stuff the head firmly.
Body
1. With black yarn, make a magic ring, 6 sc in the ring. (6 sts)
2. Inc in each st around. (12 sts)
3. *Sc in next st, inc in next st* around. (18 sts)
4. *Sc in next 2 sts, inc in next st* around. (24 sts)
5-10. Sc in each st around. (24 sts)
11. *Sc in next 2 sts, dec* around. (18 sts)
12-13. Sc in each st around. (18 sts)
– Stuff the body firmly.
Arms (make 2)
1. With black yarn, make a magic ring, 6 sc in the ring. (6 sts)
2. Sc in each st around. (6 sts)
3-10. Repeat Round 2. (6 sts)
– Stuff lightly and FO.
Legs (make 2)
1. With black yarn, make a magic ring, 6 sc in the ring. (6 sts)
2. Inc in each st around. (12 sts)
3-5. Sc in each st around. (12 sts)
– Stuff firmly and FO.
Helmet
1. With black yarn, make a magic ring, 6 sc in the ring. (6 sts)
2. Inc in each st around. (12 sts)
3. *Sc in next st, inc in next st* around. (18 sts)
4. *Sc in next 2 sts, inc in next st* around. (24 sts)
5. *Sc in next 3 sts, inc in next st* around. (30 sts)
6-8. Sc in each st around. (30 sts)
9. *Sc in next 3 sts, dec* around. (24 sts)
10. *Sc in next 2 sts, dec* around. (18 sts)
11. *Sc in next st, dec* around. (12 sts)
– FO, leaving a long tail for sewing.
Cape
1. With black yarn, ch 21.
2. Sc in 2nd ch from hook and across. (20 sts)
3-8. Ch 1, turn, sc in each st across. (20 sts)
– FO and weave in ends.
Assembly
1. Sew the head to the body.
2. Attach the arms to the sides of the body.
3. Sew the legs to the bottom of the body.
4. Position the helmet over the head and sew in place.
5. Attach the cape to the back of the body at the neck.
Finishing Touches
– Embroider details on the chest with red, blue, and white yarn.
– Ensure the figure is well stuffed and all parts are securely attached.
Tips:
– Use a stitch marker to keep track of rounds! 🧶
– May the force of creativity be with you! 🌌✨
Enjoy crafting your tiny galactic villain!
🎉 Your handmade crochet creation for Amigurumi Darth Vader Pattern is complete! Enjoy your one-of-a-kind amigurumi masterpiece and experiment with various yarn colors for a personal touch! 🧶✨