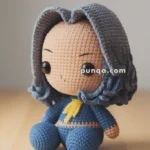
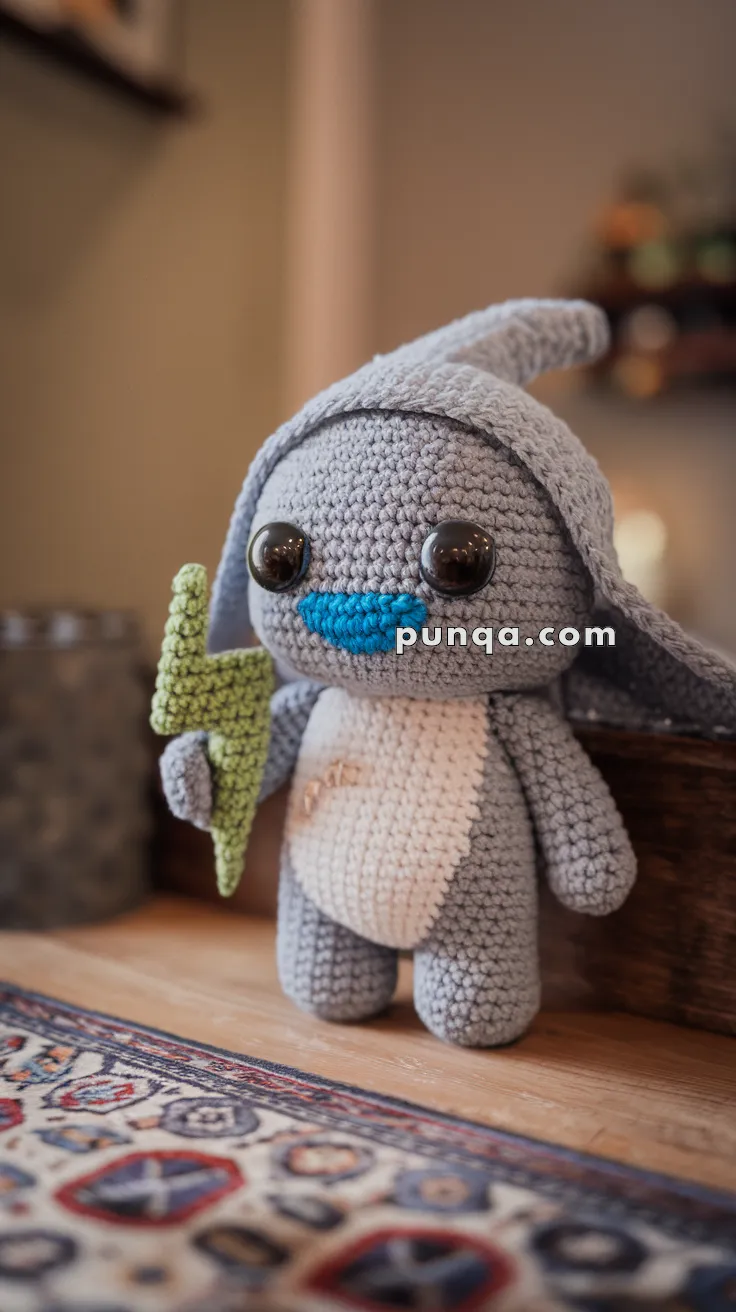
Brace yourself for a burst of handmade magic with the Amigurumi Storm, an irresistibly cute weather wizard who’s ready to zap your heart with charm! ⚡🧶 With floppy ears, a bright blue smile, and a bold lightning bolt in hand, Storm brings a playful twist to stormy skies. Whether you’re crafting for a fantasy fan, a weather enthusiast, or just love whimsical characters, this little conjurer is sure to brighten even the cloudiest day.
Perfect for crocheters who enjoy expressive designs and imaginative themes, this pattern invites you to play with vibrant yarns, textured stitches, and tiny details like swirling clouds or sparkly raindrops. Make Storm the star of your magical lineup or pair him with other elemental friends for a full crochet forecast! The Amigurumi Storm is a joyful way to stitch up wonder, whimsy, and a whole lot of handmade electricity—one loop at a time! 🌩️🧵
⚡ Storm Amigurumi Crochet Pattern
Meet Storm, the whimsical little weather buddy with floppy ears, a bright blue smile, and a lightning bolt in hand! This adorable crochet figure is perfect for intermediate crocheters who enjoy shaping, color changes, and fun accessories. With his big glossy eyes and cheerful charm, Storm is guaranteed to light up your handmade collection.
🧶 Skill Level
Intermediate – Involves shaping, sewing multiple parts, working a flat/3D lightning bolt, and floppy ear placement.
📏 Finished Size
Approximately 22 cm (8.5 inches) tall when made with worsted weight yarn and a 3.5 mm hook.
✂️ Materials Needed
- Worsted weight yarn:
- Light gray (head, body, arms, legs, ears)
- White (belly patch)
- Bright blue (mouth)
- Lime green (lightning bolt)
- 3.5 mm crochet hook
- 12 mm black safety eyes (shiny finish)
- Polyester fiberfill
- Yarn needle
- Stitch marker
- Scissors
🧵 Abbreviations (US Terms)
MR – Magic Ring
sc – Single Crochet
inc – Increase (2 sc in same st)
dec – Decrease (sc 2 together)
sl st – Slip Stitch
ch – Chain
st(s) – Stitch(es)
FO – Fasten Off
🌀 Pattern Instructions
Head (Light Gray)
- MR, 6 sc (6)
- R2: inc x6 (12)
- R3: (sc, inc) x6 (18)
- R4: (2 sc, inc) x6 (24)
- R5: (3 sc, inc) x6 (30)
- R6: (4 sc, inc) x6 (36)
- R7–14: sc around (36)
- R15: (4 sc, dec) x6 (30)
- R16: (3 sc, dec) x6 (24)
- R17: (2 sc, dec) x6 (18)
- R18: (sc, dec) x6 (12)
- R19: dec x6 (6), FO.
- Stuff firmly.
👀 Place 12 mm safety eyes between Rnds 8–9, approx. 8 sts apart.
Mouth (Bright Blue)
- MR, 6 sc (6)
- R2: inc x6 (12)
- R3–4: sc around (12)
- FO, shape into an oval. Sew centered below the eyes.
Belly Patch (White)
- MR, 6 sc (6)
- R2: inc x6 (12)
- R3: (sc, inc) x6 (18)
- R4: (2 sc, inc) x6 (24)
- R5: (3 sc, inc) x6 (30)
- R6: sc around (30)
- FO, flatten slightly. Sew onto front of body.
Body (Light Gray)
- MR, 6 sc (6)
- R2: inc x6 (12)
- R3: (sc, inc) x6 (18)
- R4: (2 sc, inc) x6 (24)
- R5: (3 sc, inc) x6 (30)
- R6: (4 sc, inc) x6 (36)
- R7–15: sc around (36)
- R16: (4 sc, dec) x6 (30)
- R17: (3 sc, dec) x6 (24)
- R18: (2 sc, dec) x6 (18)
- R19: (sc, dec) x6 (12)
- R20: dec x6 (6), FO.
- Stuff firmly.
Arms (Make 2 – Light Gray)
- MR, 6 sc (6)
- R2: inc x6 (12)
- R3–10: sc around (12)
- FO, lightly stuff. Sew to sides of body.
Legs (Make 2 – Light Gray)
- MR, 6 sc (6)
- R2: inc x6 (12)
- R3: (sc, inc) x6 (18)
- R4–8: sc around (18)
- FO, stuff and sew to bottom of body.
Floppy Ears (Make 2 – Light Gray)
- MR, 6 sc (6)
- R2: inc x6 (12)
- R3–5: sc around (12)
- R6: (2 sc, dec) x3 (9)
- R7–18: sc around (9) → long, narrow tube
- FO. Add a tiny bit of stuffing only at base.
- Sew to head so they flop backwards.
Lightning Bolt (Lime Green – Make 2, Sew Together)
- Ch 8
- R1: sc in 2nd ch, sc across (7)
- R2: ch 1, turn, sc 5, leave last 2 sts unworked
- R3: ch 3, sl st in 2nd ch, sc 1, rejoin → first “zig”
- R4: ch 4, sl st in 2nd ch, sc 2, join at base → second “zag”
- FO. Repeat for second piece.
- Place both together, whipstitch around edges. Lightly stuff if desired.
- Sew into Storm’s right hand.
🧷 Assembly
- Sew head to body.
- Attach arms just under the head.
- Sew legs to bottom for balance.
- Attach floppy ears to top sides of head.
- Stitch belly patch to body front.
- Sew mouth firmly under eyes.
- Place lightning bolt into one hand.
🌟 Final Thoughts
And there you have it — Storm, the little lightning-wielding cutie ready to brighten up your collection! His oversized eyes, floppy ears, and signature blue smile make him irresistible. The lightning bolt accessory adds that spark of personality that sets him apart from standard amigurumi dolls.
This project is perfect for gifting to a storm lover, a kid who adores quirky plushies, or simply as a cheerful display piece in your handmade lineup. ⚡✨