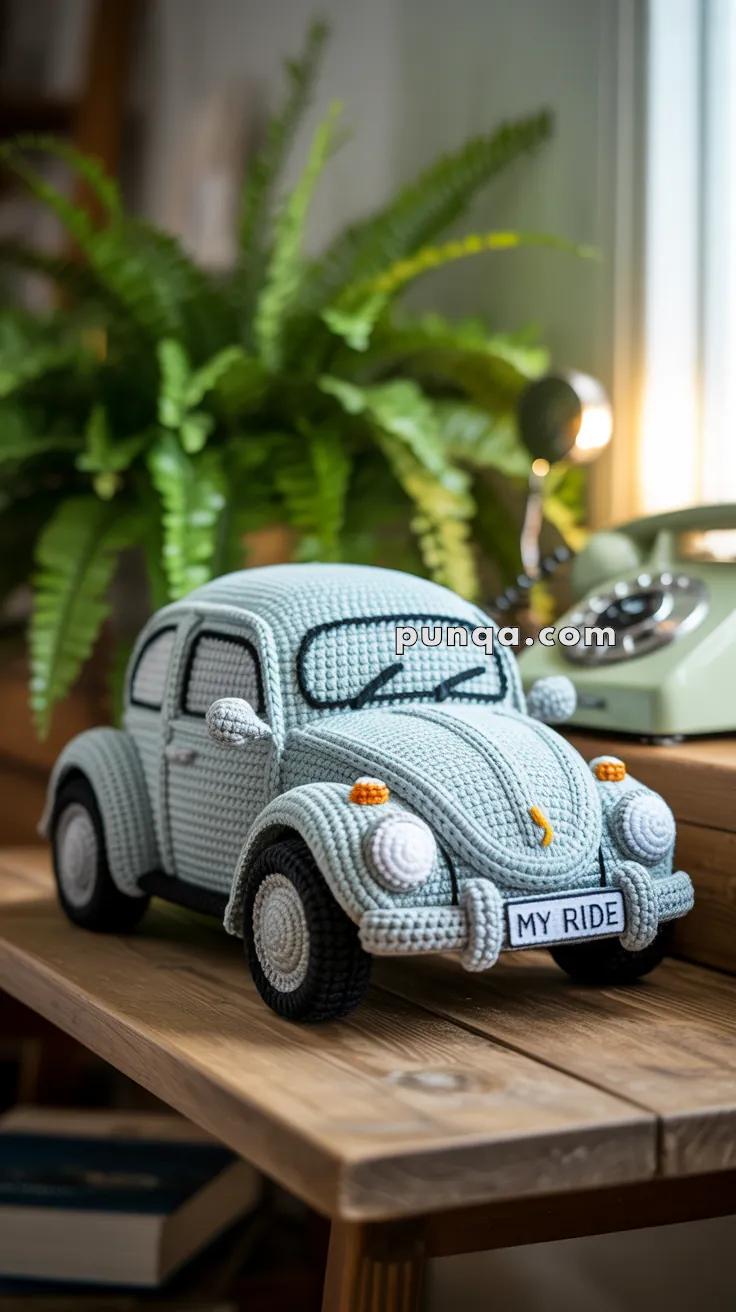
Cruise into the world of crochet with this Amigurumi VW Beetle pattern! Inspired by the iconic vintage car, this adorable design captures the rounded shape, charming headlights, and classic details in every stitch. Whether you’re crafting for car enthusiasts, adding a nostalgic touch to your collection, or simply enjoy making unique amigurumi designs, this pattern lets you stitch up a miniature VW Beetle bursting with personality! Perfect for brightening up any space, this crochet creation brings a touch of handmade retro charm to your collection. 🚗✨
Designed for customization, this pattern allows you to experiment with different colors, embroidered details, or even tiny accessories like a miniature license plate or surfboard for extra flair. Craft a classic VW Beetle with its signature look, create a playful version with pastel hues, or even stitch up a full set of vehicle-inspired amigurumi for a delightful display! Whether gifted as a quirky keepsake, displayed as a charming accent, or made simply for the joy of crafting, this Amigurumi VW Beetle is a fun and creative project—perfect for bringing a touch of handmade automotive magic to every stitch! 🧶💖✨
🚗 Amigurumi VW Beetle Crochet Pattern
Bring vintage charm to your crochet collection with this adorable retro beetle car amigurumi! ✨
Inspired by classic curved automobiles, this cozy handmade design captures the instantly recognizable rounded silhouette with sculpted fenders, raised hood lines, oversized headlights, and sweet nostalgic details that make the finished piece feel full of personality.
✨ Skill Level
Advanced
Techniques included:
- Sculptural shaping
- Surface crochet detailing
- Structured assembly
- Continuous-round construction
- Dimensional fender shaping
- Symmetry-sensitive placement
📏 Finished Size
Approximately:
- 9–10 inches (23–25 cm) long
- 5.5–6 inches (14–15 cm) tall
- 4.5–5 inches (11–12 cm) wide
Using DK yarn and a 3–3.5 mm crochet hook.
🧶 Materials
Yarn Colors
- Pale mint blue
- Black
- Medium grey
- Very pale grey
- White
- Orange
- Yellow
Supplies
- 3–3.5 mm crochet hook
- Polyester stuffing
- Plastic canvas or thick felt insert
- Yarn needle
- Stitch markers
🧵 Yarn Amounts
- Pale mint blue: 180–200 g
- Black: 75–90 g
- Grey: 35–45 g
- Pale grey: 25–30 g
- White: 25–30 g
- Orange: scrap amount
- Yellow: scrap amount
🔤 Abbreviations (US Terms)
- MR – Magic Ring
- sc – Single Crochet
- inc – Increase
- dec – Invisible Decrease
- sl st – Slip Stitch
- ch – Chain
- BLO – Back Loop Only
- FO – Fasten Off
Work in continuous rounds unless noted.
🚘 Main Car Body
The body is built with separate shaping zones:
- Flat base
- Sloped hood
- Raised cabin roof
- Rounded rear engine section
This creates the realistic beetle silhouette.
Using pale mint blue yarn.
🧱 Flat Base
Round 1
Ch 19.
Starting in second chain from hook:
17 sc, 3 sc in last chain.
Working opposite side:
16 sc, inc (38)
Round 2
inc, 16 sc, 3 inc, 16 sc, 2 inc (44)
Round 3
1 sc, inc, 16 sc, (1 sc, inc) ×3, 16 sc, (1 sc, inc) ×2 (50)
Round 4
2 sc, inc around curved ends evenly (56)
Round 5
3 sc, inc around curved ends evenly (62)
Round 6
4 sc, inc around curved ends evenly (68)
Round 7
5 sc, inc around curved ends evenly (74)
Round 8
6 sc, inc around curved ends evenly (80)
Insert plastic canvas or stiff felt reinforcement now.
The underside should remain mostly flat.
🚗 Lower Side Walls
Rounds 9–13
sc around (80)
These rounds create the lower body walls.
Keep stuffing mainly along outer edges.
Do not overstuff center.
🚘 Front Hood Shaping
This section creates the iconic beetle hood slope.
Round 14
22 sc, dec ×4, 22 sc, dec ×4 (72)
Round 15
sc around (72)
Round 16
18 sc, dec ×4, 18 sc, dec ×4 (64)
Round 17
sc around (64)
Round 18
16 sc, dec ×4, 16 sc, dec ×4 (56)
The front should now taper downward noticeably.
Shape hood downward with fingers while stuffing.
The hood must sit lower than the roof.
🚙 Roof Dome
The roof rises prominently above the hood.
Round 19
10 sc, inc ×6, 22 sc, inc ×6, 10 sc (68)
Rounds 20–24
sc around (68)
The roof should become tall and rounded.
Avoid flattening this section.
🚗 Rear Curve
The rear section curves downward more softly than the hood.
Round 25
(15 sc, dec) ×4 (64)
Round 26
sc around (64)
Round 27
(14 sc, dec) ×4 (60)
Round 28
(13 sc, dec) ×4 (56)
Round 29
(12 sc, dec) ×4 (52)
Round 30
(11 sc, dec) ×4 (48)
Stuff firmly and evenly.
The rear should remain rounded rather than sharply angled.
🚘 Bottom Closing
Round 31
(6 sc, dec) ×6 (42)
Round 32
(5 sc, dec) ×6 (36)
Round 33
(4 sc, dec) ×6 (30)
Round 34
(3 sc, dec) ×6 (24)
Round 35
(2 sc, dec) ×6 (18)
Round 36
(1 sc, dec) ×6 (12)
Round 37
dec around (6)
FO and close.
Flatten underside gently.
🛞 Wheels (Make 4)
The tires are thick and rounded with protruding white hub areas.
Tire Section
Using black yarn.
Round 1
6 sc in MR
Round 2
inc around (12)
Round 3
(1 sc, inc) ×6 (18)
Round 4
(2 sc, inc) ×6 (24)
Round 5
(3 sc, inc) ×6 (30)
Round 6
(4 sc, inc) ×6 (36)
Rounds 7–10
sc around (36)
Round 11
(4 sc, dec) ×6 (30)
Stuff lightly.
FO.
⚪ White Wheel Centers (Make 4)
Using white yarn.
Work flat circle to 24 stitches.
Sew onto tire fronts.
🔘 Grey Hubcaps (Make 4)
Using grey yarn.
Work flat circle to 18 stitches.
Sew centered onto white wheel sections.
🚗 Curved Fenders (Make 4)
The fenders should protrude noticeably outward.
Using pale mint blue yarn.
Ch 24.
Row 1
sc across (23)
Rows 2–4
sc across
Row 5
dec, sc 19, dec (21)
Row 6
dec, sc 17, dec (19)
Row 7
dec, sc 15, dec (17)
Curve pieces into arches.
Sew tightly above wheels.
💡 Headlights (Make 2)
The headlights are large rounded domes.
Using white yarn.
Round 1
6 sc in MR
Round 2
inc around (12)
Round 3
(1 sc, inc) ×6 (18)
Round 4
(2 sc, inc) ×6 (24)
Round 5
(3 sc, inc) ×6 (30)
Round 6
sc around (30)
Stuff lightly.
FO.
Attach prominently on front fenders.
🟠 Turn Signals (Make 2)
Using orange yarn.
Round 1
6 sc in MR
Round 2
sc around
FO.
Attach above headlights near top of fenders.
🪞 Side Mirrors (Make 2)
Mirror Face
Using grey yarn.
Round 1
6 sc in MR
Round 2
inc around (12)
Flatten lightly.
Mirror Stem
Ch 6.
sc back along chain.
Attach beside windshield corners.
🧱 Tube Bumpers
Using grey yarn.
Front Bumper
Ch 46 and join.
Rounds 1–4
sc around
Stuff lightly.
Add two short vertical bumper posts.
Attach low on front.
Rear Bumper
Ch 42 and join.
Rounds 1–4
sc around
Stuff lightly.
Attach low on rear.
🪟 Windows
Using very pale grey yarn.
Windshield
Ch 28.
Rows 1–10
sc across
Curve upper corners slightly during sewing.
Side Windows (Make 4)
Ch 14.
Rows 1–7
sc across
Rear Window
Ch 20.
Rows 1–8
sc across
🖤 Window Trim
Using black yarn:
Surface sl st around:
- Windshield
- Side windows
- Rear window
Add window divider lines.
🖤 Windshield Wipers
Using black yarn:
Embroider two angled windshield wipers from lower center outward.
🧵 Hood Ridges
Using pale mint blue yarn:
Surface sl st two raised curved lines beginning near windshield and extending downward toward hood emblem area.
The ridges should follow the hood curve.
🟡 Hood Emblem
Embroider tiny yellow curved emblem centered near front hood.
🖤 Underbody Strip
Using black yarn:
Surface sl st along lower side edges beneath doors.
🏷 Front License Plate
Using white yarn.
Ch 15.
Rows 1–4
sc across
Embroider:
MY RIDE
Attach centered between front bumper posts.
🪡 Assembly
🪡 Attach wheels beneath fenders
🪡 Sew fenders tightly over wheel arches
🪡 Add headlights and turn signals
🪡 Attach bumpers and bumper posts
🪡 Add windows and black trim
🪡 Sew mirrors beside windshield
🪡 Add windshield wipers
🪡 Surface crochet hood ridges
🪡 Add hood emblem and license plate
✨ Shaping Tips
✨ Keep hood lower than roof
✨ Shape roof into rounded dome
✨ Avoid making front fully spherical
✨ Push fenders outward while sewing
✨ Curve rear downward softly
✨ Keep wheel placement symmetrical
🌿 Finishing Touches
✨ Steam lightly if needed
✨ Shape hood and roof separately by hand
✨ Adjust wheel positioning before final stitching
✨ Smooth bumper tubes evenly
✨ Reinforce underside if displaying on shelf
Your vintage crochet beetle car is now complete! 🚗✨
With its iconic curved body, sculpted hood, rounded fenders, oversized headlights, and nostalgic retro styling, this charming handmade vehicle becomes a beautiful keepsake full of warmth and personality.
The carefully shaped silhouette gives the car its unmistakable classic appearance, while the soft crochet texture adds a cozy handcrafted feel that makes it perfect for display on shelves, desks, nurseries, craft rooms, or gift tables.
Whether you make it as a collectible decoration, a heartfelt handmade gift, or part of a larger crochet vehicle collection, this timeless little beetle is sure to bring smiles and vintage charm wherever it goes. 💛