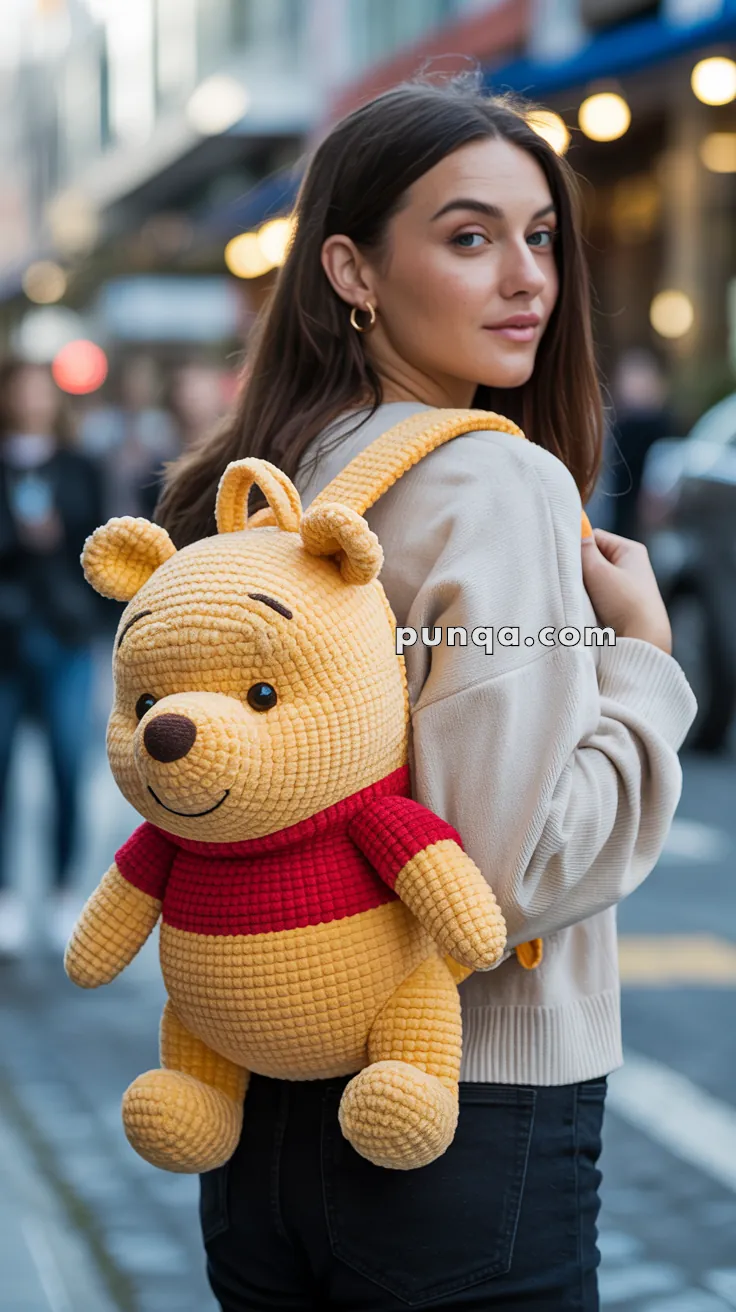
Carry a touch of childhood nostalgia wherever you go with this Amigurumi Winnie the Pooh Backpack crochet pattern! Inspired by the lovable bear from the Hundred Acre Wood, this charming backpack captures Pooh’s signature round shape, cheerful expression, and cozy warmth in every stitch. With its soft golden hues, adorable ears, and playful details, this crochet backpack is perfect for adding a whimsical touch to your accessories. Whether you’re crafting for Disney fans, creating a fun and functional bag, or simply enjoy making character-inspired amigurumi designs, this pattern lets you stitch up a delightful Winnie the Pooh backpack bursting with personality! 🍯🐻✨
Designed for customization, this pattern allows you to experiment with different shades of yellow and red, embroidered details, or even tiny accessories like a miniature honey pot or bee for extra charm. Craft a classic Pooh backpack with his signature look, create a pastel version for a dreamy aesthetic, or even stitch up a full set of Disney-inspired amigurumi bags for a magical collection! Whether gifted as a cherished keepsake, displayed as a playful accent, or made simply for the joy of crafting, this Amigurumi Winnie the Pooh Backpack is a fun and creative project—perfect for bringing a touch of handmade enchantment to every stitch! 🧶💖

🎒 Amigurumi Winnie the Pooh Backpack Crochet Pattern
Carry your essentials with a hug! This adorable Winnie the Pooh backpack is not just an accessory, it’s a huggable friend! Featuring detailed ears, plump limbs, a red shirt, and secure backpack straps, this pattern is designed for real-life use with functional space and a secure closure. Perfect for kids or grown-up fans of this lovable bear! 🧸🍯
✨ Skill Level
Intermediate – Includes color changes, 3D shaping, attachment of limbs and functional bag structure.
📏 Finished Size
Approx. 14–16 inches (35–40 cm) tall — real backpack size.
🧶 Materials
Yarn (Super Bulky or Chenille-style recommended for plush effect):
- Color A: Golden Yellow (Main body)
- Color B: Deep Red (Shirt)
- Color C: Brown (Eyebrows, nose)
- Crochet hook: 4.5–6 mm (match to yarn weight)
- Tapestry needle
- Safety eyes (18–20 mm black or brown)
- Zipper (25–30 cm, matching color) or magnetic button for closure
- Lining fabric (optional)
- Polyfill stuffing
- Backpack strap adjusters (optional, for adjustable straps)
🧵 Abbreviations (US Terms)
MR – Magic Ring
sc – Single Crochet
inc – Increase
dec – Decrease
sl st – Slip Stitch
ch – Chain
FO – Fasten Off
BLO – Back Loops Only
🐻 Head & Backpack Body (Main Compartment – Color A & B)
Start with Color A (Golden Yellow)
Round 1: MR, 6 sc (6)
Round 2: inc x6 (12)
Round 3: (1 sc, inc) x6 (18)
Round 4: (2 sc, inc) x6 (24)
Round 5: (3 sc, inc) x6 (30)
Round 6: (4 sc, inc) x6 (36)
Round 7: (5 sc, inc) x6 (42)
Round 8–24: sc around (42)
Color Change to Color B (Red Shirt):
Use the yarn-over color change method to switch cleanly.
Round 25–32: sc around (42)
Round 33: (5 sc, dec) x6 (36)
Round 34: (4 sc, dec) x6 (30)
Round 35: (3 sc, dec) x6 (24)
Stuff bottom half firmly.
Round 36: (2 sc, dec) x6 (18)
Round 37: sc around (18)
Round 38: (1 sc, dec) x6 (12)
Do not close! This remains open for the zipper or closure.
🧵 Backpack Opening & Closure
- Using slip stitch, crochet an edge around the open hole with Color B for neatness.
- Sew a zipper around the opening edge using thread and a needle.
- Alternatively, create a flap:
Ch 20, turn, 18 sc across for 4–5 rows. Attach one side to the top and add a magnetic button.
- Alternatively, create a flap:
👂 Ears (Make 2 – Color A)
MR, 6 sc
Round 2: (1 sc, inc) x3 (9)
Round 3: sc around (9)
FO, flatten and sew to sides of head between Rounds 6–8.
👃 Nose & Face Details
Nose (Color C):
MR, 6 sc
Round 2: inc x6 (12)
Round 3–4: sc around (12)
FO, stuff lightly, sew centered below eyes.
Eyebrows (Color C):
Embroider thin lines above eyes using whip stitch.
Eyes:
Attach safety eyes approx. 5–6 rows below the top, 10 sts apart.
🦵 Arms (Make 2 – Color A)
MR, 6 sc
Round 2: (1 sc, inc) x3 (9)
Round 3–8: sc around (9)
Stuff lightly. FO and sew at sides, aligned with red shirt area.
🦵 Legs (Make 2 – Color A)
MR, 6 sc
Round 2: (1 sc, inc) x3 (9)
Round 3–5: sc around (9)
Stuff firmly. Sew to the bottom corners for a sitting posture.
🎒 Backpack Straps (Make 2 – Color A)
Ch 55–65 (adjust to wearer’s height)
Row 1: sc in 2nd ch from hook and across
Row 2: sc across
FO.
Sew top ends to the top of the backpack.
Bottom ends should be sewn to the lower sides of the red shirt area.
Optional: Thread through backpack strap adjusters for a clean, functional look.
🧵 Optional Lining
Cut fabric in a slightly smaller oval than the interior. Sew inside for added structure.
✂️ Finishing Touches
- Shape and sew all limbs and features securely.
- Weave in all ends.
- Test zipper or closure for smooth use.
- Optional: Add inner pocket for keys or coins.
💡 Customization Ideas
- Use Velcro strips for easier child-friendly closure
- Embroider the name on the back or shirt
- Turn it into a crossbody by modifying the straps
- Add honey pot charm zipper pull 🍯
This Winnie the Pooh backpack is a perfect mix of practicality and charm — a cuddly companion that holds your treasures while keeping smiles around all day long! 🧸🎒


