Drift into a fairytale with the Amigurumi Sleeping Beauty Doll, a dreamy crochet project that brings storybook magic to life! 👑🧶 With her flowing hair, elegant gown, and peaceful expression, this princess is ready to charm hearts and inspire imaginative play. Whether you’re crafting for a little royal, decorating a nursery, or adding to your fairytale collection, Sleeping Beauty is sure to become a treasured handmade keepsake.
Perfect for crocheters who love delicate details and enchanting themes, this pattern invites you to explore soft textures, graceful shaping, and a sprinkle of royal flair. Customize her dress with glittery yarn, add a tiny crown, or pair her with other storybook characters for a full enchanted ensemble. The Amigurumi Sleeping Beauty Doll is a magical way to stitch up sweetness, serenity, and a happily-ever-after—one loop at a time! 🧵✨
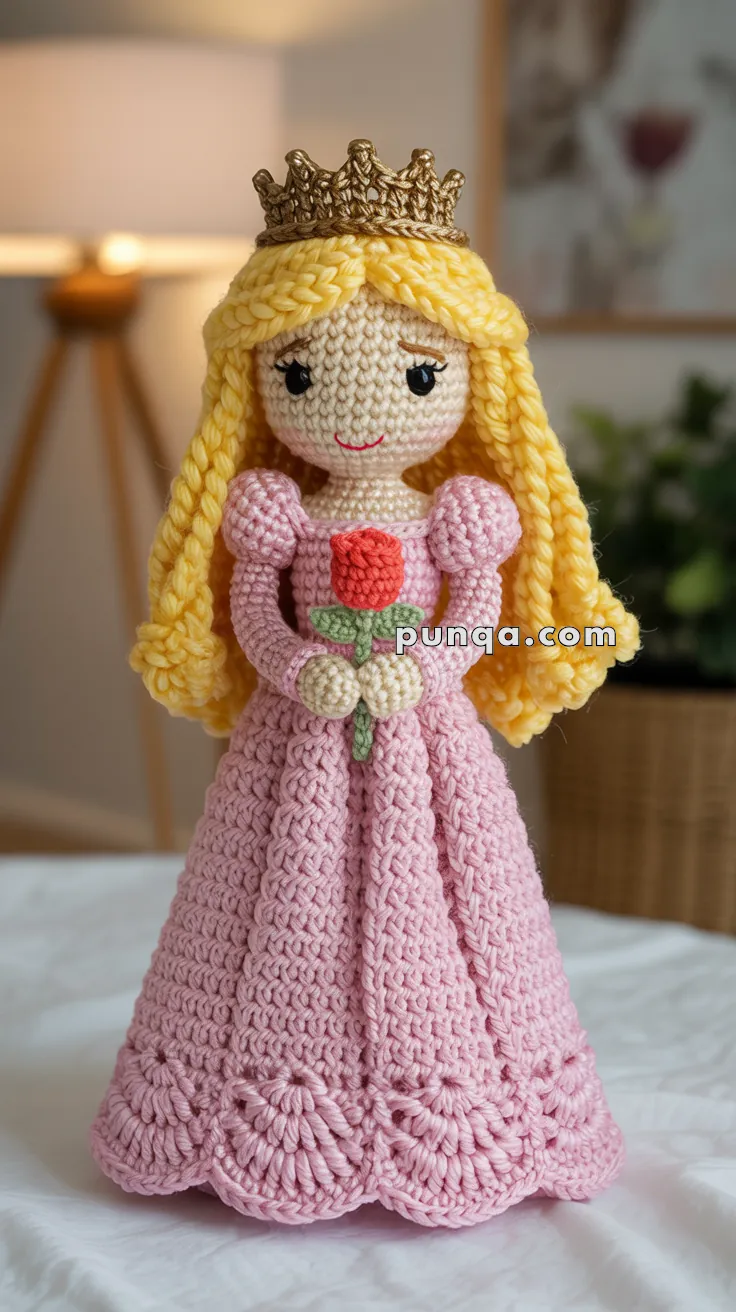
👑 Amigurumi Princess with Rose Crochet Pattern
Every fairy tale deserves a princess, and this crochet pattern brings her to life in all her glory. With flowing golden hair, a puff-sleeved pink gown, a golden crown, and a delicate rose in her hands, this amigurumi doll is perfect for gifting, décor, or storytelling playtime. ✨🌹
✨ Skill Level
Intermediate – shaping, puff sleeves, textured skirt, embroidery, and accessories.
📏 Finished Size
Approx. 25–30 cm (10–12 inches) tall
(using DK yarn and a 2.5–3.0 mm hook)
🧶 Materials
Yarn (DK or light worsted):
- Skin tone – head, torso, hands
- Pink – dress and puff sleeves
- Yellow – hair
- Green – rose stem & leaves
- Red – rose flower
- Gold / metallic – crown
- Black – eyelashes and smile
Notions:
- 2.5–3.0 mm crochet hook
- 10–12 mm safety eyes
- Polyester fiberfill
- Tapestry needle
- Stitch marker
- Scissors
🧵 Abbreviations (US Terms)
MR – Magic Ring
sc – Single Crochet
inc – Increase (2 sc in one stitch)
dec – Decrease (sc2tog)
ch – Chain
sl st – Slip Stitch
dc – Double Crochet
hdc – Half Double Crochet
FO – Fasten Off
Work in continuous rounds unless stated otherwise. Stuff firmly but smoothly.
🧑 Head (Skin Tone)
Rnd 1: MR 6 (6)
Rnd 2: inc ×6 (12)
Rnd 3: (sc, inc) ×6 (18)
Rnd 4: (2 sc, inc) ×6 (24)
Rnd 5: (3 sc, inc) ×6 (30)
Rnd 6: (4 sc, inc) ×6 (36)
Rnd 7–14: sc 36
Insert safety eyes between Rnds 9–10, about 7–8 sts apart.
Embroider:
- curved lashes above eyes
- small curved smile
Rnd 15: (4 sc, dec) ×6 (30)
Rnd 16: (3 sc, dec) ×6 (24)
Rnd 17: (2 sc, dec) ×6 (18)
Stuff firmly
Rnd 18: (sc, dec) ×6 (12)
Rnd 19: dec ×6 (6)
FO and close.
👗 Upper Body (Torso & Neck – Skin Tone)
This creates the doll body under the dress.
Rnd 1: MR 6 (6)
Rnd 2: inc ×6 (12)
Rnd 3: (sc, inc) ×6 (18)
Rnd 4: (2 sc, inc) ×6 (24)
Rnd 5–8: sc 24
Rnd 9: (3 sc, dec) ×6 (18)
Rnd 10–12: sc 18
Stuff firmly
FO, leaving long tail.
Sew head onto torso.
💕 Puff Sleeves (Make 2 – Pink)
Rnd 1: MR 6 (6)
Rnd 2: inc ×6 (12)
Rnd 3: (sc, inc) ×6 (18)
Rnd 4: (2 sc, inc) ×6 (24)
Rnd 5–6: sc 24
Rnd 7: (2 sc, dec) ×6 (18)
Rnd 8: (sc, dec) ×6 (12)
FO, stuff lightly, flatten slightly and sew to shoulders.
✋ Arms & Hands (Make 2 – Skin Tone)
Rnd 1: MR 6 (6)
Rnd 2: inc ×6 (12)
Rnd 3–5: sc 12
Rnd 6: (2 sc, dec) ×3 (9)
Rnd 7–14: sc 9
Stuff lightly.
Flatten and close with sc across 5 stitches.
FO, leaving tail.
Sew arms to front of torso so the hands meet at the center (to hold the rose).
👗 Dress & Skirt (Pink)
Attach pink yarn to waist of torso.
Rnd 1: inc in each st around (36)
Rnd 2–5: sc 36
Begin textured skirt pattern:
Rnd 6 onward (repeat):
(sc, skip 2 sts, 5 dc in next st, skip 2 sts) repeat around
Continue this round pattern for 20–22 rounds until skirt reaches floor length.
Scalloped Hem
Last round: (sc, 3 dc in next st, sc) repeat around.
FO and weave in ends.
💇 Hair (Yellow)
Cut long strands of yarn.
Attach using loop method from crown line down both sides of head.
Style into two long flowing sections (not braided).
Let hair fall smoothly over shoulders and down the back.
Trim ends evenly.
👑 Crown (Gold)
Ch 30, join to form ring.
Rnd 1: sc 30
Rnd 2: (ch 3, sl st in next st) repeat around
Rnd 3: (sc, hdc, dc, hdc, sc) in each ch-3 loop
FO and sew onto head.
🌹 Rose Accessory
Flower (Red)
Ch 26
(sc, hdc, 3 dc, hdc, sc) across
Roll into rose shape and stitch base.
Stem & Leaves (Green)
Ch 10, sl st back.
Leaves: ch 6, sl st back (make 2).
Sew rose between the princess’s hands.
🧷 Assembly
- Sew head to torso.
- Attach puff sleeves to shoulders.
- Sew arms so hands meet at center.
- Crochet dress directly onto torso.
- Attach hair and crown.
- Sew rose into hands.
- Finish facial embroidery.
✨ Finishing Touches
- Lightly shape skirt so it fans outward naturally
- Add gentle blush to cheeks if desired
- Optionally stiffen crown slightly
- Trim hair for smooth, flowing look
❤️ Final Notes
This princess doll now has a complete and well-shaped body beneath her gown, giving her graceful posture and true photo-accurate proportions. Her puff sleeves, flowing hair, textured skirt, and rose accessory create a romantic and storybook appearance, while her soft embroidered face keeps her sweet and timeless.
Whether made as a decorative piece, a gift, or a cherished keepsake, this princess brings elegance and warmth to every stitch. Enjoy crafting your own fairytale character and watching her come to life in yarn. 🌸👑