Welcome to the elegant and mystical world of amigurumi! 🌿✨ Today, I’m excited to share my free crochet pattern for an Amigurumi Arwen—a regal and enchanting creation perfect for Lord of the Rings fans, fantasy lovers, or anyone who enjoys crafting expressive and character-driven plush designs! 🧶 Whether you love stitching up legendary figures, experimenting with intricate details, or simply want to add the graceful Evenstar to your handmade lineup, this pattern will guide you through crafting a beautifully sculpted plush with Arwen’s flowing robes, delicate elven features, and timeless charm! 💖
This design embraces soft textures, elegant shaping, and thoughtful details to bring a magical and noble presence to your crochet projects! 🧶✨ I’ve carefully outlined each step to ensure your Amigurumi Arwen turns out just right—ready to brighten up your space or become a treasured handmade gift! 🎁 So grab your hooks, pick out deep blues, shimmering silvers, and soft greens, and let’s stitch up a legendary Arwen! 🌿
🧝♀️ Amigurumi Arwen Crochet Pattern
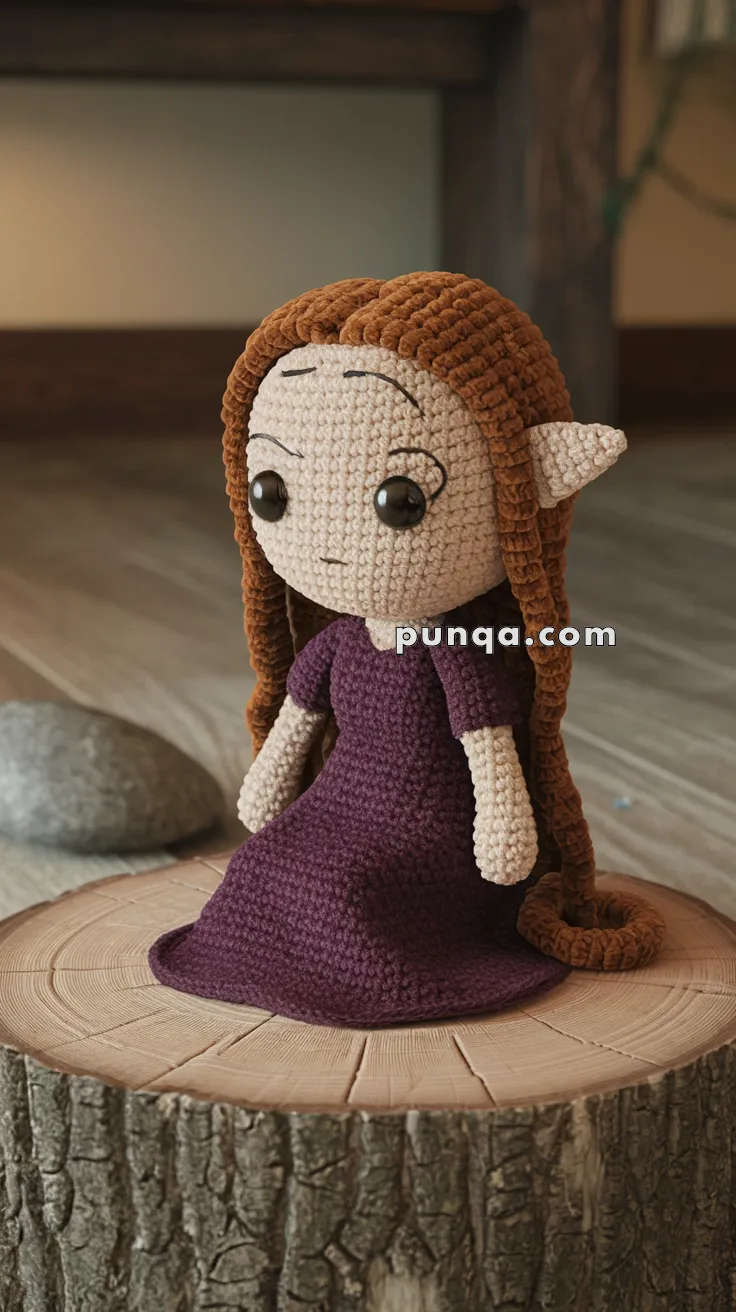
Bring the grace of Elven royalty to your crochet collection with this stunning Amigurumi Arwen! Inspired by her timeless beauty, this doll features flowing auburn hair, elvish ears, and a regal purple gown. She’s a perfect project for fans of fantasy, storytelling, or anyone enchanted by the elegance of Middle-earth.
✨ Skill Level
Intermediate – Involves shaping, color changes, sewing parts, and working in continuous rounds.
📏 Finished Size
Approx. 9–11 inches (23–28 cm) tall when using worsted weight yarn and a 3.5 mm hook.
🧶 Materials
-
Worsted weight yarn:
-
Skin tone (light beige or cream)
-
Hair color (auburn or chestnut)
-
Dress color (deep purple or burgundy)
-
Small amount of black (for brows/eyelashes)
-
-
3.5 mm crochet hook
-
Safety eyes (10–12 mm)
-
Polyester fiberfill stuffing
-
Tapestry needle
-
Stitch marker
-
Scissors
-
Hot glue or fabric glue (optional for hair placement)
🧵 Abbreviations (US Terms)
-
MR – Magic Ring
-
sc – Single Crochet
-
inc – Increase
-
dec – Decrease
-
ch – Chain
-
hdc – Half Double Crochet
-
dc – Double Crochet
-
sl st – Slip Stitch
-
FO – Fasten Off
-
BLO – Back Loops Only
👩 Head (Work in spiral with skin tone yarn)
-
MR, 6 sc (6)
-
inc x6 (12)
-
(1 sc, inc) x6 (18)
-
(2 sc, inc) x6 (24)
-
(3 sc, inc) x6 (30)
-
(4 sc, inc) x6 (36)
7–16. sc around (36) -
(4 sc, dec) x6 (30)
-
(3 sc, dec) x6 (24)
– Insert safety eyes between Rnds 11–12, about 6–7 sts apart
– Embroider eyelashes and brows with black yarn
– Stuff firmly -
(2 sc, dec) x6 (18)
-
(1 sc, dec) x6 (12)
-
dec x6 (6)
FO, weave tail to close.
🦋 Ears (Make 2 with skin tone yarn)
-
MR, 4 sc (4)
-
(1 sc, inc) x2 (6)
-
sc around (6)
-
(1 sc, dec) x2 (4)
Flatten and FO, leave a long tail for sewing.
🧍 Body (Start with skin tone, switch to dress color)
-
MR, 6 sc (6)
-
inc x6 (12)
-
(1 sc, inc) x6 (18)
4–6. sc around (18) -
Switch to dress color, BLO, sc around (18)
8–16. sc around (18) -
(1 sc, dec) x6 (12)
– Stuff firmly -
sc around (12)
FO, leave tail for attaching head.
✋ Arms (Make 2 with skin tone → dress color)
-
MR, 6 sc with skin tone (6)
2–4. sc around (6) -
Switch to dress color, sc around (6)
6–12. sc around (6)
– Lightly stuff
FO, leave long tail for sewing.
👗 Skirt (Work flat or in rounds, attach later)
-
Ch 31
-
Starting from 2nd ch: sc across (30)
3–18. Repeat sc rows to form rectangular panel
FO and sew around body base or crochet directly from BLO stitches of body base if preferred.
Optional: Add flare by increasing stitches in later rows with (1 sc, inc) repeat pattern.
💇 Hair Cap & Strands (Auburn Yarn)
Cap:
-
MR, 6 sc
-
inc x6 (12)
-
(1 sc, inc) x6 (18)
-
(2 sc, inc) x6 (24)
-
(3 sc, inc) x6 (30)
-
(4 sc, inc) x6 (36)
7–10. sc around (36)
FO, sew onto head.
Strands:
-
Cut many 10–12” strands
-
Loop through edge of cap using lark’s head knot
-
Braid some sections and leave others free-flowing
-
Use glue or stitch to fix braids in place at back
✂️ Assembly
-
Sew head onto body.
-
Attach arms to sides.
-
Sew ears aligned with eyes.
-
Attach skirt if not worked directly.
-
Attach hair cap and sew/braid hair as desired.
-
Optional: Add small elven embellishments like a silver belt, necklace, or embroidered leaf pattern on dress.
💡 Customization Ideas
-
Add wire to arms for poseability
-
Use sparkly yarn for a magical shimmer
-
Embroider a cloak or cape for traveling Arwen look
-
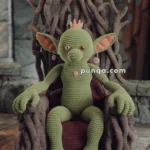
Create Aragorn to complete the iconic duo!
This gentle Elven beauty will grace your handmade collection with timeless elegance. A perfect gift for fantasy lovers, or a noble guardian for your shelf! 🌿🧝♀️