Welcome to the heartwarming and elegant world of amigurumi! 💕✨ Today, I’m excited to share my free crochet pattern for a Romantic Couple—a beautifully detailed bride and groom duo sitting on a charming park bench, perfect for wedding gifts, anniversary keepsakes, or anyone who enjoys crafting expressive and sentimental plush designs! 🏡 Whether you love stitching up romantic scenes, creating textured and lifelike figures, or simply want to add a sweet couple to your handmade collection, this pattern will guide you through crafting a sculpted plush with flowing wedding attire, delicate floral accents, and a touch of timeless love! 💖
This design embraces soft textures, intricate shaping, and dreamy details to bring a sense of romance and celebration to your crochet projects! 🧶🌸 I’ve carefully outlined each step to ensure your Amigurumi Romantic Couple turns out just right—ready to brighten up your collection or become a treasured handmade gift! 🎁 So grab your hooks, pick out elegant whites, soft pastels, or rich golds, and let’s stitch up a stunning bride and groom duo! ✨
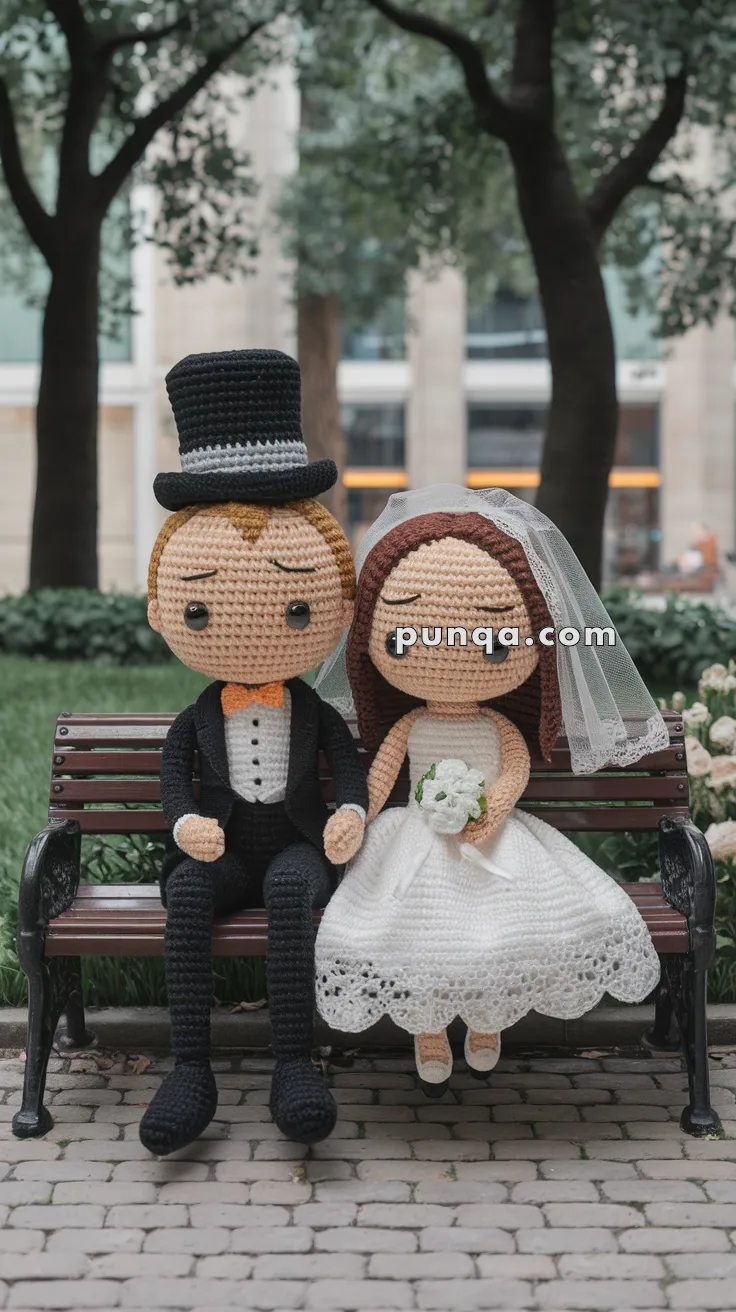
💍 Amigurumi Romantic Couple – Bride & Groom Crochet Pattern
Celebrate love with this elegant amigurumi bride and groom set! Dressed in a lacy white gown and formal tuxedo, these two are ready to charm your handmade wedding decorations, anniversary gifts, or keepsakes.
✨ Skill Level
Intermediate to Advanced – Includes shaping, color changes, lacy work, and outfit assembly.
📏 Finished Size
Each doll is approx. 28–30 cm (11–12″) tall using DK or light worsted yarn and a 2.5–3.0 mm hook.
🧶 Materials Needed
For Both Dolls:
-
Yarn (DK or light worsted weight):
-
Skin tone
-
Black (suit & shoes)
-
White (dress & shirt)
-
Brown (hair)
-
Orange (bow tie)
-
Green & white (bouquet)
-
-
2.5–3.0 mm crochet hook
-
Tapestry needle
-
Fiberfill stuffing
-
6 mm safety eyes
-
Small black buttons (optional)
-
Lace trim or tulle (for veil)
-
Thin wire (optional for shaping arms)
-
Hot glue (for attaching bouquet/veil)
🧵 Abbreviations (US Terms)
-
MR – Magic Ring
-
sc – Single Crochet
-
inc – Increase (2 sc in one stitch)
-
dec – Decrease (sc 2 together)
-
sl st – Slip Stitch
-
ch – Chain
-
hdc – Half Double Crochet
-
dc – Double Crochet
-
FO – Fasten Off
🧑🤵 Groom Pattern
🧔 Head
With skin tone yarn:
-
MR, 6 sc
-
inc x6 (12)
-
(sc, inc) x6 (18)
-
(2 sc, inc) x6 (24)
-
(3 sc, inc) x6 (30)
6–12. sc around (30) -
(4 sc, inc) x6 (36)
14–18. sc around -
(4 sc, dec) x6 (30)
-
(3 sc, dec) x6 (24)
-
(2 sc, dec) x6 (18)
-
(1 sc, dec) x6 (12)
-
dec x6 (6)
FO and stuff firmly.
💇 Hair Cap (Brown)
Make a separate semi-circle cap:
-
MR, 6 sc
-
inc x6 (12)
-
(sc, inc) x6 (18)
-
(2 sc, inc) x6 (24)
-
(3 sc, inc) x6 (30)
Continue to 36, FO and sew onto head. Embroider hairline.
🧥 Body
Start with white for shirt:
-
MR, 6 sc
-
inc x6 (12)
-
(sc, inc) x6 (18)
-
(2 sc, inc) x6 (24)
5–7. sc around (24)
Switch to black:
8–20. sc around (24)
Stuff firmly.
🦵 Legs (x2)
Start with black (shoes):
-
MR, 6 sc
-
inc x6 (12)
3–5. sc around
Switch to skin tone:
6–20. sc around (12)
FO one leg, don’t FO second — join both legs with 3 ch and continue the body.
🦳 Arms (x2)
Start with skin tone:
-
MR, 6 sc
-
(sc, inc) x3 (9)
3–5. sc around
Switch to black (sleeves):
6–14. sc around
FO, stuff lightly, sew to body.
👔 Bow Tie
With orange yarn:
ch 5, turn
Row 1: sc in 2nd ch and across (4)
Row 2–3: sc across
FO and wrap yarn around center to form bow. Sew under neck.
🎩 Top Hat
With black yarn:
-
MR, 6 sc
-
inc x6 (12)
-
(sc, inc) x6 (18)
-
(2 sc, inc) x6 (24)
-
sc in back loop (24)
6–9. sc around -
Switch to gray, sc around
-
sl st around
FO and attach to top of head.
👰 Bride Pattern
💇 Head & Hair
Same as groom, but hair is longer:
After hair cap, cut long strands and loop through top for layered hair. Tie in back or braid gently.
👗 Body (White)
Same as groom but use white yarn and do not change to black.
Add lacy dress skirt later.
👗 Lacy Skirt
Attach white yarn at waist and work in rounds:
Round 1: ch 3, dc around
Round 2: (ch 3, skip 1, dc) repeat
Round 3+: Continue until desired length, adding scalloped trim at bottom:
(ch 1, sc, hdc, dc x2, hdc, sc) in each loop. FO.
💐 Bouquet
Make 3–5 small magic rings with white yarn and stitch as tiny spirals. Bundle with green yarn and attach to hand.
🧕 Veil
Cut a piece of tulle. Gather one end and stitch to back of head. Optional: glue on small beads or ribbon.
👣 Shoes (x2)
With white yarn:
-
MR, 6 sc
-
inc x6 (12)
3–5. sc around
FO and stitch to feet.
🪢 Finishing
-
Attach arms, legs, and heads to bodies.
-
Add safety eyes and embroider brows, smiles.
-
Sew bouquet and top hat securely.
-
Pose and stitch together at hands if desired.
This sweet couple will steal hearts at any wedding-themed event or handmade gift! 💞