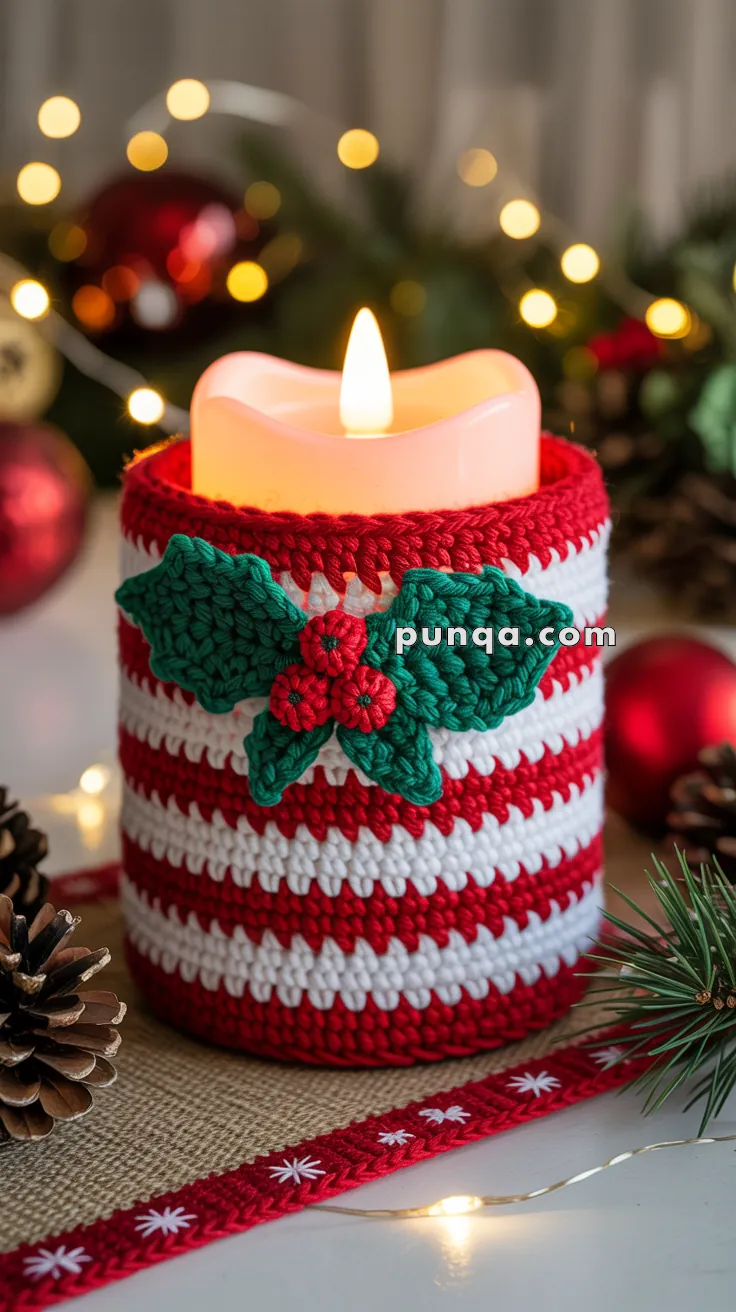
Add a flicker of festive charm to your holiday décor with the Striped Christmas Candle Holder—a cozy crochet creation that glows with seasonal spirit! 🎄🕯️ With its cheerful stripes and snug design, this handmade holder is perfect for showcasing battery-operated candles while adding a splash of color to mantels, tablescapes, or gift displays. Whether you’re going for classic red-and-green or mixing in metallics and snowy whites, this pattern invites you to play with color and texture in the most joyful way.
Quick to stitch and endlessly customizable, this candle holder makes a delightful project for beginners and seasoned crocheters alike. It’s a wonderful way to use up yarn scraps, experiment with festive palettes, or even create a matching set for your holiday gatherings. Pair it with twinkling lights, pinecones, or mini ornaments for a warm, handmade touch that brings the magic of the season to life. 🧶✨

🕯️ Striped Christmas Candle Holder Crochet Pattern
Nothing says Christmas like the warm glow of a candle wrapped in festive cheer! This striped Christmas candle holder, decorated with holly leaves and berries, is the perfect holiday accent. Designed in candy-cane red and white stripes, it’s a quick and easy project to brighten up your Christmas table.
✨ Skill Level
Beginner to Intermediate – simple color changes, flat leaf shaping, and sewing appliqués.
📏 Finished Size
Designed to fit a medium LED candle (approx. 10–12 cm / 4–5 in tall, 8–9 cm / 3–3.5 in wide).
You can easily adjust the circumference by adding or subtracting rounds.
🧶 Materials
- Red cotton yarn (DK weight) – main stripes
- White cotton yarn (DK weight) – stripes
- Green cotton yarn – holly leaves
- Red cotton yarn – berries
- 3.0 mm crochet hook
- Scissors, tapestry needle
- LED candle (safety note: do NOT use with real flame candles)
🧵 Abbreviations (US Terms)
- MR – Magic Ring
- sc – Single Crochet
- inc – Increase (2 sc in one stitch)
- sl st – Slip Stitch
- ch – Chain
- FO – Fasten Off
🎄 Candle Cozy Base & Body
Base (red yarn):
- MR, 6 sc (6)
- inc ×6 (12)
- (sc, inc) ×6 (18)
- (2 sc, inc) ×6 (24)
- (3 sc, inc) ×6 (30)
- (4 sc, inc) ×6 (36)
- (5 sc, inc) ×6 (42)
Continue increasing until the circle matches the bottom of your candle.
Body (start stripes):
- sc in BLO (back loops only) around to create a sharp edge for the base.
- Switch to white yarn, sc around.
- Switch to red yarn, sc around.
- Alternate red and white every round until the cover reaches the height of your candle.
- Last round: sc in red, finish with a neat round of sl st.
👉 Tip: Keep yarn floats inside neat by carrying the unused color loosely up the inside. This keeps the inside smooth and avoids bulky joins.
🍃 Holly Leaves (Make 2–3)
With green yarn:
- ch 8
- sc in 2nd ch, hdc in next, dc in next 2, hdc in next, sc in next, sl st in last.
- Now work up the opposite side of chain: sc, hdc, dc, dc, hdc, sc, sl st at tip.
FO and shape into leaf with pointed ends. Block lightly if needed.
🍒 Berries (Make 3)
With red yarn:
- MR, 6 sc (6)
- sl st, FO leaving long tail.
Sew tightly closed to form a small ball.
🪡 Assembly
- Place cozy snugly around candle.
- Sew holly leaves near the top edge, arranging them in a fan.
- Sew 3 berries in the middle of the leaves.
- Weave in ends.
🎉 Finishing Touches
Your Striped Christmas Candle Holder is ready! Place it on your table, mantle, or windowsill, and let the LED candle inside cast a magical festive glow. This cozy design not only adds warmth but also protects your candle glass from scratches.


