Sprinkle some handmade holiday cheer onto your sink with the Santa Soap Dispenser Cover, a festive crochet project that’s as jolly as it is practical! 🎅🧼 Featuring a bright red dress design, a bold black belt with a golden buckle, and wavy white trim at the top and bottom, this merry little cover transforms your everyday soap bottle into a cheerful Christmas accent. It’s a quick and charming way to add seasonal spirit to your kitchen or bathroom.
Perfect for crocheters who love playful décor and joyful details, this pattern invites you to explore bold colorwork, fun textures, and a dash of whimsy. Whether you’re decking the halls, gifting to a fellow holiday enthusiast, or adding a handmade touch to your winter market table, the Santa Soap Dispenser Cover is a delightful way to stitch up festive flair and everyday function—one loop at a time! 🧵🎁
🎀 Crochet Mrs. Claus Soap Dispenser Cover Pattern
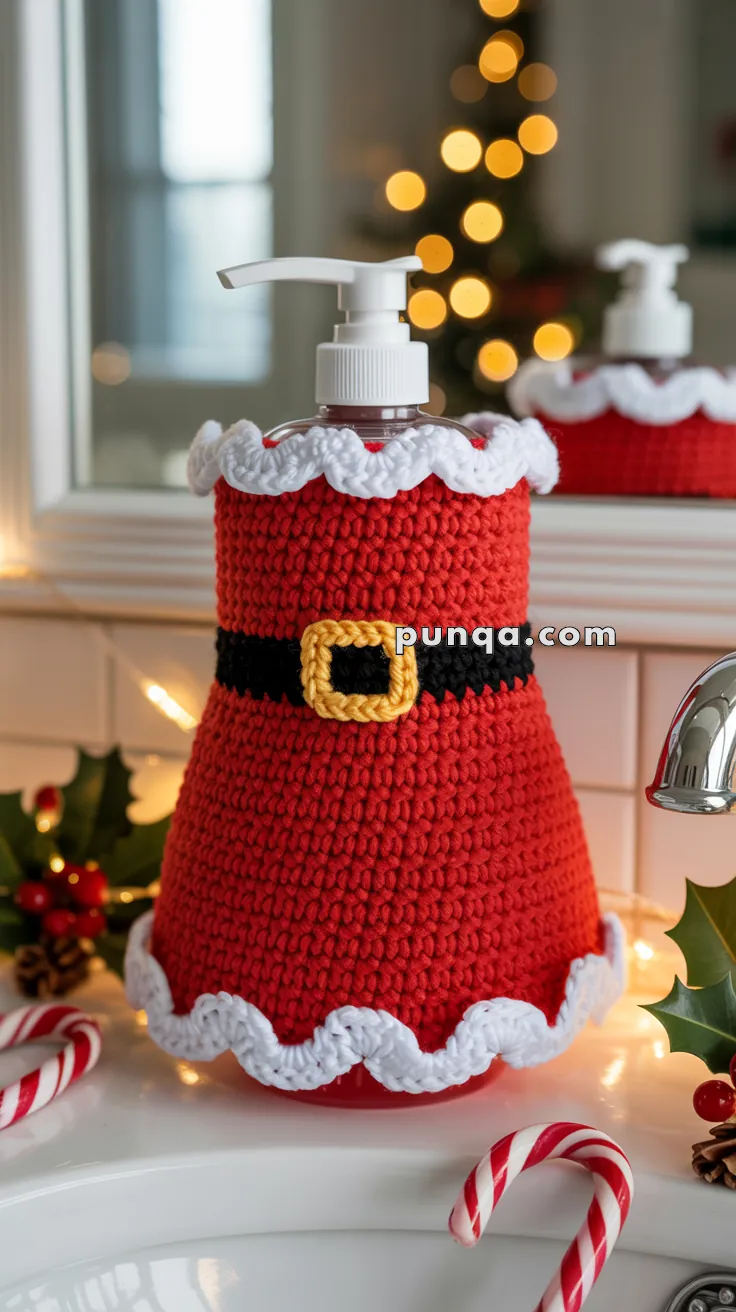
Dress up your soap dispenser for the holidays with this Mrs. Claus–inspired cover. The design forms a smooth A-line dress that gently flares from the midsection, hugs neatly beneath the pump collar, and finishes with soft white scalloped trim at the top and hem. A bold black belt and raised gold buckle complete the classic festive look.
✨ Skill Level
Confident Beginner — this pattern uses only basic stitches but requires careful counting and even tension to achieve the clean dress shape.
📏 Finished Size
Fits standard 7–8 in (18–20 cm) tall soap dispensers
Approx. 7–8 cm (2¾–3 in) diameter at the base
🧶 Materials & Yarn Amounts
Worsted-weight cotton yarn (tight stitches recommended)
- Red (dress): ~45–55 g
- White (trim): ~12–15 g
- Black (belt): ~8–10 g
- Gold/Yellow (buckle): ~3–4 g
Crochet hook: 3.5–4.0 mm
Tapestry needle
Scissors
(Yarn amounts are based on a dense fabric similar to the photo and may vary slightly by tension.)
🧵 Abbreviations (US)
MR – magic ring
sc – single crochet
inc – increase (2 sc in same stitch)
sl st – slip stitch
ch – chain
dc – double crochet
FO – fasten off
🔽 Pattern Instructions
🎀 Dress Body (Worked Bottom-Up in the Round)
With Red
MR, 6 sc (6)
inc x6 (12)
(1 sc, inc) x6 (18)
(2 sc, inc) x6 (24)
(3 sc, inc) x6 (30)
(4 sc, inc) x6 (36)
(5 sc, inc) x6 (42)
➡️ Stop increasing once the cover fits snugly over the dispenser base.
🧱 Lower Straight Section
sc around 5 rounds
This creates the straight lower skirt before the flare begins.
👗 A-Line Shaping
(6 sc, inc) x6 (48)
sc around 2 rounds
(7 sc, inc) x6 (54)
sc around 2 rounds
The dress should now widen gently, matching the soft outward slope seen in the photo.
🖤 Belt
Switch to Black
sc around 3 rounds
The belt sits slightly above the visual midpoint, as shown.
🔴 Upper Bodice (Tapered Fit)
Switch back to Red
sc around 4 rounds, keeping tension firm so the neckline hugs inward beneath the pump collar.
FO.
❄️ White Trim
Bottom Hem Trim (Deeper Scallop)
Attach White at the hem.
(sl st, skip 1 st, 4 dc in next st, skip 1 st)
Repeat around.
FO.
Top Neckline Trim (Shallower Scallop)
Attach White at the top edge.
(sl st, skip 1 st, 2 dc in next st, skip 1 st)
Repeat around.
FO.
This creates a snug, decorative edge that sits directly below the pump collar without flaring.
🟨 Buckle (Raised Rectangle)
With Gold
ch 12
Row 1: sc in 2nd ch from hook and across (11)
Row 2: ch 1, turn, sc 11
Rotate and work sc evenly around the rectangle, placing 3 sc in each corner to round the shape.
FO, leaving a long tail.
✂️ Assembly
- Slide the cover over the dispenser
- Center the buckle on the belt and sew securely
- Adjust trims so scallops sit evenly
- Weave in all ends neatly
🎀 Final Result
This finished cover matches the photo’s proportions and structure: a smooth, gently flared dress shape, snug neckline, pronounced bottom trim, subtle top trim, and a bold belt with a dimensional buckle. It stays in place during use while adding a warm, festive accent to your sink.