There’s something truly magical about crocheting your own lampshade cover. 🌟 Imagine transforming a simple lamp into a work of art that adds a personal touch to any room. Crochet is not just a craft; it’s a journey of creativity and relaxation that lets your imagination run wild. When I think about creating a lampshade cover pattern, my heart dances with excitement at the idea of playing with different yarns, colors, and stitches. The appeal lies in the uniqueness of each piece, as no two handmade covers are exactly the same. It’s a chance to express your personality and make a statement with your decor.
The process of crafting a lampshade cover is like piecing together a beautiful puzzle. First, I choose my yarn, indulging in the vast array of textures and hues available. Then, it’s all about picking the right pattern or even designing my own, which is half the fun! 🧶 From simple stitches to intricate lace designs, each step is a delightful challenge that brings the vision to life. As the crochet hook dances through the yarn, a masterpiece slowly emerges, wrapping the lampshade like a cozy hug. It’s a journey that starts with an idea and ends with a warm glow illuminating a one-of-a-kind creation.
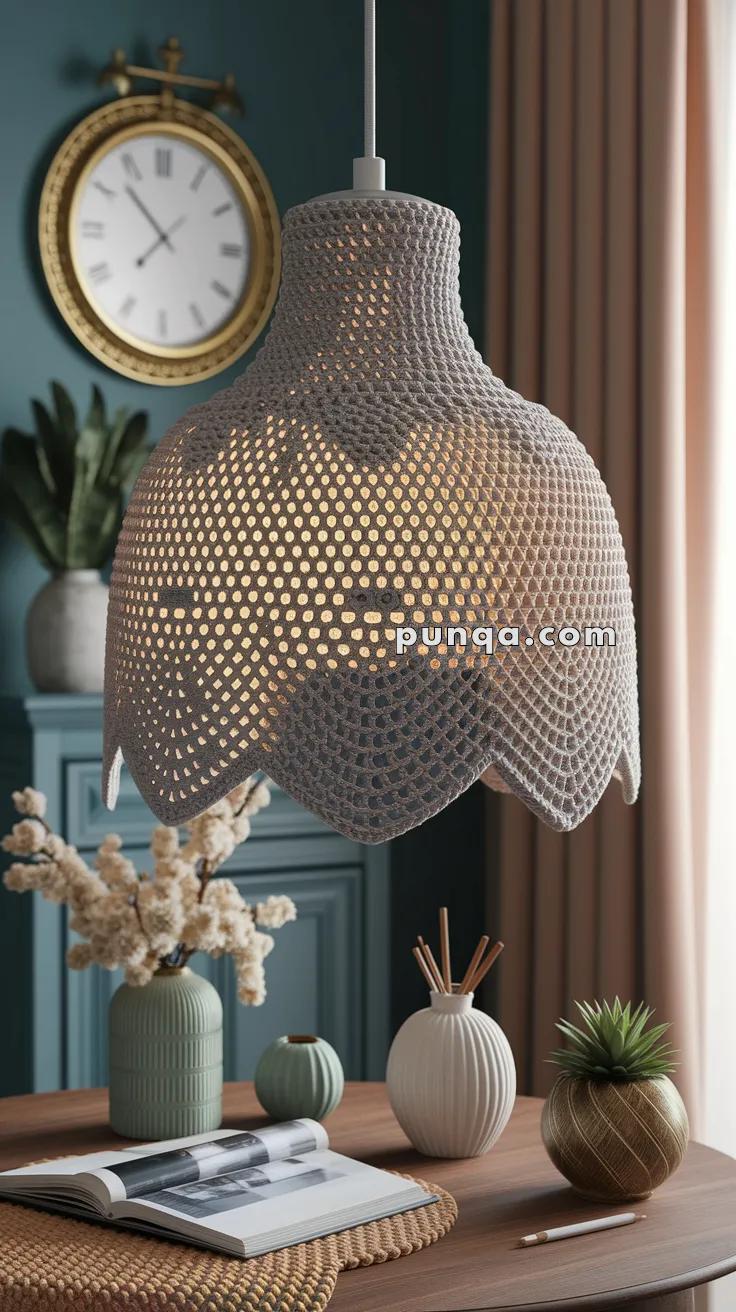
💡 Crochet Lampshade Cover Pattern
Give your pendant light a cozy, stylish update with this openwork lampshade cover. Its floral-lattice pattern casts beautiful shadows and adds handmade charm to any room.
✨ Skill Level
Intermediate (Basic lace and shaping skills required)
🧵 Materials
-
Cotton yarn, sport or DK weight (approx. 100g)
-
2.5mm or 3.0mm crochet hook
-
Scissors
-
Yarn needle
-
Stitch marker
-
Blocking pins (optional)
-
Fabric stiffener (optional, for a firmer structure)
-
A pendant light or wire lampshade frame (approx. 10–12 in / 25–30 cm diameter)
🧶 Abbreviations (US terms)
-
ch – chain
-
sl st – slip stitch
-
sc – single crochet
-
dc – double crochet
-
tr – treble crochet
-
st – stitch
-
sp – space
-
sk – skip
-
rep – repeat
🪡 Pattern Instructions
🔘 Top Ring (fits around bulb socket)
-
ch 24, sl st to form ring (adjust based on light fitting circumference)
-
ch 3, dc in each st around, sl st to join (24 dc)
-
ch 4 (counts as tr), tr in each st around, sl st to join
🌸 Mesh Body Section
-
ch 5 (counts as 1 dc + ch 2), sk 2, dc in next, rep around, sl st to 3rd ch (creates mesh lattice)
5–20. ch 5, dc in next ch-2 sp, rep around, sl st to join
👉 Stretch over the frame occasionally to check fit and repeat mesh rows until the cover reaches the base.
🌊 Scalloped Edge (Wave Pattern)
-
ch 3 (counts as dc), dc in next, tr in next 2, dc in next 2, sc in next — repeat across the entire edge.
-
ch 1, sc in each st across, sl st to finish.
FO and weave in ends.
🪶 Optional Finishing
-
Lightly block the cover using pins and steam to emphasize scallop edges.
-
For structure, apply spray starch or stiffener and shape it over the lampshade while drying.
🛠 Assembly
-
Slip cover over the lampshade and gently stretch to fit.
-
Use invisible thread, elastic band, or discreet sewing to secure it at the top ring and base if needed.