Elevate your handmade accessories with the Interlocking CC Brooch, a chic crochet project that blends bold design with timeless elegance! 🧶✨ Worked in the round for a bold tubular look, this brooch beautifully mimics the iconic interwoven curves, making it a standout piece that’s both fashionable and fun to create. Whether you’re dressing up a blazer, adding flair to a handbag, or gifting a touch of luxury, this brooch is sure to turn heads.
Perfect for crocheters who love sleek shapes and stylish finishes, this pattern invites you to experiment with metallic yarns, crisp stitches, and high-impact details. Try gold for a classic glam vibe, silver for modern sparkle, or bold colors for a playful twist. The Interlocking CC Brooch is a fabulous way to stitch up sophistication, creativity, and a dash of designer-inspired magic—one loop at a time! 🧵💫
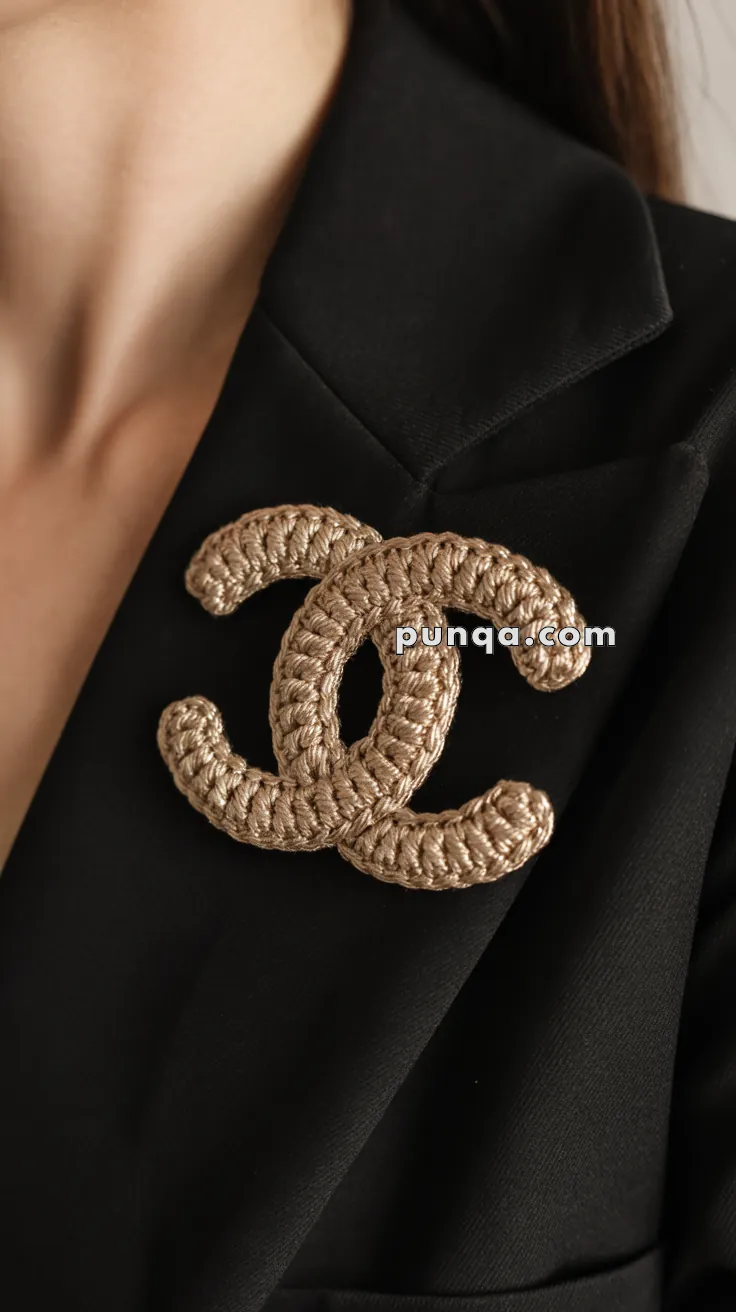
✨ Crochet Interlocking “CC” Brooch Pattern
Elevate your outfit with this chic interlocking “CC” crochet brooch. Worked in the round for a bold tubular look, it perfectly mimics the iconic interwoven curves. The metallic yarn adds just the right shine, making it a statement piece for any jacket or dress.
🧶 Materials Needed
- Gold or metallic mercerized cotton yarn (sport or DK)
- Crochet hook: 2.5 mm – 3 mm
- Brooch pin back (sew-on or glue-on)
- Tapestry needle
- Scissors
- Fiberfill or scrap yarn (for light stuffing)
- Optional: fabric stiffener for extra firmness
📏 Finished Size
Approx. 3.5–4 in (9–10 cm) wide when using DK yarn and a 2.5 mm hook.
✨ Skill Level
Intermediate – The pattern is simple in stitches (just single crochet in the round) but requires neat shaping, light stuffing, and careful assembly to achieve the interlocking design.
🔤 Abbreviations (US Terms)
- MR = Magic Ring
- sc = single crochet
- inc = increase (2 sc in same st)
- dec = decrease (sc2tog)
- st = stitch
- FO = fasten off
🪡 Pattern Instructions
Step 1: Crochet Two Tubular Strips
Each “C” is a stuffed tube that you’ll bend into shape.
With gold yarn:
- MR, 6 sc (6)
- [sc in each st] around (6)
- Continue working spiral rounds of 6 sc until the tube measures ~22–24 cm long.
- Stuff lightly with fiberfill or scrap yarn as you go.
- FO, leaving long tail.
👉 Repeat for the second tube.
Step 2: Shape into Curves
- Bend each stuffed tube gently into a C-shape.
- Use the yarn tail and tapestry needle to secure ends closed.
- Tuck in stuffing firmly at the tips for a neat rounded finish.
Step 3: Interlock the Two Cs
- Place one “C” flat.
- Slide the second “C” through the first, overlapping at the midpoint just like in the photo.
- Stitch them together invisibly at 3–4 points where they cross so the interlock holds.
Step 4: Finishing
- Weave in all ends neatly at the back.
- Attach the brooch pin back at the center rear with sewing or glue.
- (Optional) Brush lightly with fabric stiffener for a polished finish.
🌟 Styling Ideas
- Pin on a black blazer for maximum contrast.
- Try different yarns: metallic silver for modern elegance, bronze for a vintage feel.
- Add seed beads or rhinestones for a luxury upgrade.
💡 Tips for Success
- Don’t overstuff the tubes; they should bend smoothly without bulging.
- Use mercerized cotton or satin-finish yarn for the glossy look.
- Steam-block the finished brooch gently to help curves set in place.
And there you have it – your very own interlocking “CC” crochet brooch! ✨ This little project is a perfect blend of fashion and fiber art, giving you a bold accessory that looks stylish and handmade all at once. Whether you pin it on a sleek black blazer, a cozy sweater, or even a handbag, it’s guaranteed to stand out.
This brooch works up quickly, makes a thoughtful handmade gift, and can easily be customized in different metallic shades to match your wardrobe. Every stitch adds character, and in the end, you’ll have a statement piece that’s both elegant and unique.
So grab your yarn, hook, and a little creativity – and let your stitches shine! 💫