Sweeten up your sink with the Gingerbread Man Soap Dispenser Cover, a festive crochet treat that’s almost good enough to eat! 🍪🧼 With its warm brown body, icing-style trim, and cheerful face, this adorable cover turns your everyday soap bottle into a holiday delight. Whether you’re decorating for Christmas or just love cozy seasonal touches, this little gingerbread buddy is sure to bring smiles and a sprinkle of handmade charm to your kitchen or bathroom.
Perfect for crocheters who enjoy playful designs and quick projects, this pattern invites you to explore fun textures, bold shapes, and whimsical details. Add buttons, a bow tie, or even a peppermint swirl for extra flair! Whether you’re crafting for yourself, gifting to a fellow holiday enthusiast, or adding a sweet touch to your winter market table, the Gingerbread Man Soap Dispenser Cover is a joyful way to stitch up festive fun—one loop at a time! 🧵🎄
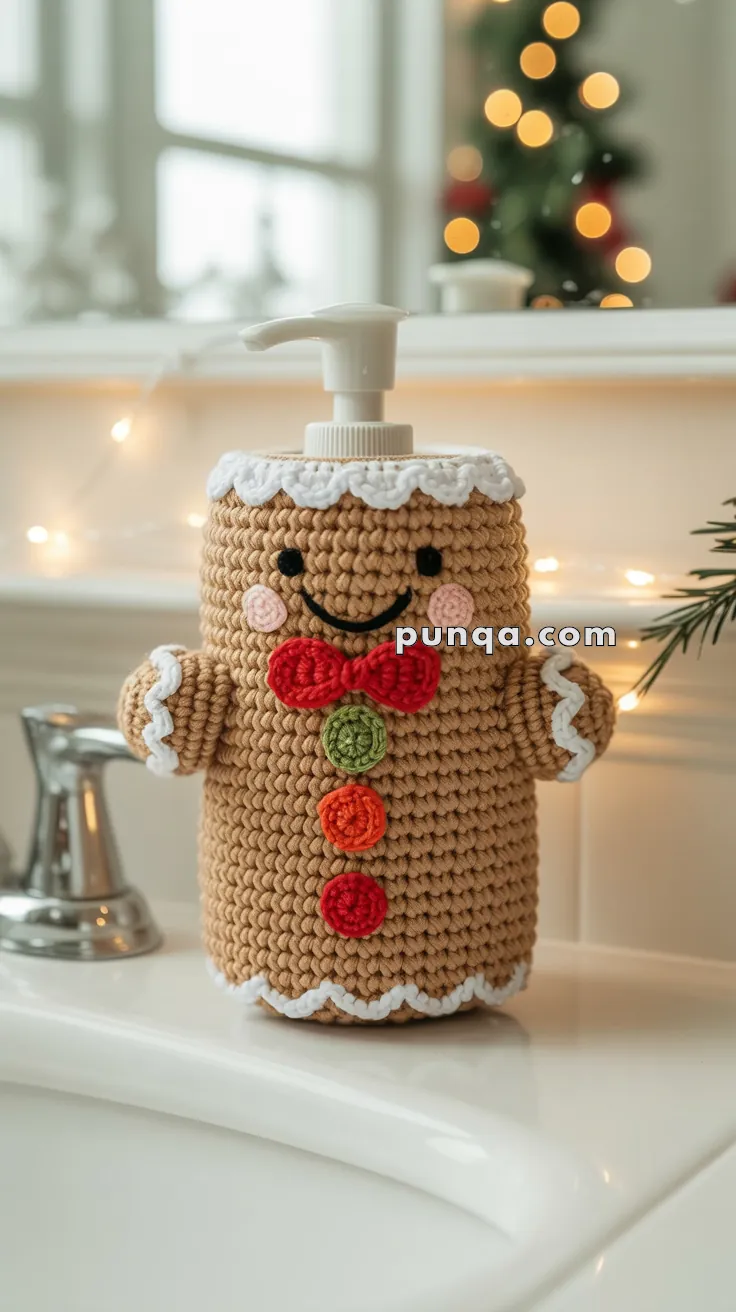
🍪 Gingerbread Man Soap Dispenser Cover Crochet Pattern
This sweet little Gingerbread Man is ready to bring holiday cheer to your kitchen or bathroom! With his rosy cheeks, icing trim, chunky bow, and colorful buttons, he’s the perfect festive addition to your handmade décor.
🧵 Skill Level
Intermediate – You’ll need to know how to crochet in the round, make simple appliqués, and embroider facial features.
📏 Finished Size
- Height: ~8 in (20 cm) tall (without pump)
- Width: Fits a standard cylindrical soap dispenser (about 3–3.5 in wide, 6–7 in tall)
- Arms: ~1 in (2.5 cm) long
✂️ Materials
- Worsted weight cotton yarn:
- Light Brown (main body + arms)
- White (icing trim)
- Red (bow + bottom button)
- Green (middle button)
- Orange (top button)
- Pink (cheeks)
- Black (eyes + smile embroidery)
- Crochet hook: 3.5 mm (E)
- Yarn needle
- Scissors
- Stitch markers
- Standard soap dispenser
🧶 Abbreviations (US Terms)
- MR = Magic Ring
- ch = chain
- sc = single crochet
- inc = increase (2 sc in same st)
- dec = decrease (sc 2 sts together)
- sl st = slip stitch
- st(s) = stitch(es)
🪡 Pattern Instructions
🍪 Body (Light Brown)
- MR, 6 sc (6)
- inc around (12)
- (sc, inc) around (18)
- (2 sc, inc) around (24)
- (3 sc, inc) around (30)
- (5 sc, inc) around (42)
7–34. sc around (42) → adjust rows for dispenser height - sl st to join, fasten off and weave in ends.
🤎 Arms (make 2)
- MR, 6 sc (6)
- inc around (12)
3–8. sc around (12) - sl st to close, fasten off leaving tail.
- Attach near top, just under icing trim.
- Add white trim: join white, (sc, hdc, dc, hdc, sc) in same st, skip next, repeat around opening.
🤍 Icing Trim (Top & Bottom)
Attach white yarn to edge.
- Work (sc, hdc, dc, hdc, sc) in one st, skip 1 st around.
- This creates the rounded scallop “icing drip.”
- Top trim: fuller scallops. Bottom trim: work fewer repeats (skip 2 occasionally) for tighter edge.
🎀 Bow (Red)
Bow Center
- ch 8, sc in 2nd ch from hook and across (7).
- ch 1, turn, sc across (7).
- Fasten off, leave tail.
- Pinch middle and wrap yarn around several times to form bow.
Bow Tails (optional for accuracy)
- ch 5, sc back (4). Make 2.
- Sew beneath bow center.
🔵 Buttons (3 total)
- Red Button (bottom): MR, 10 sc, join, fasten off.
- Green Button (middle): same as above.
- Orange Button (top): same as above.
- Sew vertically down center.
- Add “X” embroidery in black yarn to Red + Green buttons.
💕 Cheeks (2 in Pink)
- MR, 8 sc, join, fasten off.
- Sew on either side of smile.
👀 Eyes (2 in Black)
- MR, 6 sc, join, fasten off.
- Sew above smile, evenly spaced.
😀 Smile
- Use black yarn and yarn needle.
- Work a wide U-shaped curve with surface slip stitch or chain embroidery.
🧩 Assembly
- Sew arms to sides near the top.
- Attach bow under smile.
- Sew buttons down center line.
- Add cheeks + eyes.
- Embroider smile.
- Add icing trim top + bottom.
- Slip cover onto dispenser — adjust snugness if needed.
✨ Final Touches
Your Gingerbread Man Soap Dispenser Cover is complete! With his rosy cheeks, scalloped icing trim, and chunky bow, he’ll make everyone smile each time they wash their hands. Pair him with Santa, Snowman, Reindeer, Elf, and Mrs. Claus for a full holiday set — perfect for gift giving or festive home décor.