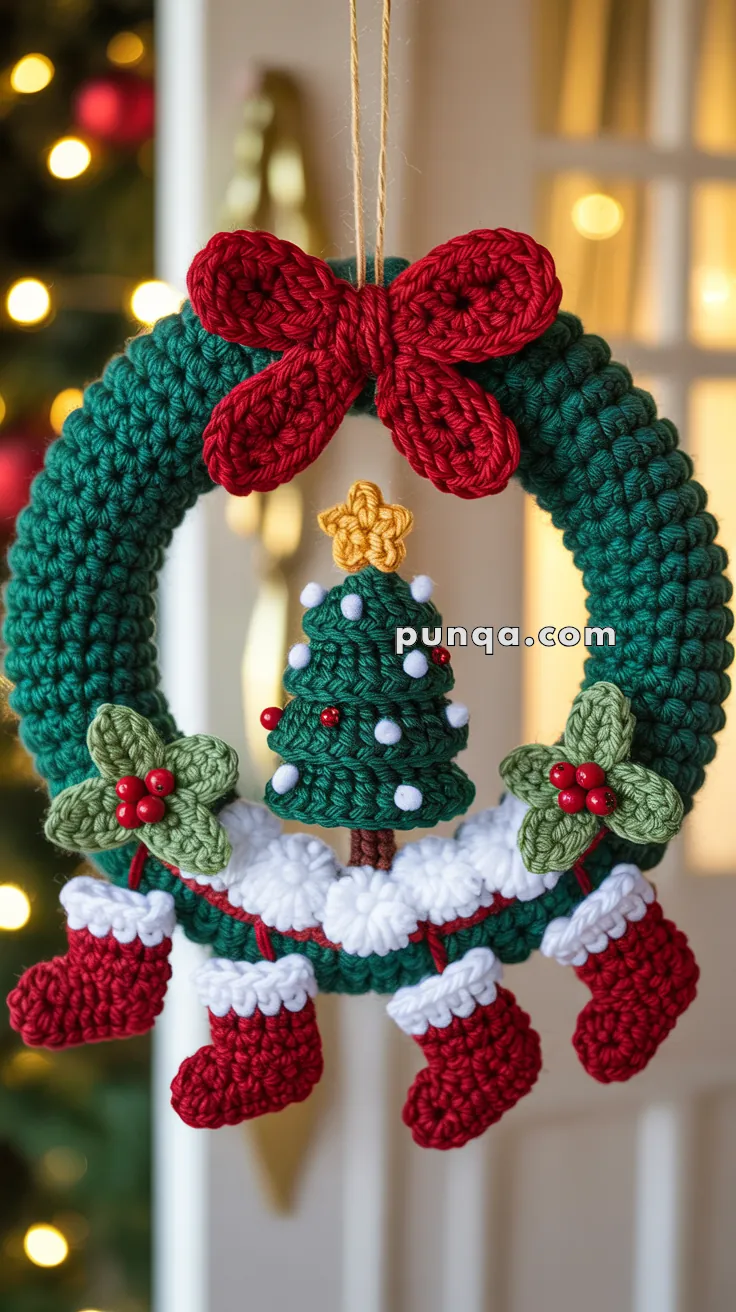
Deck the halls with handmade charm using the Festive Christmas Wreath, a joyful crochet project that’s bursting with holiday spirit! 🎄🧶 This delightful design features a plump green wreath base adorned with all the seasonal favorites—a tiny Christmas tree crowned with a star, fluffy snow puffs, holly leaves with bright red berries, and even dangling stockings that add a playful touch. Tied together with a big red bow, it’s the perfect way to welcome guests with warmth and whimsy.
Ideal for crocheters who love detailed decorations and festive flair, this pattern invites you to mix textures, play with vibrant colors, and customize each element to match your holiday style. Whether you hang it on your door, gift it to a fellow yarn-lover, or use it as a centerpiece, the Festive Christmas Wreath is a merry way to stitch up magic—one cheerful loop at a time! 🎅✨
🎀 Festive Christmas Wreath Crochet Pattern
There’s something truly special about handmade Christmas decorations, and this crocheted wreath captures all the cozy magic of the season. With its rich teal-green base, dimensional red bow, miniature stockings, and adorable layered tree complete with twinkling ornaments, this wreath is a showstopper that will bring holiday cheer to any door, wall, or mantel.
This pattern creates a fully three-dimensional wreath with careful attention to texture and detail. Each element—from the fluffy snow mounds to the delicate holly leaves—is designed to recreate the charming, handcrafted look of a classic Christmas decoration.
✨ What Makes This Pattern Special
- Fully dimensional construction – thick, stuffed wreath base with 3D bow
- Layered Christmas tree – three graduated tiers with a golden star topper
- Realistic details – individual snow puffs, holly clusters with berries, and striped stocking cuffs
- Five mini stockings – perfectly sized and evenly spaced
- Four-loop bow – true bow construction with separate loops
- Perfect for gifting – makes a treasured handmade holiday keepsake
📋 Pattern Information
Skill Level: Intermediate
Requires understanding of increases/decreases, working in rounds, and assembling multiple motifs.
Finished Size: 23–25 cm (9–10 inches) across
Time to Complete: 6–8 hours for experienced crocheters
🧶 Materials List
Yarn
- Dark Green/Teal – 80–90g (wreath + tree)
- Red – 35–40g (bow, stockings, berries)
- White – 20–25g (snow, cuffs, ornaments)
- Light Green – 10g (holly leaves)
- Brown – 5g (tree trunk)
- Yellow/Gold – small amount (star)
Recommended: DK weight cotton or cotton blend for best stitch definition.
Other Supplies
- 3.0 mm crochet hook (C/2–D/3)
- Polyester fiberfill
- 8–10 white pom-poms (~1 cm)
- 15–20 red beads
- Yarn needle
- Stitch markers
- Scissors
- Strong twine or cord
- Fabric glue (optional)
🧵 Abbreviations (US Terms)
MR – magic ring
sc – single crochet
hdc – half double crochet
dc – double crochet
inc – increase
dec – decrease
pop – popcorn stitch (5 dc into one stitch, close as described)
ch – chain
sl st – slip stitch
BLO – back loop only
FLO – front loop only
FO – fasten off
🌿 PART 1: Wreath Base (Dark Green)
The wreath base is a thick stuffed tube.
Tube Construction
- R1: MR, 8 sc
- R2: inc around (16)
- R3: (1 sc, inc) × 8 (24)
- R4–120: sc around (24)
This creates a tube approx. 72–75 cm long, forming a 23–25 cm wreath.
Stuffing & Assembly
- Stuff evenly as you crochet.
- Shape tube into a ring.
- Whip stitch ends together securely.
- Adjust stuffing and close opening.
Set aside.
🎀 PART 2: Four-Loop Dimensional Bow (Red)
A true 4-loop bow with separate loops.
Bow Loops (Make 4)
- Ch 22
- Row 1: sc across
- Rows 2–12: sc across
- FO with long tail.
Form each into an oval loop by sewing short ends together.
Bow Assembly
- Arrange loops in 2×2 grid (top pair + bottom pair).
- Sew through all centers firmly.
Center Knot
- Wrap 60 cm of red yarn tightly 15–20 times around center.
- Tie securely.
Set aside.
🎄 PART 3: Layered Christmas Tree (Dark Green)
Bottom Tier
- R1: MR 6
- R2: inc ×6 (12)
- R3: (1 sc, inc) ×6 (18)
- R4: (2 sc, inc) ×6 (24)
- R5–7: sc around (24)
Stuff lightly and FO.
Middle Tier
- R1: MR 6
- R2: inc ×6 (12)
- R3: (1 sc, inc) ×6 (18)
- R4–6: sc around (18)
Stuff and FO.
Top Tier
- R1: MR 6
- R2: inc ×6 (12)
- R3–5: sc (12)
Stuff and FO.
Trunk (Brown)
- R1: MR 6
- R2–7: sc (6)
Stuff lightly.
Assembly
- Sew trunk to bottom tier.
- Attach middle tier centered on top.
- Attach top tier centered.
⭐ PART 4: Star Topper (Yellow)
R1: MR
Repeat 5×:
- ch 4
- sl st in 2nd ch
- sc next
- hdc next
- sl st in MR
Pull tight, FO, leave long tail.
❄️ PART 5: Snow Mounds (White)
Snow Puffs (Make 12–14)
Each puff:
- MR, pop stitch, sl st into ring
- FO with long tail.
Should be 1.5–2 cm rounded puffs.
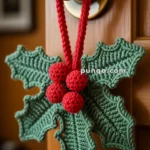
🍃 PART 6: Holly Leaves (Light Green)
Single Leaf (Make 6)
Ch 7, then work:
- sl st, sc, hdc, dc, dc, hdc
- 3 sc in last ch
- hdc, dc, dc, hdc, sc, sl st
FO with tail.
Holly Clusters (Make 2)
- Arrange 3 leaves in a fan.
- Sew bases.
- Add 3 red beads to center.
🧦 PART 7: Mini Stockings (Red × 5)
Stocking Body
- R1: MR 6
- R2: inc ×6 (12)
- R3: (1 sc, inc) ×6 (18)
- R4–6: sc (18)
- R7: (1 sc, dec) ×6 (12)
- R8–9: sc (12)
Lightly stuff.
Two-Tone Cuff
- R10: attach white, BLO sc (12)
- R11: switch to red, sc (12)
- R12: switch to white, pop stitch in each st (12 pops)
FO with tail.
Make 5 stockings total.
🎨 PART 8: Tree Ornaments & Berries
Tree
- Add 8–10 white pom-poms
- Add 6–8 red beads
Placement:
- Bottom tier: 3–4
- Middle tier: 2–3
- Top tier: 2
Holly (already prepared)
🎄 FINAL ASSEMBLY
Step 1 — Attach Bow
Sew bow to top center of wreath.
Step 2 — Attach Tree
Sew trunk + bottom tier to inner lower curve.
Step 3 — Add Star
Attach securely to tree top.
Step 4 — Snow Base
Arrange 12–14 snow puffs in an arc under tree.
Sew individually.
Step 5 — Holly Clusters
Attach one cluster left of snow, one right.
Step 6 — Stockings
Space 5 stockings evenly:
- 1 centered
- 2 left
- 2 right
Sew by cuff.
Step 7 — Decorate Tree
Add ornaments following placement guide.
Step 8 — Add Hanging Loop
Attach twine loop at back behind bow.
💡 Finishing Tips
Shaping
- Light steam helps shape bow loops and holly leaves
- Align stockings so they hang naturally
Optional Stiffening
- Light fabric stiffener improves longevity
- Pin in shape and let dry 24 hours
📏 Sizing Notes
Bigger (30–32 cm)
- Extend tube to R150
- Add rounds to tree tiers
- Use 6–7 stockings
- Add extra snow puffs
Smaller (18–20 cm)
- Tube to R95
- Tree as written
- Use 4 stockings
- Fewer puffs
🎁 Gift Presentation Ideas
- Wrap in clear box with tissue
- Add care card
- Include matching handmade tag
- Present with wreath hanger
- Create matching ornament set
🧼 Care Instructions
Cleaning:
- Spot clean only
- Air dry thoroughly
Storage:
- Store flat in a box
- Use acid-free tissue
- Avoid sunlight
❤️ Final Thoughts
This handmade wreath is a heartfelt holiday treasure, rich with warmth, charm, and timeless Christmas colors. Whether you make it for your home or as a gift, it becomes a keepsake that brings joy year after year.
Happy crocheting, and may your holidays be merry and bright! 🎄✨


Beautiful