Welcome to the festive and colorful world of crochet! 🐣✨ Today, I’m excited to share my free crochet pattern for a Striped Easter Egg—a bright and cheerful creation perfect for springtime décor, Easter baskets, or anyone who enjoys crafting playful and seasonal designs! 🌸 Whether you love stitching up holiday-themed projects, experimenting with fun color combinations, or simply want to add a handmade touch to your Easter celebrations, this pattern will guide you through crafting beautifully textured eggs with soft curves and vibrant stripes! 🎨
This design embraces bold patterns, pastel shades, and charming details to bring a joyful and festive presence to your crochet projects! 🧶✨ I’ve carefully outlined each step to ensure your Striped Easter Egg turns out just right—ready to decorate your home, fill your baskets, or become a treasured handmade gift! 🎁 So grab your hooks, pick out sunny yellows, soft pinks, or speckled blues, and let’s stitch up some delightful striped Easter eggs! 🐣
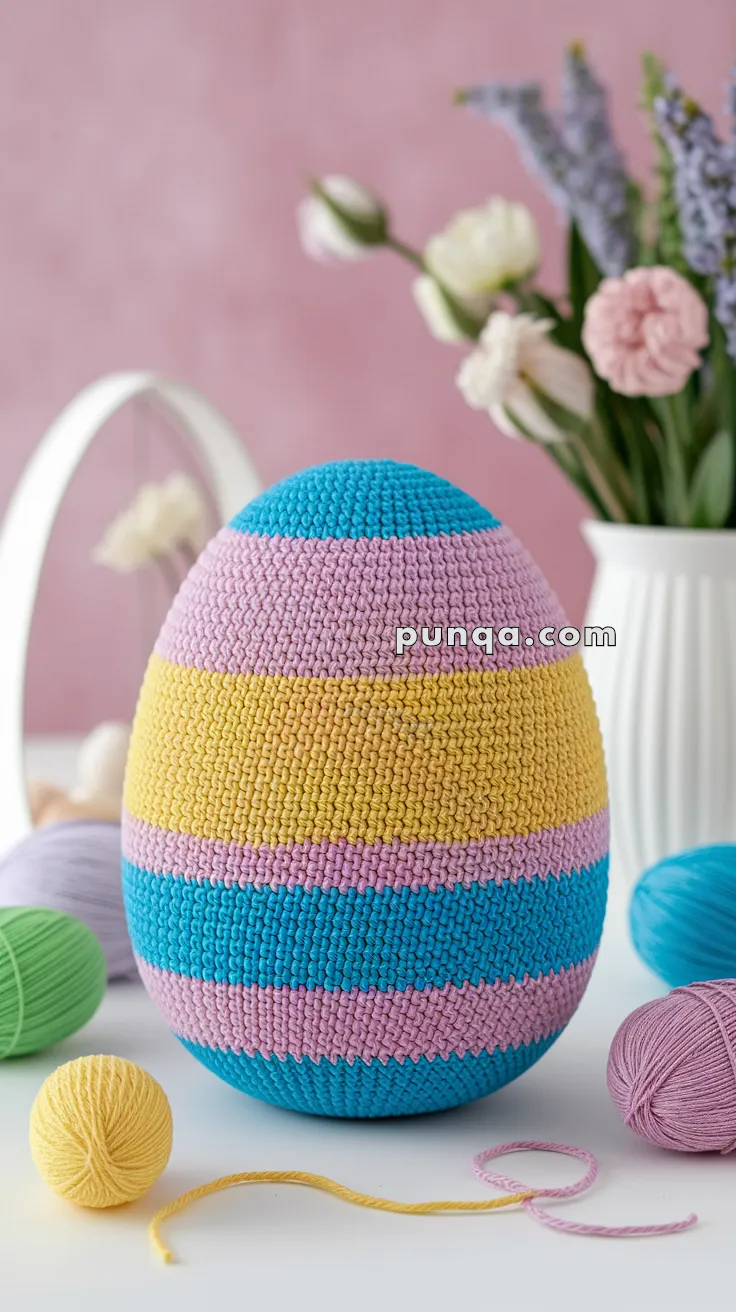
🐣 Amigurumi Striped Easter Egg – Free Crochet Pattern
Celebrate springtime with this cheerful and colorful striped Easter egg! Its smooth shape and bold, pastel bands make it a fun and decorative project that’s great for Easter baskets, centerpieces, or playful gifts.
✨ Skill Level
Beginner to Intermediate – Basic shaping and color changes involved.
📏 Finished Size
Approx. 6–8 inches (15–20 cm) tall when using worsted weight yarn and a 3.5 mm hook.
🧶 Materials
-
Worsted weight yarn:
-
Color A – Sky Blue
-
Color B – Soft Lilac
-
Color C – Sunny Yellow
-
-
Crochet hook: 3.5 mm
-
Tapestry needle
-
Stitch marker
-
Polyfill stuffing
🧵 Abbreviations (US Terms)
MR – Magic Ring
sc – Single Crochet
inc – Increase
dec – Decrease
sl st – Slip Stitch
FO – Fasten Off
🥚 Easter Egg Body
Worked in continuous rounds. Use stitch marker to keep track. Change colors every 5 rounds in the following sequence: A (Blue), B (Lilac), C (Yellow), B (Lilac), A (Blue), B (Lilac), and A (Blue)
Start with Color A (Sky Blue):
-
MR, 6 sc (6)
-
inc x6 (12)
-
(1 sc, inc) x6 (18)
-
(2 sc, inc) x6 (24)
-
(3 sc, inc) x6 (30)
-
(4 sc, inc) x6 (36)
-
(5 sc, inc) x6 (42)
-
(6 sc, inc) x6 (48)
-
(7 sc, inc) x6 (54)
10–30. sc around (54) – Change color every 5 rounds
Start Decreasing:
31. (7 sc, dec) x6 (48)
32. (6 sc, dec) x6 (42)
33. (5 sc, dec) x6 (36)
34. (4 sc, dec) x6 (30)
35. (3 sc, dec) x6 (24)
— Stuff firmly with polyfill —
36. (2 sc, dec) x6 (18)
37. (1 sc, dec) x6 (12)
38. dec x6 (6)
FO and weave yarn tail through front loops of last round to close.
✂️ Finishing Touches
-
Shape the egg gently with your hands.
-
Weave in all yarn tails neatly.
-
Optional: Add a felt bunny face, ribbon bow, or applique to personalize!
💡 Customization Ideas
-
Use pastel rainbow color stripes for a classic Easter palette
-
Add safety eyes and embroidery to turn it into a kawaii character egg
-
Crochet in cotton yarn for a firmer structure
This bright striped egg adds a happy splash of color to your Easter celebrations and works up in no time! 🌼🌸