Bring a touch of nature to your yarn stash with this charming Crochet Leaf pattern! Whether you’re crafting a seasonal garland, embellishing a cozy scarf, or adding a botanical twist to your amigurumi creations, these little leaves are the perfect accent. Their delicate shape and quick construction make them ideal for using up leftover yarn, experimenting with color, or simply enjoying a meditative moment with your hook. 🍃✨
From vibrant spring greens to rich autumn tones, each leaf can reflect the mood of the season or your own creative flair. Try pairing them with crochet flowers, stitching them into bunting, or scattering them across a table for a handmade centerpiece. With just a few stitches and a dash of imagination, this Crochet Leaf pattern brings organic beauty and endless versatility to your projects—one loop at a time! 🌿🧶💚
🍃 Crochet Leaf Pattern
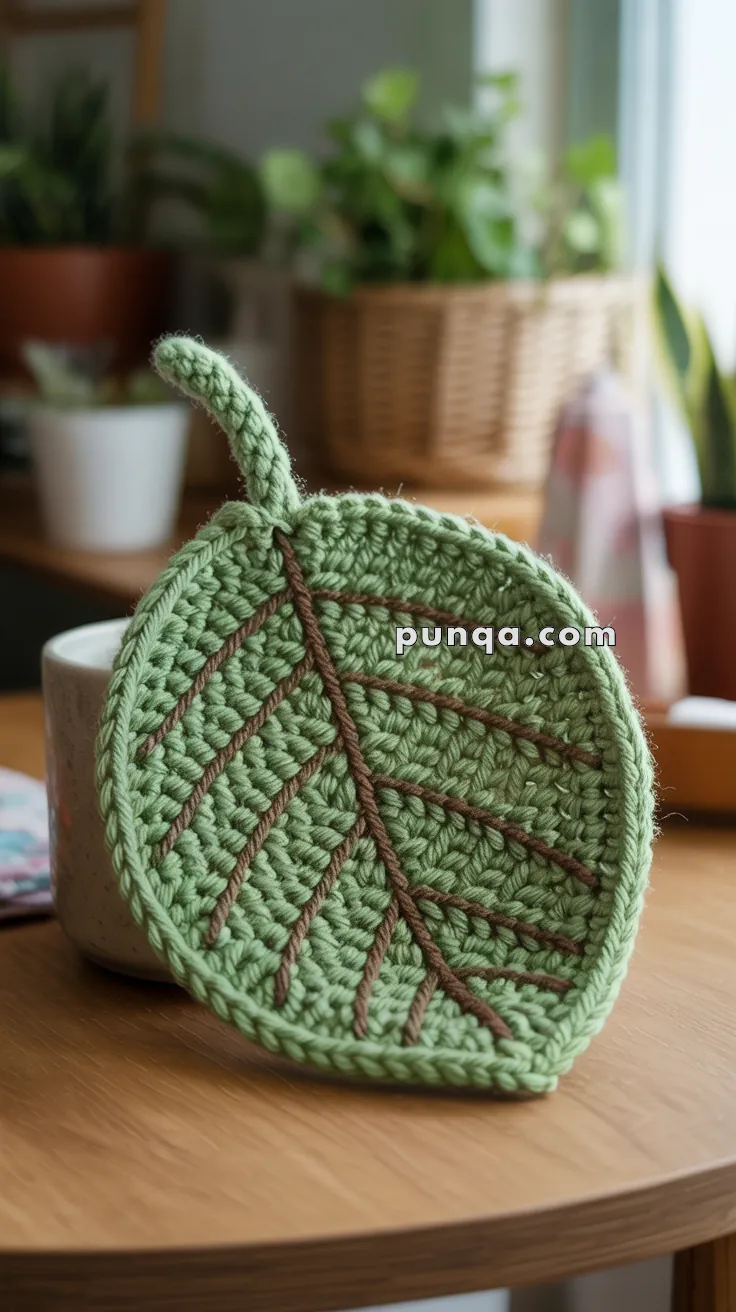
Add a touch of nature to your home with this beautiful crochet leaf potholder or coaster. With simple stitches and embroidered veins, it’s perfect for gifting or cozy kitchen decor!
✨ Skill Level
Beginner to Intermediate – Basic shaping, surface slip stitch embroidery, and simple increases.
📏 Finished Size
Approx. 5–7 inches (13–18 cm) tall when using worsted weight yarn and a 4 mm hook.
🧶 Materials
- Worsted weight yarn in:
- Green (leaf body)
- Brown (vein embroidery)
- Crochet hook: 4 mm (G/6)
- Yarn needle for embroidery
- Scissors
🧵 Abbreviations (US Terms)
ch – Chain
sc – Single Crochet
hdc – Half Double Crochet
dc – Double Crochet
tr – Treble Crochet
sl st – Slip Stitch
st(s) – Stitch(es)
FO – Fasten Off
🍃 Leaf Pattern
Using green yarn:
Ch 12
Row 1 (leaf base):
Work into the back bumps of the chain:
1 sc in 2nd ch from hook, 1 hdc in next, 2 dc, 2 tr, 2 dc, 1 hdc, 1 sc, 3 sc in last ch (tip of leaf)
Continue on the other side of the chain:
1 sc, 1 hdc, 2 dc, 2 tr, 2 dc, 1 hdc, 1 sc
Join with sl st to first sc.
Row 2 (leaf shaping):
ch 1,
1 sc, 1 hdc, 2 dc, 2 tr, 2 dc, 1 hdc, 1 sc,
[3 sc in tip]
1 sc, 1 hdc, 2 dc, 2 tr, 2 dc, 1 hdc, 1 sc
Join with sl st.
Optional Row 3 (border for extra thickness):
ch 1, sc around the leaf edge, placing 3 sc at the tip, and sl st to join.
🍂 Leaf Stem
At the top tip (where the 3 sc were made), join green yarn.
Ch 10
sl st back down the chain
sl st into base of leaf to secure
FO and weave in ends.
🍫 Embroidered Veins
Use brown yarn and a yarn needle.
- Start from the tip (bottom point) of the leaf and embroider one straight vein up the center using surface slip stitches or backstitch.
- Then stitch diagonal “branch” veins from the center out to the edges, evenly spaced on both sides.
💡 Tip: For a clean look, keep the tension relaxed and avoid pulling too tight. You may pin the lines before stitching.
🍵 Final Notes
This leaf makes a charming potholder, mug rug, or decoration. Experiment with fall colors like mustard, burgundy, or orange for seasonal flair. Pair several together as a nature-inspired set!
Enjoy bringing a little greenery to your table! 🍃