Get ready to sleigh the season with the Crochet Baby Reindeer Set, a festive and cozy ensemble that turns your little one into the star of the holiday show! 🦌🧶 This adorable set includes a reindeer hat complete with antlers and floppy ears, a button-up diaper cover with rustic wooden buttons, and matching booties topped with holly leaf bows. Whether you’re prepping for a Christmas photo shoot or crafting a heartfelt holiday gift, this set is sure to bring joy and giggles.
Perfect for crocheters who love themed baby makes and charming seasonal details, this pattern invites you to play with warm browns, snowy whites, and pops of red and green. Add a jingle bell, embroider a tiny red nose, or personalize each piece to match your holiday vibe. The Crochet Baby Reindeer Set is a delightful way to stitch up snuggles, smiles, and a whole lot of festive magic—one merry loop at a time! 🎄🧵
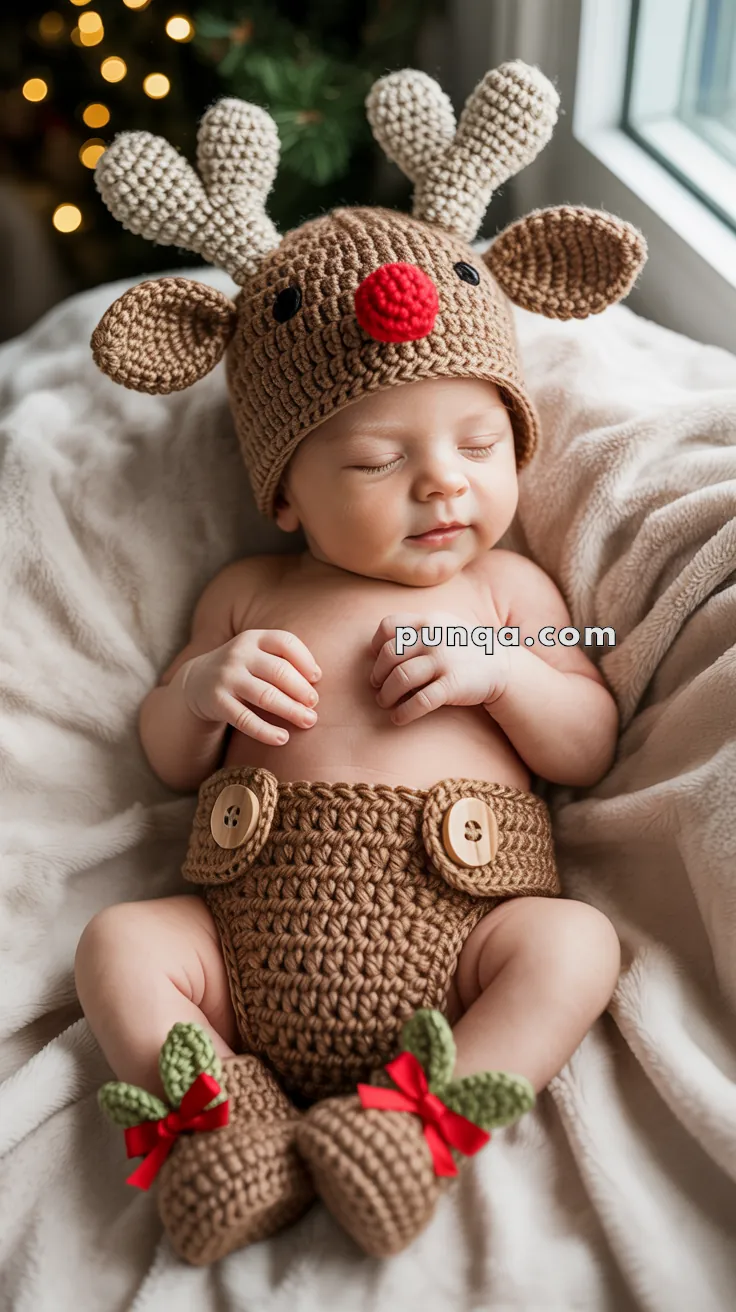
🦌 Crochet Baby Reindeer Set (Hat, Diaper Cover & Booties)
Create the sweetest holiday photo outfit with this cozy baby reindeer set. The hat features soft forked antlers, rounded ears, and a Rudolph nose, paired with a ribbed diaper cover and holly-trimmed booties for a festive newborn look.
✨ Skill Level
Intermediate – includes working in the round, shaping, stuffing, BLO texture, and assembly.
📏 Finished Size
Fits newborn–3 months
- Hat circumference: 14–15 in (36–38 cm)
- Diaper cover: 16–17 in (41–43 cm) waist when buttoned
- Booties: 3.5 in (9 cm) sole length
🧶 Materials
Worsted weight yarn (#4):
- Light brown – main color
- Beige/cream – antlers & ear lining
- Red – nose & bootie bows
- Green – holly leaves
- Black – eyes
Other:
- 4.0 mm hook
- Fiberfill
- 2 large wooden buttons (1–1.5 in)
- Yarn needle
- Scissors
- Stitch markers
🧵 Abbreviations
MR – magic ring
sc – single crochet
hdc – half double crochet
dc – double crochet
inc – increase
dec – decrease / sc2tog
sl st – slip stitch
ch – chain
BLO – back loop only
FO – fasten off
🎩 Reindeer Hat
Hat Base (Light Brown)
Round 1: MR, 6 sc
Round 2: inc × 6 (12)
Round 3: (sc, inc) × 6 (18)
Round 4: (2 sc, inc) × 6 (24)
Round 5: (3 sc, inc) × 6 (30)
Round 6: (4 sc, inc) × 6 (36)
Round 7: (5 sc, inc) × 6 (42)
Round 8: (6 sc, inc) × 6 (48)
Rounds 9–20: sc around (48)
FO and weave in ends.
🦌 Y-Shaped Antlers (Make 2 – Beige)
Main Stem
Round 1: MR, 6 sc
Round 2: inc × 6 (12)
Rounds 3–10: sc around (12)
Stuff lightly.
Forked Branches (2 tips)
Flatten stem. Work into front 6 stitches only:
Rounds 1–5: sc around (6), FO.
Attach yarn to back 6 stitches:
Rounds 1–5: sc around (6), FO.
Lightly stuff. Shape into a soft Y-fork.
👂 Ears (Make 2)
Outer Ear (Light Brown)
Round 1: MR, 6 sc
Round 2: inc × 6 (12)
Round 3: (sc, inc) × 6 (18)
Rounds 4–6: sc around (18)
FO.
Inner Ear (Beige)
Round 1: MR, 6 sc
Round 2: inc × 6 (12)
Round 3: sc around (12)
FO.
Layer inner ear onto outer ear, stitch lightly, flatten, and fold slightly at the base.
🔴 Nose (Red)
Round 1: MR, 6 sc
Round 2: inc × 6 (12)
Round 3: sc around (12)
Round 4: (sc, dec) × 4 (8)
Stuff lightly.
Round 5: dec × 4 (4)
FO and close.
👁 Eyes (Black – Make 2)
Round 1: MR, 6 sc
FO and sew above the nose.
🧵 Hat Assembly
- Sew antlers toward the top-back of the hat, not directly on the crown.
- Angle them slightly backward, matching the reindeer silhouette from the photo.
- Attach ears at mid-hat height, pointing outward and slightly back.
- Sew nose in front center.
- Sew eyes above the nose.
👶 Ribbed Diaper Cover (hdc BLO)
This piece is worked entirely in hdc BLO to create the vertical ribbing texture.
Main Panel
Ch 16
Row 1: hdc in 2nd ch and across (15)
Rows 2–10: ch 1, turn, hdc BLO across (15)
Increase Rows
Rows 11–28:
- ch 1, turn
- inc in first st, hdc BLO across, inc in last st
Continue until panel is 34–36 sts wide.
Hip Area (Work Even)
Rows 29–38: hdc BLO across (34–36 sts)
Front Taper
Rows 39–44:
- ch 1, turn
- dec in first st, hdc BLO across, dec in last st
Continue until you reach 16–18 sts.
FO.
Side Flaps (Make 2)
Attach yarn to upper edge.
Row 1: ch 1, hdc BLO 10–12 sts
Rows 2–6: ch 1, turn, hdc BLO across
FO.
Button Placement
Sew buttons to hip level, the widest point of the cover (NOT the waistband).
🧦 Booties with Ribbed Texture
The entire bootie is worked in hdc BLO to match the diaper cover texture.
Sole (Make 2 – Light Brown)
Ch 10
Round 1: sc in 2nd ch, sc 7, 3 sc in last ch; sc 7 along other side, inc (20)
Round 2: inc × 2, sc 7, inc × 3, sc 7, inc (26)
Round 3: sc around (26)
Upper Bootie (hdc BLO)
Rounds 4–7: hdc BLO around (26)
Toe Section
Round 8: (2 hdc, dec) × 6 (18)
Round 9: hdc BLO around (18)
Round 10: (hdc, dec) × 6 (12)
Round 11: dec × 6 (6)
FO and close.
🌿 Holly Leaves (Make 4 – Green)
Ch 6
In 2nd ch from hook: sl st, sc, hdc, dc, sc
FO.
🎀 Bows (Make 2 – Red)
Ch 24
Tie into a bow and wrap center with yarn.
Attach
Sew 2 holly leaves + 1 bow to each bootie.
🎉 Final Look
Your baby reindeer set is complete! With ribbed textures, soft forked antlers, holly-trimmed booties, and a cozy holiday palette, this set is perfect for newborn photography and festive gifting.