Welcome to the adventurous world of One Piece amigurumi! ⚔️✨ Today, I’m excited to share my free crochet pattern for Amigurumi Zoro—a fierce yet huggable version of the legendary swordsman we all know and love! Whether you’re a Straw Hat Pirates fan, love crafting anime characters, or simply want to add some swashbuckling charm to your collection, this pattern will guide you through stitching your own three-sword-wielding warrior with his iconic green hair and bandana! 💚
This design captures Zoro’s tough yet endearing spirit with carefully shaped details, from his scowling expression to his layered outfit and signature haramaki belt. The pattern includes step-by-step instructions for his three swords (perfect for tucked or battle-ready poses!), as well as tips for achieving his signature moss-green hair color. Whether you display him on your shelf or let him “train” with your other amigurumi, this little Roronoa will bring some serious pirate energy to your crochet creations!
So grab your hooks, choose your shades of green and black, and let’s crochet a swordsman who never gets lost in cuteness! 🌊🏴☠️
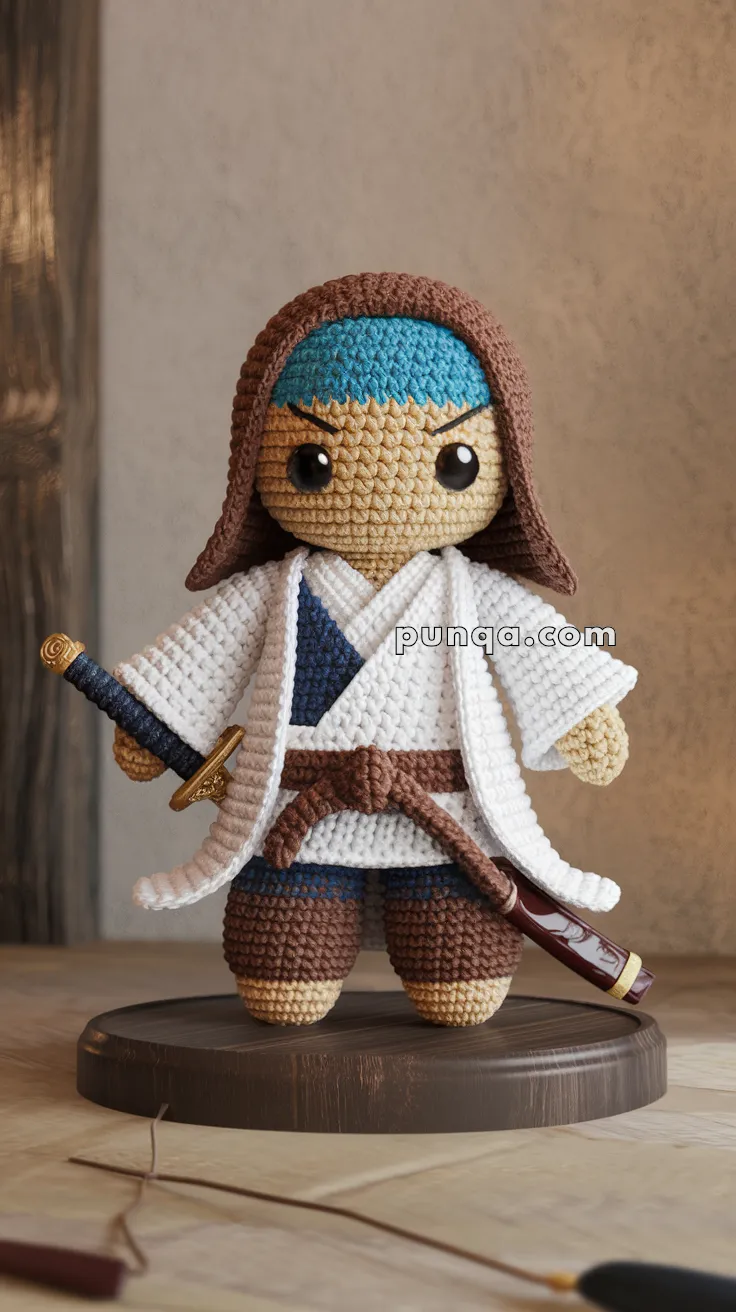
🗡️ Amigurumi Zoro Crochet Pattern
Crochet your own mini warrior in full samurai attire with a fierce stance and katana sword. Perfect for fans of heroic swordsmen and amigurumi collectors!
🧶 Skill Level
Intermediate – Includes color changes, clothing details, and accessory assembly.
📏 Finished Size
Approximately 22–25 cm (9–10 in) tall with worsted-weight yarn and a 2.5–3.0 mm hook.
✂️ Materials Needed
-
Worsted weight yarn (cotton or acrylic):
-
Skin tone (face, hands, feet)
-
Brown (pants, belt, hood)
-
Blue (headband, inner shirt)
-
White (robe)
-
Black or dark brown (katana handle)
-
Gold/yellow (katana guard)
-
-
Crochet hook: 2.5–3.0 mm
-
Safety eyes: 8 mm
-
Fiberfill stuffing
-
Yarn needle, stitch marker, scissors
-
Optional: Felt and glue for sword sheath
🔁 Abbreviations (US Terms)
-
MR – Magic Ring
-
sc – Single Crochet
-
inc – Increase
-
dec – Decrease
-
BLO – Back Loop Only
-
FLO – Front Loop Only
-
ch – Chain
-
sl st – Slip Stitch
-
FO – Fasten Off
🧵 Pattern Instructions
🔸 Head (Skin Tone)
-
MR, 6 sc
-
inc x6 (12)
-
(sc, inc) x6 (18)
-
(2 sc, inc) x6 (24)
-
(3 sc, inc) x6 (30)
-
(4 sc, inc) x6 (36)
7–14. sc around (36) -
(4 sc, dec) x6 (30)
-
(3 sc, dec) x6 (24)
-
(2 sc, dec) x6 (18)
-
(sc, dec) x6 (12)
-
dec x6 (6)
FO and stuff firmly.
👀 Eyes & Eyebrows
-
Insert safety eyes between R10–11, 7 stitches apart.
-
Use black yarn or thread to embroider bold angled brows above the eyes.
🎯 Headband (Blue)
With blue yarn:
-
MR, 6 sc
-
Work flat: ch 1, turn, sc in each stitch across for 5 rows
-
Wrap around top of head and sew in place. (Or crochet 2 rows of sc around R4–R6)
🧍 Body (Start with Pants – Brown)
-
MR, 6 sc
-
inc x6 (12)
-
(sc, inc) x6 (18)
-
(2 sc, inc) x6 (24)
5–6. sc around -
Switch to blue (inner shirt), sc around
8–14. sc around (24) -
(2 sc, dec) x6 (18)
-
(sc, dec) x6 (12)
Stuff and FO.
🦵 Legs (Make 2 – Brown + Skin Tone for Feet)
-
MR, 6 sc
-
inc x6 (12)
3–5. sc around -
Switch to skin tone, sc around
7–8. sc around
Stuff, FO. Sew to bottom of body.
💪 Arms (Make 2 – Skin Tone to Robe White)
-
MR, 6 sc
-
(sc, inc) x3 (9)
-
sc around
-
Switch to white, sc around
5–8. sc around
Stuff lightly and sew to body sides.
🥋 Robe (White – Worked Flat)
Back Panel:
-
ch 12
-
sc across for 12 rows
FO.
Front Panels (Make 2):
-
ch 6
-
sc across for 12 rows
FO.
Assembly:
-
Sew panels together at shoulders
-
Attach to body and sew sides
-
Fold front panels diagonally for “cross-wrap” look
🪢 Belt (Brown)
-
ch ~40
-
sc across
-
Wrap around waist and tie at side with visible knot
-
Use extra strands to form hanging ends
🧥 Hood (Brown)
-
ch 22, sl st to form a loop
-
R1–5: sc around
-
FO and shape to fit head, sew behind headband
⚔️ Katana Sword (Black + Gold)
Handle (Black):
-
MR, 6 sc
-
sc in rounds for 6 rows
FO.
Guard (Gold):
-
ch 4, join to ring
-
sc around 2 rounds
Slide onto handle.
Blade:
Optional – You can use gray felt, foam, or yarn-covered wire. Insert into hand or secure to belt with yarn loop.
🧷 Finishing Touches
-
Sew head to body
-
Attach arms and legs securely
-
Add katana and hood details
-
Optional: add fabric sword sheath
🥋 You’re Done!
Now your crocheted warrior stands ready to defend honor and tradition with style. Perfect for gifting or display!