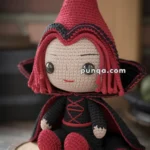
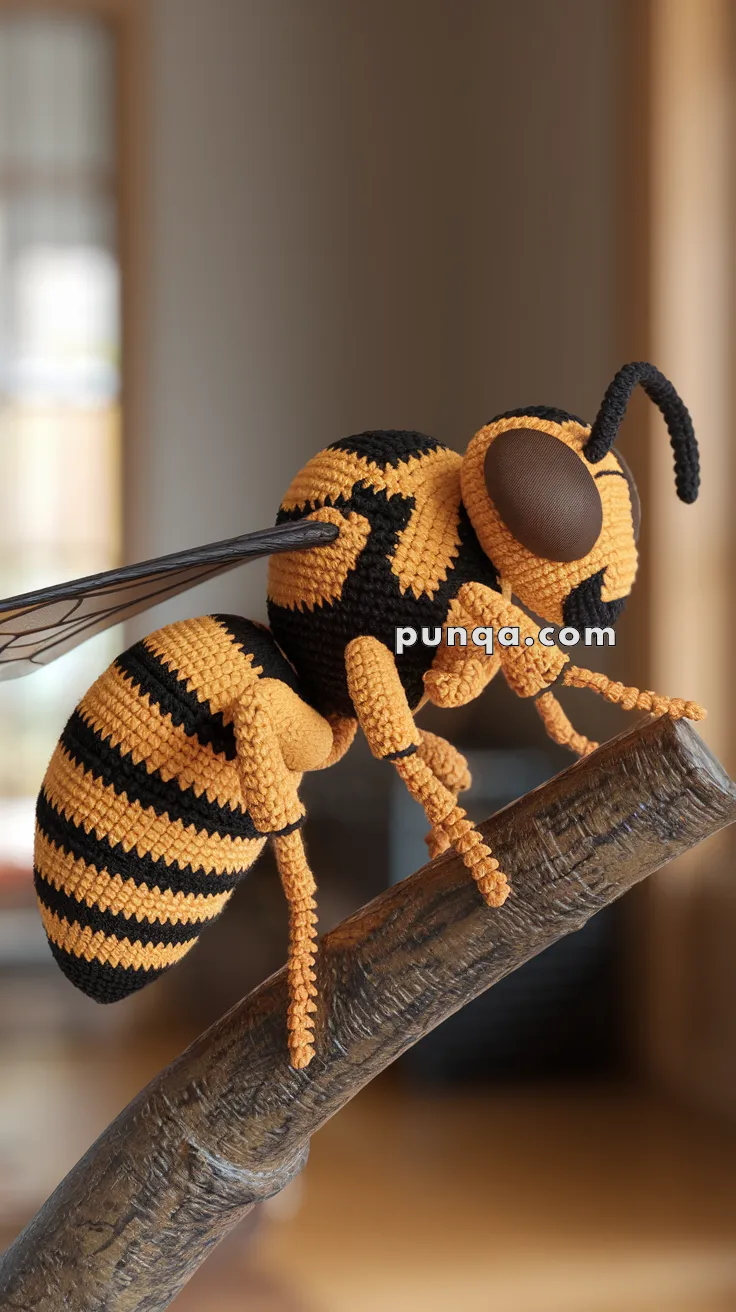
Buzz into bold creativity with the Amigurumi Wasp, a striking crochet creation that’s full of personality and flair! 🐝🧶 With its sleek black and yellow body, detailed wings, and confident stance, this little insect is ready to make a statement in your handmade collection. Whether you’re crafting for a nature lover, building a bug-themed display, or just enjoy quirky designs, this wasp brings a fun and fearless vibe to your crochet lineup.
Perfect for crocheters who love sculpted shapes and expressive details, this pattern invites you to stitch up a creature that’s both eye-catching and full of charm. Add a tiny flower, pair it with bees and butterflies, or create a whole garden scene buzzing with life. The Amigurumi Wasp is a joyful way to stitch up energy, uniqueness, and a sprinkle of handmade magic—one loop at a time! 🧵✨🌼
🐝 Realistic Amigurumi Wasp Crochet Pattern
Bring the fascinating anatomy of a wasp to life with this advanced crochet project! Featuring articulated legs, a tapered abdomen, elongated head, and upright translucent wings, this amigurumi captures every detail of the real insect while keeping a handmade charm. It’s a perfect challenge for intermediate and advanced crocheters who love precision and realism.
✨ Skill Level
Intermediate to Advanced — includes color changes, shaping, segmented construction, and realistic assembly.
📏 Finished Size
Approx. 20–22 cm (8–9 inches) long when posed on a branch
Using DK or light worsted yarn with a 3.0 mm hook.
🧶 Materials
Yarn (DK or light worsted):
-
Golden Yellow – body and legs
-
Black – stripes, head markings, antennae
-
Dark Brown – compound eyes
Other supplies:
-
3.0 mm crochet hook
-
Polyester fiberfill
-
Sheer organza or mesh fabric (wings)
-
Black embroidery thread (wing veins)
-
Optional thin craft wire (for legs)
-
Fabric glue or hot glue
-
Yarn needle, scissors
-
Stitch marker
🧵 Abbreviations (US)
MR – magic ring
sc – single crochet
inc – increase
dec – invisible decrease
ch – chain
sl st – slip stitch
FO – fasten off
🧠 Head (Golden Yellow + Black)
The head is large, oval, and slightly elongated — matching the plush exactly.
R1: MR 6 (6)
R2: inc x6 (12)
R3: (sc, inc) x6 (18)
R4: (2 sc, inc) x6 (24)
R5: (3 sc, inc) x6 (30)
R6: (4 sc, inc) x6 (36)
R7–R10: sc around (36)
Switch to black for top markings:
R11–R12: sc around (36)
R13: (4 sc, dec) x6 (30)
R14: (3 sc, dec) x6 (24)
R15: (2 sc, dec) x6 (18)
Stuff firmly into a rounded oval.
R16: (sc, dec) x6 (12)
R17: dec x6 (6)
FO and close.
👁 Compound Eyes (Make 2 – Dark Brown)
Large flat oval eyes exactly like the photo.
R1: MR 6
R2: inc x6 (12)
R3: (sc, inc) x6 (18)
R4: (2 sc, inc) x6 (24)
R5–R6: sc around (24)
Lightly stuff and flatten slightly.
Sew close together on the front sides of the head.
🐜 Antennae (Make 2 – Black)
R1: MR 5
R2–R16: sc around (5)
FO.
Curve forward and sew high on the head.
🫀 Thorax (Yellow + Black Band)
Short and round, slightly smaller than the head.
R1: MR 6
R2: inc x6 (12)
R3: (sc, inc) x6 (18)
R4: (2 sc, inc) x6 (24)
R5: (3 sc, inc) x6 (30)
R6–R7: yellow sc (30)
R8–R9: black sc (30)
R10–R11: yellow sc (30)
R12: (3 sc, dec) x6 (24)
R13: (2 sc, dec) x6 (18)
Stuff firmly.
FO and close.
🍯 Abdomen (Striped, Thick, Tapered)
Fat rounded abdomen with bold black rings and pointed end.
R1: MR 6
R2: inc x6 (12)
R3: (sc, inc) x6 (18)
R4: (2 sc, inc) x6 (24)
R5: (3 sc, inc) x6 (30)
R6: (4 sc, inc) x6 (36)
Stripe pattern:
R7–8: Yellow
R9–10: Black
R11–12: Yellow
R13–14: Black
R15–16: Yellow
R17–18: Black
R19–20: Yellow
R21–22: Black
R23–24: Yellow
Taper:
R25: (4 sc, dec) x6 (30)
R26: (3 sc, dec) x6 (24)
R27: (2 sc, dec) x6 (18)
R28: (sc, dec) x6 (12)
R29: dec x6 (6)
Stuff firmly as you go.
FO and close.
🦵 Segmented Legs (Make 6 – Yellow)
Long thin legs with clear joints and realistic proportions.
Upper Segment
R1: MR 6
R2–R12: sc around (6)
Lower Segment
R1: MR 5
R2–R10: sc around (5)
Foot
R1: MR 4
R2–R6: sc around (4)
Join segments end-to-end.
Insert thin wire if poseable legs are desired.
Attach 3 legs per side of thorax.
🪽 Wings (2 pieces)
Cut two long teardrop shapes from sheer organza (8–9 cm).
Embroider black vein lines across wings.
Glue or sew upright into the top seam of the thorax, angled backward.
🧩 Assembly
-
Sew head to thorax
-
Sew abdomen to thorax
-
Attach eyes and antennae
-
Insert wings upright
-
Attach six legs in natural stance
-
Curve legs to grip a branch
💛 Final Thoughts
This realistic amigurumi wasp combines the precision of scientific accuracy with the warmth of handmade art. Its tapered abdomen, upright wings, and jointed legs make it a true showpiece for crochet naturalists. Whether displayed on a branch or added to a nature-themed collection, this buzzing masterpiece will command attention wherever it lands.