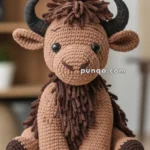
Making a warthog amigurumi is a fantastic project that’s both charming and rewarding. 🐗✨ The process is like crafting a little friend, stitch by stitch, where every loop of yarn brings this quirky animal to life. Plus, warthogs have such unique and expressive features that they’re perfect for showcasing creativity and a bit of whimsy. From their bristly little snouts to the curly tails, every detail is a chance to add personality and fun to your creation.
Jumping into making a warthog amigurumi pattern is an adventure that blends creativity with a touch of patience. First, I gather my materials: soft yarn in earthy tones, a trusty crochet hook, and a pair of safety eyes that will give my warthog that gentle, endearing gaze. 🧶👀 The beauty of amigurumi is in the shaping, starting from the roly-poly body and working through each distinctive feature. I enjoy experimenting with different techniques to capture the warthog’s playful essence—whether it’s crafting the little tusks or ensuring its snout has just the right curve. It’s an incredibly satisfying journey, and in the end, I’m left with not just a delightful toy but a handmade keepsake filled with love and personality.
🐗 Amigurumi Warthog Crochet Pattern
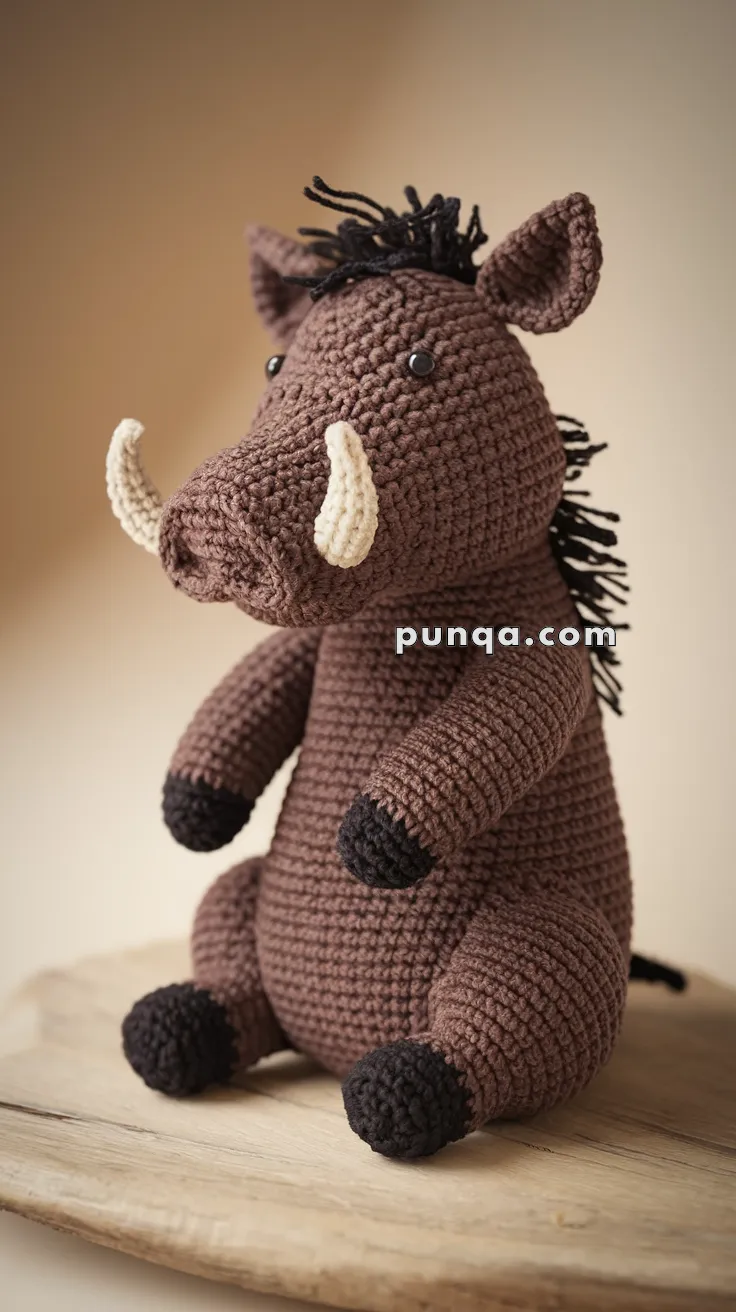
Meet this charming little warthog, sitting proudly with chunky hooves, a big rounded snout, curved ivory tusks, floppy ears, and a playful spiky mane running from head to back. With its plump belly, short limbs, and expressive face, this amigurumi perfectly matches the warm, rustic look of the warthog in the photo and makes a wonderful handmade companion for animal lovers and collectors alike.
✨ Skill Level
Intermediate
Includes shaping, multi-part assembly, mane detailing, and tusk construction.
📏 Finished Size
Approx. 25–27 cm (10–10.5 inches) tall when seated
(using worsted-weight yarn and a 3.5 mm hook)
🧶 Materials & Yarn
Yarn (Worsted Weight):
-
Dark Brown – main body, head, arms, legs
-
Black – hooves, mane, tail tip
-
Cream / Ivory – tusks
Other Supplies:
-
3.5 mm crochet hook
-
10 mm safety eyes
-
Polyester fiberfill
-
Yarn needle
-
Stitch marker
-
Scissors
🧵 Abbreviations (US Terms)
MR – Magic Ring
sc – Single Crochet
inc – Increase
dec – Decrease
ch – Chain
sl st – Slip Stitch
FO – Fasten Off
🐗 Head (Tall Shape)
With dark brown yarn:
R1: MR 6
R2: inc ×6 → 12
R3: (1 sc, inc) ×6 → 18
R4: (2 sc, inc) ×6 → 24
R5: (3 sc, inc) ×6 → 30
R6: (4 sc, inc) ×6 → 36
R7–13: sc around (36)
Insert eyes between R9–10, spaced 9 sts apart.
R14: (4 sc, dec) ×6 → 30
R15: (3 sc, dec) ×6 → 24
R16: (2 sc, dec) ×6 → 18
R17: (1 sc, dec) ×6 → 12
Stuff firmly
R18: dec ×6 → 6
FO and close.
🐽 Long Snout (Signature Shape)
With dark brown yarn:
R1: MR 6
R2: inc ×6 → 12
R3: (1 sc, inc) ×6 → 18
R4: (2 sc, inc) ×6 → 24
R5–10: sc around (24)
R11: (2 sc, dec) ×6 → 18
R12–13: sc around (18)
Lightly stuff firmly so it holds shape.
FO and sew low on the face so it protrudes forward.
Embroider two nostrils.
🦷 Tusks (Large & Curved)
With ivory yarn:
R1: MR 4
R2–8: sc around (4)
Do not stuff.
Curve naturally and stitch on each side of the snout.
👂 Ears (High & Triangular)
With dark brown yarn:
R1: MR 5
R2: (1 sc, inc) ×2, 1 sc → 7
R3: (2 sc, inc) ×2, 1 sc → 9
R4–6: sc around (9)
Flatten into triangles.
Sew high on the head.
🧍 Body (Tall Barrel Shape)
With dark brown yarn:
R1: MR 6
R2: inc ×6 → 12
R3: (1 sc, inc) ×6 → 18
R4: (2 sc, inc) ×6 → 24
R5: (3 sc, inc) ×6 → 30
R6: (4 sc, inc) ×6 → 36
R7–16: sc around (36)
R17: (4 sc, dec) ×6 → 30
R18: (3 sc, dec) ×6 → 24
R19: (2 sc, dec) ×6 → 18
Stuff firmly and shape belly
R20: (1 sc, dec) ×6 → 12
R21: dec ×6 → 6
FO and close.
💪 Arms (Forward Facing)
Start with black yarn:
R1: MR 6
R2: (1 sc, inc) ×3 → 9
R3–5: sc around (9)
Switch to brown:
R6–14: sc around (9)
Stuff lightly.
Sew slightly forward on body.
🦵 Legs (Long Seated Style)
Start with black yarn:
R1: MR 6
R2: inc ×6 → 12
R3–6: sc around (12)
Switch to brown:
R7–16: sc around (12)
Stuff firmly.
Sew low and forward for seated pose.
🐾 Tail
With black yarn:
ch 10
sl st back along chain
Add small yarn tuft
Sew centered on back.
🖤 Mane (Head to Back)
Cut black yarn strands 7–8 cm long.
Attach from between ears, across head, down spine to mid-back.
Trim lightly for natural spiky texture.
🪡 Assembly
-
Sew head upright onto body
-
Attach snout first, then tusks
-
Add ears before mane
-
Attach arms slightly forward
-
Attach legs low and wide
-
Sew tail
-
Shape with hands
🌟 Finished Warthog
Your warthog now sits proudly with his tall head, bold snout, chunky hooves, and playful mane — perfectly matching the strong, cuddly proportions shown in the photo. With his warm brown color and gentle expression, he looks straight out of a cozy woodland storybook.
A wonderful companion for safari collections, nursery shelves, or heartfelt handmade gifts. 🐗🧶💛