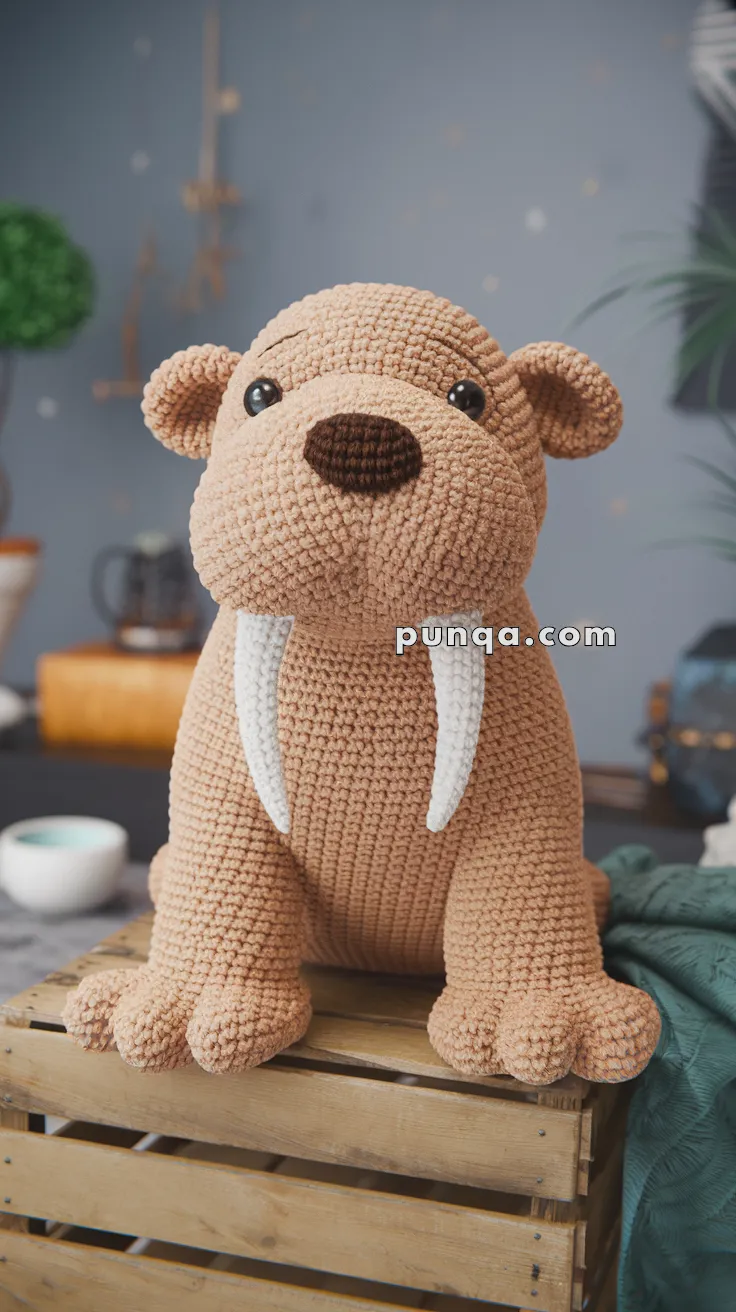
Dive into the world of adorable Arctic creatures with this Amigurumi Walrus Pup crochet pattern! With its round, cuddly body, tiny flippers, and signature tusks, this little walrus is ready to bring a splash of charm to your collection. Whether you’re crafting for ocean lovers, adding a whimsical touch to your decor, or simply enjoy making cute amigurumi designs, this pattern lets you stitch up a lovable walrus bursting with personality! Perfect for gifting, decorating, or just keeping as a cheerful companion, this crochet creation brings a touch of handmade marine magic to every stitch. 🦭✨
Designed for customization, this pattern allows you to experiment with different shades of gray, embroidered details, or even tiny accessories like a miniature fish or scarf for extra charm. Craft a classic walrus pup with soft, earthy tones, create a pastel version for a dreamy aesthetic, or even stitch up a full set of Arctic-inspired amigurumi for a delightful display! Whether gifted as a thoughtful keepsake, displayed as a charming accent, or made simply for the joy of crafting, this Amigurumi Walrus Pup is a fun and creative project—perfect for bringing a touch of handmade ocean magic to every stitch! 🧶💖✨
🦭 Amigurumi Walrus Pup Crochet Pattern
Get ready to create the ultimate cuddle buddy! This plush walrus pup features flippery paws, a squishy round snout, and iconic white tusks. Perfect for ocean animal lovers and kids alike, this huggable creature will melt hearts!
✨ Skill Level
Intermediate – Some experience with shaping and bobble stitches recommended.
📏 Finished Size
Approx. 12–14 inches (30–35 cm) tall when using chunky velvet or chenille yarn and a 4–5 mm hook.
🧶 Materials
-
Chunky velvet/chenille yarn in:
-
Main Color (light brown or beige)
-
Contrast Color (white for tusks, dark brown for nose)
-
-
Crochet hook: 4.0–5.0 mm
-
12 mm safety eyes
-
Polyester fiberfill
-
Stitch marker
-
Tapestry needle
-
Optional: pipe cleaners or yarn scraps for shaping tusks
🧵 Abbreviations (US Terms)
MR – Magic Ring
sc – Single Crochet
inc – Increase (2 sc in one stitch)
dec – Decrease (sc2tog)
bo – Bobble Stitch (4 dc bobble)
sl st – Slip Stitch
FO – Fasten Off
🦶 Front Legs with Bobble-Style Toes (Make 2)
Work in continuous rounds.
Toes (worked as one piece):
Using main color:
-
Make 3 bobble circles separately:
-
MR, 6 sc (6)
-
(1 sc, inc) x3 (9)
-
(2 sc, inc) x3 (12)
-
Round 4: sc around (12)
FO on the first two, do not FO the third.
-
-
Join:
-
Hold all 3 together. Sc around all three in sequence (36 total).
-
2 rounds: sc around (36)
-
-
Round 7: (4 sc, dec) x6 (30)
-
Round 8: (3 sc, dec) x6 (24)
-
Round 9: (2 sc, dec) x6 (18)
-
Rounds 10–18: sc around (18)
Stuff and FO, leaving long tail for sewing.
🐾 Back Legs with Toes (Make 2)
Repeat same instructions as front legs but make legs slightly shorter:
-
Only go to Round 15 instead of Round 18.
🐶 Body
-
MR, 6 sc
-
inc x6 (12)
-
(1 sc, inc) x6 (18)
-
(2 sc, inc) x6 (24)
-
(3 sc, inc) x6 (30)
-
(4 sc, inc) x6 (36)
-
(5 sc, inc) x6 (42)
8–25. sc around (42) -
(5 sc, dec) x6 (36)
-
(4 sc, dec) x6 (30)
-
(3 sc, dec) x6 (24)
-
(2 sc, dec) x6 (18)
-
(1 sc, dec) x6 (12)
Stuff firmly, FO and close.
🦷 Tusks (Make 2)
Using white yarn:
-
MR, 4 sc
2–10. sc around (4) – Optional: insert wire or pipe cleaner
FO, leave tail for sewing.
🐽 Snout
Using dark brown yarn:
-
MR, 6 sc
-
inc x6 (12)
-
(1 sc, inc) x6 (18)
4–5. sc around (18)
Stuff lightly, FO.
🧑🦱 Head
Using main color:
-
MR, 6 sc
-
inc x6 (12)
-
(1 sc, inc) x6 (18)
-
(2 sc, inc) x6 (24)
-
(3 sc, inc) x6 (30)
-
(4 sc, inc) x6 (36)
7–15. sc around (36)
Insert eyes between Rounds 10–11 with 10 stitches between. -
(4 sc, dec) x6 (30)
-
(3 sc, dec) x6 (24)
-
(2 sc, dec) x6 (18)
-
(1 sc, dec) x6 (12)
-
dec x6 (6)
Stuff well and FO.
👂 Ears (Make 2)
-
MR, 6 sc
-
(1 sc, inc) x3 (9)
3–5. sc around (9)
Flatten, FO and sew to head.
🌀 Tail
-
MR, 4 sc
2–5. sc around (4)
FO, sew to back of body.
🧷 Assembly
-
Sew legs to the body using whipstitch or mattress stitch, positioned evenly to make the walrus stable.
-
Attach the head to the top of the body with strong stitches.
-
Sew the snout slightly over the lower face, directly between the eyes.
-
Place the tusks below snout on each side.
-
Add ears to each side of the head.
-
Sew on the tail at the back base.
-
Embroider nostrils and a smile if desired.
💡 Tips for Realistic Bobble Toes
-
Use a 4-dc bobble for a more defined toe shape.
-
If using velvet yarn, don’t overstuff the toes to maintain round definition.
-
Position the toes slightly angled outward for charm.
🧸 Final Words
This chunky walrus pup is irresistibly snuggly and adds a fun marine touch to any space. With its chubby bobble toes and long tusks, it’s sure to become a favorite in your handmade animal collection!
Happy hooking! 🧶💙