Welcome to the explosive world of Dragon Ball amigurumi! 💥✨ Today, I’m excited to share my free crochet pattern for Amigurumi Vegeta—the proud Saiyan prince in all his fierce yet adorable glory! Whether you’re a devoted DBZ fan, love crafting dynamic characters, or simply want to add some “Over 9000” energy to your handmade collection, this pattern will guide you through stitching up this spiky-haired warrior with his signature scowl, battle-worn armor, and undeniable royal swagger!
This design captures Vegeta’s powerful presence through bold angles and striking details! 🧶🔥 I’ve carefully outlined each step to ensure your Saiyan prince turns out just right—complete with his iconic widow’s peak hairstyle, textured armor, and that permanent look of superiority we all love. Perfect for display, gifting, or keeping watch over your yarn stash with princely pride! So grab your hooks, pick out royal blues and vibrant oranges, and let’s stitch up a warrior who’s always ready for battle (or at least a dramatic pose)! ✨
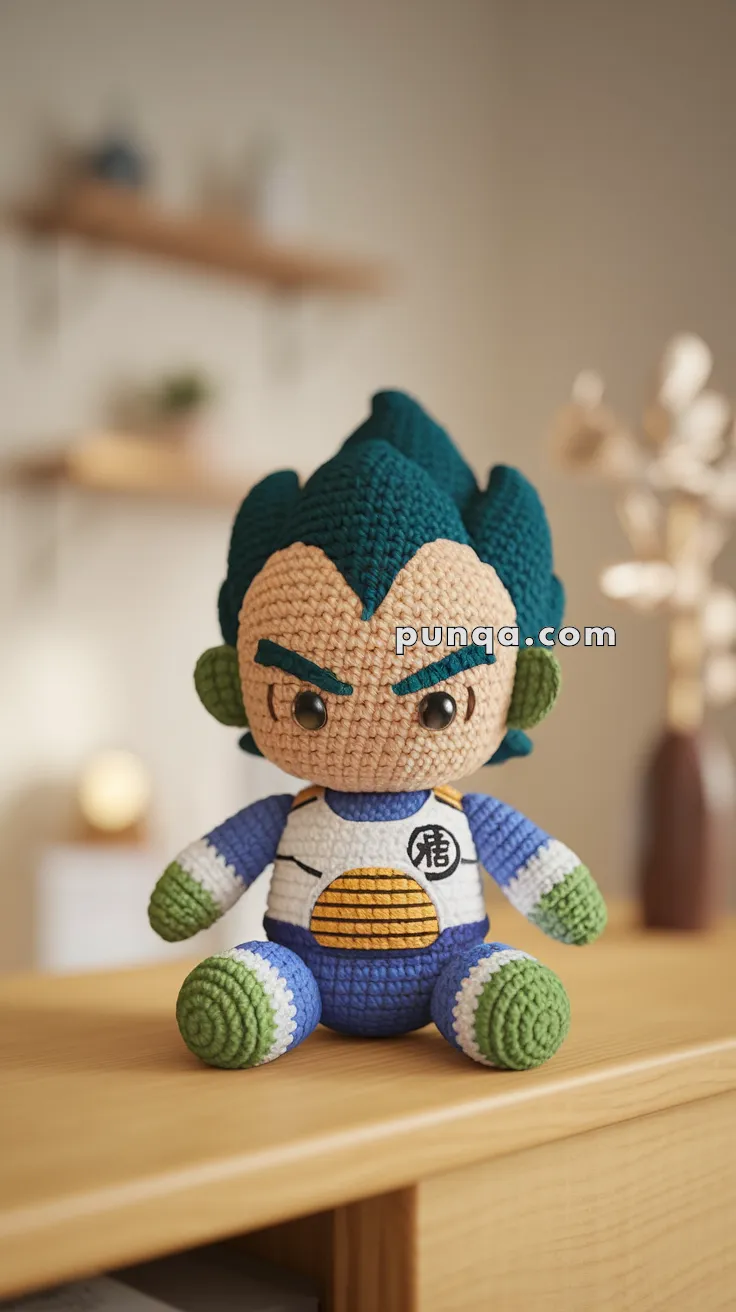
🛡️ Amigurumi Vegeta Crochet Pattern (Chibi Style)
Bring the Prince of all Saiyans to life with this chibi-style Amigurumi Vegeta! 💥 Featuring his iconic widow’s peak, stern brows, blue and white Saiyan armor, and signature spiky hair, this soft version of Vegeta is perfect for fans of Dragon Ball Z. Whether for collecting, gifting, or displaying with pride, this mighty little warrior is full of Saiyan spirit!
✨ Skill Level
Intermediate – Includes color changes, shaping, and appliqué details.
📏 Finished Size
Approximately 22–25 cm (9–10 inches) tall using worsted-weight yarn and a 3.5 mm hook.
🧶 Materials & Yarn Amounts
Yarn (Worsted Weight / 4 Medium):
-
Skin tone (head, ears): ~30 g
-
Dark teal / blue-green (hair, eyebrows): ~35 g
-
Royal blue (bodysuit): ~25 g
-
White (armor, glove bands, boot bands): ~20 g
-
Yellow / golden orange (chest plate): ~10 g
-
Green (gloves, boots): ~15 g
-
Black (symbol, mouth – embroidery only): scraps
Notions:
-
3.5 mm crochet hook
-
10–12 mm black safety eyes
-
Polyester fiberfill
-
Tapestry needle
-
Stitch marker
-
Scissors
🪡 Abbreviations (US Terms)
MR – Magic Ring
sc – single crochet
inc – increase (2 sc in one stitch)
dec – decrease (sc2tog)
sl st – slip stitch
FO – fasten off
Work in continuous rounds unless stated otherwise.
🧠 Head (Skin Tone)
R1: MR, 6 sc (6)
R2: inc ×6 (12)
R3: (sc, inc) ×6 (18)
R4: (2 sc, inc) ×6 (24)
R5: (3 sc, inc) ×6 (30)
R6: (4 sc, inc) ×6 (36)
R7–R14: sc around (36)
Insert safety eyes between R9–R10, spaced about 6 stitches apart.
R15: (4 sc, dec) ×6 (30)
R16: (3 sc, dec) ×6 (24)
Begin stuffing firmly.
R17: (2 sc, dec) ×6 (18)
R18: (sc, dec) ×6 (12)
R19: dec ×6 (6)
FO, close, shape into a smooth rounded head.
💇 Hair (Dark Teal / Blue-Green)
Hair Base Cap
This creates the solid tall hair mass seen in the photo.
R1: MR, 6 sc (6)
R2: inc ×6 (12)
R3: (sc, inc) ×6 (18)
R4: (2 sc, inc) ×6 (24)
R5: (3 sc, inc) ×6 (30)
R6–R8: sc around (30)
FO, leave long tail.
Hair Spikes (Make 5 – compact & thick)
These are short and wide, not thin cones.
R1: MR, 5 sc (5)
R2: sc around (5)
R3: (sc, inc) ×2, sc (7)
R4: sc around (7)
R5: (2 sc, inc) ×2, sc (9)
R6: sc around (9)
Stuff only the base lightly. FO.
Attach spikes vertically:
-
3 centered at the front/top
-
2 slightly angled outward at the back
Sew hair cap to head first, then sew spikes on top to form a single sculpted hair silhouette.
👂 Ears (Make 2 – Skin Tone)
R1: MR, 6 sc (6)
R2: sc around (6)
Flatten slightly, FO. Sew low on each side of head.
🧥 Body (Seated Shape)
Start with royal blue.
R1: MR, 6 sc (6)
R2: inc ×6 (12)
R3: (sc, inc) ×6 (18)
R4: (2 sc, inc) ×6 (24)
R5–R8: sc around (24)
Switch to white (armor base):
R9–R10: sc around (24)
Switch to yellow/orange for chest plate
(sc across 10 front stitches only, then switch back to white)
R11–R12: sc around (24)
R13: (2 sc, dec) ×6 (18)
Stuff firmly.
R14: (sc, dec) ×6 (12)
R15: dec ×6 (6)
FO, close. Body should be short, wide, and stable.
💪 Arms (Make 2)
Start with green (hands).
R1: MR, 6 sc (6)
R2–R3: sc around (6)
Switch to white (glove band):
R4–R5: sc around (6)
Switch to royal blue (sleeves):
R6–R10: sc around (6)
Stuff lightly only at top. FO.
Sew slightly forward on body sides.
🦵 Legs (Make 2)
Start with green (boots).
R1: MR, 6 sc (6)
R2: inc ×6 (12)
R3–R4: sc around (12)
Switch to white (boot band):
R5–R6: sc around (12)
Switch to royal blue (pants):
R7–R10: sc around (12)
Stuff firmly. Flatten base slightly.
FO and sew to front bottom of body for seated pose.
🪙 Armor Details
Chest Plate (Yellow/Orange)
Ch 7
Row 1: sc in 2nd ch and across (6)
Rows 2–5: sc across (6)
FO, sew centered on chest.
Saiyan Symbol
Using black yarn, embroider a small circular symbol on the left chest area.
😊 Facial Details
-
Eyebrows: Thick, sharply angled stitches in dark teal
-
Mouth: Short straight or slightly curved black stitch low on face
No nose is added (matches photo).
🧷 Assembly Order
-
Sew head to body securely
-
Attach arms and legs symmetrically
-
Attach ears
-
Sew hair cap, then spikes
-
Add facial embroidery and chest symbol
-
Final shaping and balance check
💡 Customization Ideas
-
Make a Super Saiyan version with gold hair
-
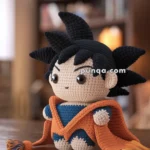
Create matching Goku for a chibi duo
-
Add a felt or crocheted scouter accessory
This chibi Vegeta will power up your amigurumi shelf with Saiyan pride and soft strength! 🧶💥