Hey there! 🌟 I’ve recently found myself utterly enchanted by the world of amigurumi, especially when it comes to creating something as mythical and exciting as a valkyrie amigurumi pattern! There’s something so delightful about transforming a simple skein of yarn into a miniature guardian from Norse mythology! 🧚♀️ The process is incredibly rewarding, allowing me to blend craftsmanship with storytelling. Each stitch feels like part of a magical incantation, breathing life into these tiny warriors who seem ready to leap into battle at any moment. The possibilities for creativity are endless, from designing intricate armor to crafting delicate wings that seem to flutter with the slightest breeze.
Getting started on a valkyrie amigurumi involves gathering some colorful yarn, a trusty crochet hook, and a sprinkle of imagination. I love diving into the design phase, sketching out what I imagine this fierce yet elegant figure to look like. Choosing the perfect color palette is akin to picking a superhero’s costume—every choice adds character and depth. And then there’s the actual crocheting, where each loop and stitch begins to form the shape of a valkyrie. ✨ It’s a joyful journey of trial and error, where the end result is not just a doll, but a miniature embodiment of strength and grace. The camaraderie among fellow crafters in sharing tips and patterns is another highlight, making this creative process as much about community as it is about personal expression. 🌈
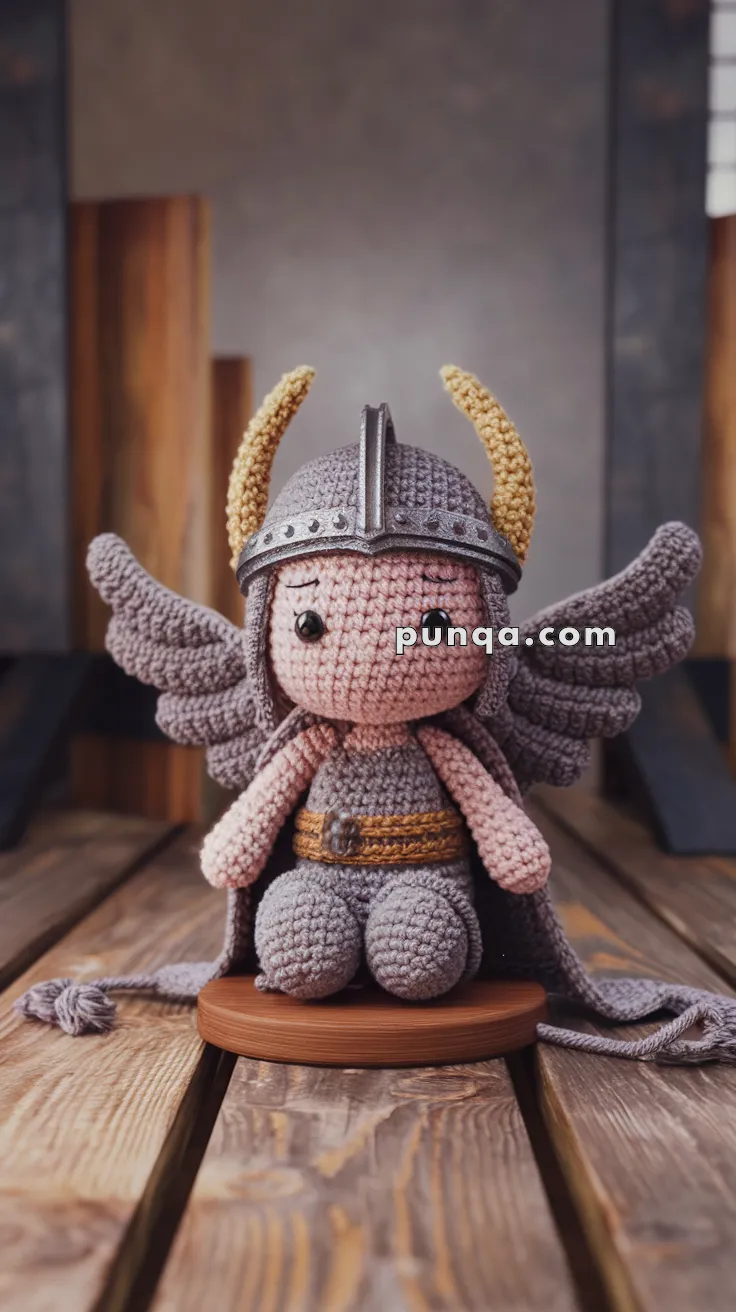
🦅 Amigurumi Valkyrie Crochet Pattern
Bring Norse mythology to life with this graceful and strong Valkyrie doll — perfect for display or play.
🧵 Skill Level: Intermediate
📏 Finished Size: ~25–28 cm (10–11 in)
🧶 Materials
-
DK or worsted weight yarn in:
-
Skin tone (head, arms, legs)
-
Steel gray (armor, helmet, shoes)
-
Dark gray or black (hair)
-
Gold or mustard (horns and belt)
-
-
2.5–3.0 mm crochet hook
-
8–10 mm safety eyes
-
Tapestry needle
-
Stitch marker
-
Polyester fiberfill
-
Thin wire (optional, for shaping wings)
-
Small brown button (for belt buckle)
✨ Abbreviations (US Terms)
-
MR – Magic Ring
-
sc – Single crochet
-
inc – Increase (2 sc in one stitch)
-
dec – Decrease (invisible preferred)
-
ch – Chain
-
sl st – Slip stitch
-
hdc – Half double crochet
-
BLO – Back loop only
-
FO – Fasten off
🧠 Head (Skin Tone)
-
MR, 6 sc
-
inc x6 = 12
-
(1 sc, inc) x6 = 18
-
(2 sc, inc) x6 = 24
-
(3 sc, inc) x6 = 30
-
(4 sc, inc) x6 = 36
7–14. sc around -
(4 sc, dec) x6 = 30
-
(3 sc, dec) x6 = 24
Insert safety eyes between R9–10, 7 sts apart -
(2 sc, dec) x6 = 18
-
(1 sc, dec) x6 = 12
Stuff head firmly -
dec x6 = 6, FO
👧 Hair Cap (Dark Gray/Black)
-
MR, 6 sc
-
inc x6 = 12
-
(1 sc, inc) x6 = 18
-
(2 sc, inc) x6 = 24
-
(3 sc, inc) x6 = 30
-
(4 sc, inc) x6 = 36
7–10. sc around
FO and sew to head
Optional: Add strands for long flowing hair using loop stitch or chained yarn sewn at the center part.
⛑️ Helmet (Steel Gray)
-
MR, 6 sc
-
inc x6 = 12
-
(1 sc, inc) x6 = 18
-
(2 sc, inc) x6 = 24
-
(3 sc, inc) x6 = 30
-
(4 sc, inc) x6 = 36
7–10. sc around
FO
Horn Trim: Surface crochet or sew thin strip over center
Horns (Gold, Make 2):
-
Ch 8
-
Row 1: Starting in 2nd ch from hook, sc 6, inc
-
FO and sew curved into horn shape
🪽 Wings (Steel Gray, Make 2)
Wing Panel:
-
Ch 9
-
sc in 2nd ch from hook, sc across (8)
3–4. Turn, ch 1, dec, sc across -
Repeat until you have 1 st
FO
Make 2 panels per wing and sew together. Add optional wire to shape. Attach to back of body or cape.
🧍 Body (Steel Gray + Skin)
-
MR, 6 sc
-
inc x6 = 12
-
(1 sc, inc) x6 = 18
-
(2 sc, inc) x6 = 24
-
sc around for 4 rounds
Switch to skin tone
6–10. sc around
Stuff
FO
Belt (Gold):
Ch 22, sc across, wrap around waist and stitch on tiny button
🦵 Legs (Make 2 – Steel Gray → Skin)
-
MR, 6 sc
-
inc x6 = 12
-
(1 sc, inc) x6 = 18
4–6. sc (steel gray)
7–10. sc (skin tone)
Stuff and sew to bottom of body
💪 Arms (Make 2 – Skin)
-
MR, 6 sc
-
(1 sc, inc) x3 = 9
3–9. sc
Stuff lightly
FO and sew to sides
🧣 Cape (Steel Gray)
-
Ch 24
-
sc across
3–6. Repeat
Add tassels or chain ties
Attach cape at back shoulders
✏️ Final Touches
-
Embroider brows and eyelashes with brown or black thread
-
Add armor “texture” using surface slip stitch or light embroidery
-
Sew wings firmly at mid-back level