✨ Skill Level
Intermediate – shaping, joining legs, layered mane construction, facial placement, and assembly.
📏 Finished Size
Approx. 26–28 cm (10–11 inches) tall using DK yarn and a 2.75–3.25 mm hook.
🧶 Materials
Yarn (DK or light worsted):
-
Lavender / light purple (body, head, legs, ears)
-
Dark blue (mane & tail)
-
Magenta pink (mane & tail)
-
Purple (mane & tail)
-
Light pink (horn)
-
Tan / brown (horn band)
Tools & Notions:
-
2.75–3.25 mm crochet hook
-
18–20 mm cartoon safety eyes or felt eyes
-
Black embroidery thread (lashes, mouth)
-
White embroidery thread (eye highlights if needed)
-
Fiberfill stuffing
-
Stitch marker
-
Tapestry needle
-
Scissors
🧵 Abbreviations (US Terms)
MR – Magic Ring
sc – Single crochet
inc – Increase
dec – Decrease
sl st – Slip stitch
ch – Chain
FO – Fasten off
BLO – Back loop only
🦄 Head (Lavender)
MR 6 (6)
R2: inc x6 (12)
R3: (1 sc, inc) x6 (18)
R4: (2 sc, inc) x6 (24)
R5: (3 sc, inc) x6 (30)
R6: (4 sc, inc) x6 (36)
R7: (5 sc, inc) x6 (42)
R8–R15: sc around (42)
Insert eyes between R10–11, about 9 stitches apart.
R16: (5 sc, dec) x6 (36)
R17: (4 sc, dec) x6 (30)
R18: (3 sc, dec) x6 (24)
Stuff firmly
R19: (2 sc, dec) x6 (18)
R20: (1 sc, dec) x6 (12)
R21: dec x6 (6)
FO and close.
🐴 Body & Legs (Worked as One Piece)
Legs (Make 4)
MR 6 (6)
R2: inc x6 (12)
R3–R7: sc around (12)
FO for first 3 legs. Do not FO last leg.
Join Legs & Body
R8: sc around all 4 legs (48)
R9: sc around (48)
R10: (6 sc, dec) x6 (42)
R11: sc around (42)
R12: (5 sc, dec) x6 (36)
R13–R17: sc around (36)
R18: (4 sc, dec) x6 (30)
R19–R22: sc around (30)
Stuff body firmly
R23: (3 sc, dec) x6 (24)
R24: (2 sc, dec) x6 (18)
R25: (1 sc, dec) x6 (12)
FO and close.
👂 Ears (Make 2 – Large & Upright)
MR 6 (6)
R2: (1 sc, inc) x3 (9)
R3: (2 sc, inc) x3 (12)
R4: (3 sc, inc) x3 (15)
R5–R7: sc around (15)
Flatten slightly but keep curved shape.
FO leaving long tail for sewing.
🦴 Horn (With Tan Band)
With light pink:
MR 4 (4)
R2: (1 sc, inc) x2 (6)
R3–R5: sc around (6)
Change to tan:
R6–R7: sc around (6)
Change back to light pink:
R8–R11: sc around (6)
Lightly stuff.
FO leaving tail.
This creates the visible tan stripe seen in the photo.
💇♀️ Front Mane Bangs (Flat Panels)
Make 5 rectangular panels in this order:
Dark Blue – Purple – Dark Blue – Pink – Dark Blue
For each panel:
Ch 9
Row 1: sc in 2nd ch from hook and across (8)
Row 2–8: ch1, turn, sc across (8)
FO.
Sew panels side-by-side across the forehead under the horn, forming a flat layered fringe.
💜 Side Mane (Chunky Strands)
Make 6 long strands, alternating colors:
Dark Blue / Pink / Purple
Each strand:
Ch 30
sc in each chain
FO.
Fold strands in half and sew to right side of head only, forming the thick side-swept mane seen in the photo.
🌈 Tail (Striped & Thick)
Make 5 long strands:
Each strand:
Ch 35
sc in each chain
FO.
Group strands together and sew firmly to back of body.
👁 Eyes & Facial Details
-
Use large cartoon safety eyes or felt eyes.
-
Embroider black eyelashes above eyes.
-
Add tiny curved stitched mouth centered below eyes.
-
Optional tiny nose stitch (short vertical line).
🧵 Assembly
-
Sew head to body securely.
-
Attach ears high and wide on top sides of head.
-
Attach horn centered on top of head.
-
Sew front mane panels below horn.
-
Add side mane to right side.
-
Attach tail to back.
-
Embroider face details last.
✂️ Finishing Touches
-
Shape mane and tail with fingers.
-
Steam lightly if needed.
-
Optional soft blush on cheeks.
-
Optional felt cutie mark on flank.
💡 Customization Ideas
-
Add wings for alicorn version
-
Add sparkle embroidery to horn
-
Create matching Spike dragon
-
Use glossy anime-style eyes
🌟 Final Thoughts
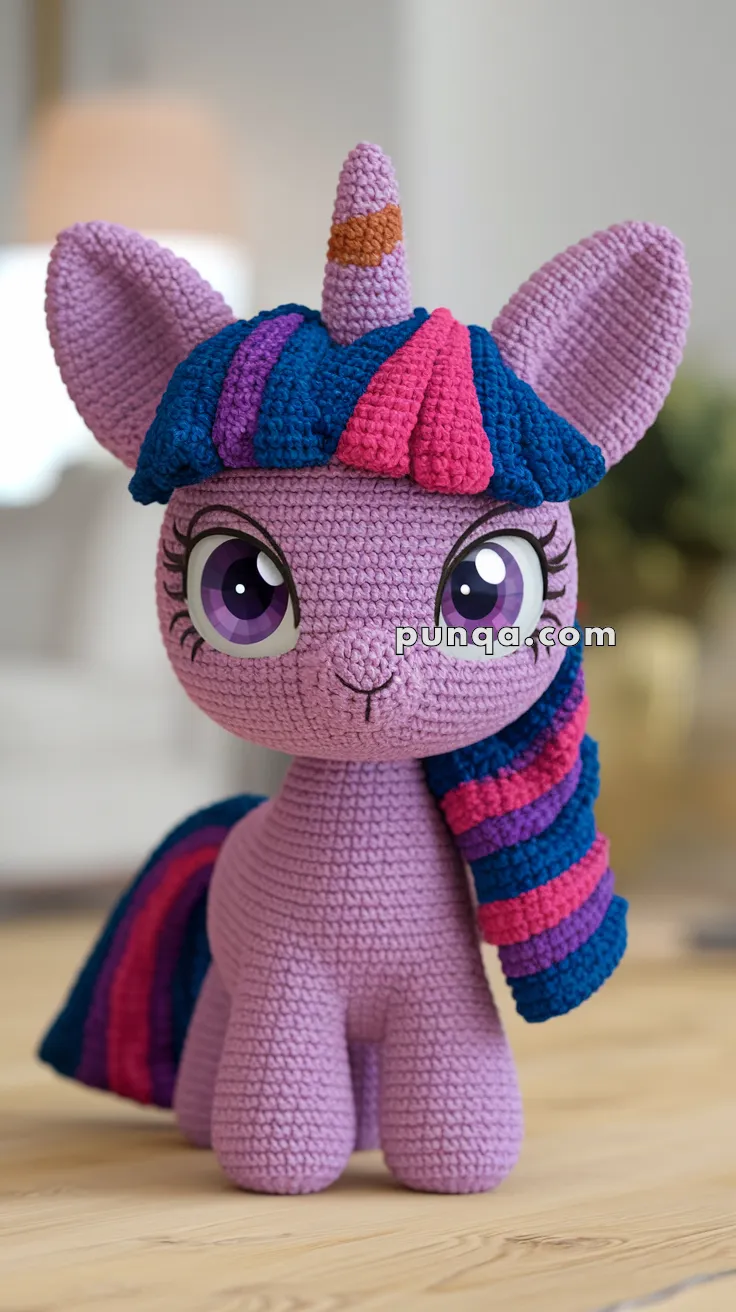
This Twilight Sparkle amigurumi pattern now matches the photo with:
✔ Large expressive eyes
✔ Flat segmented bangs
✔ Thick striped side mane
✔ Wide upright ears
✔ Correct horn band
✔ Smooth rounded body
✔ Chunky striped tail
She’s perfect for collectors, gifts, or display and truly captures Twilight’s sweet, magical personality.
Friendship really is magic when it’s handmade 🦄💜✨