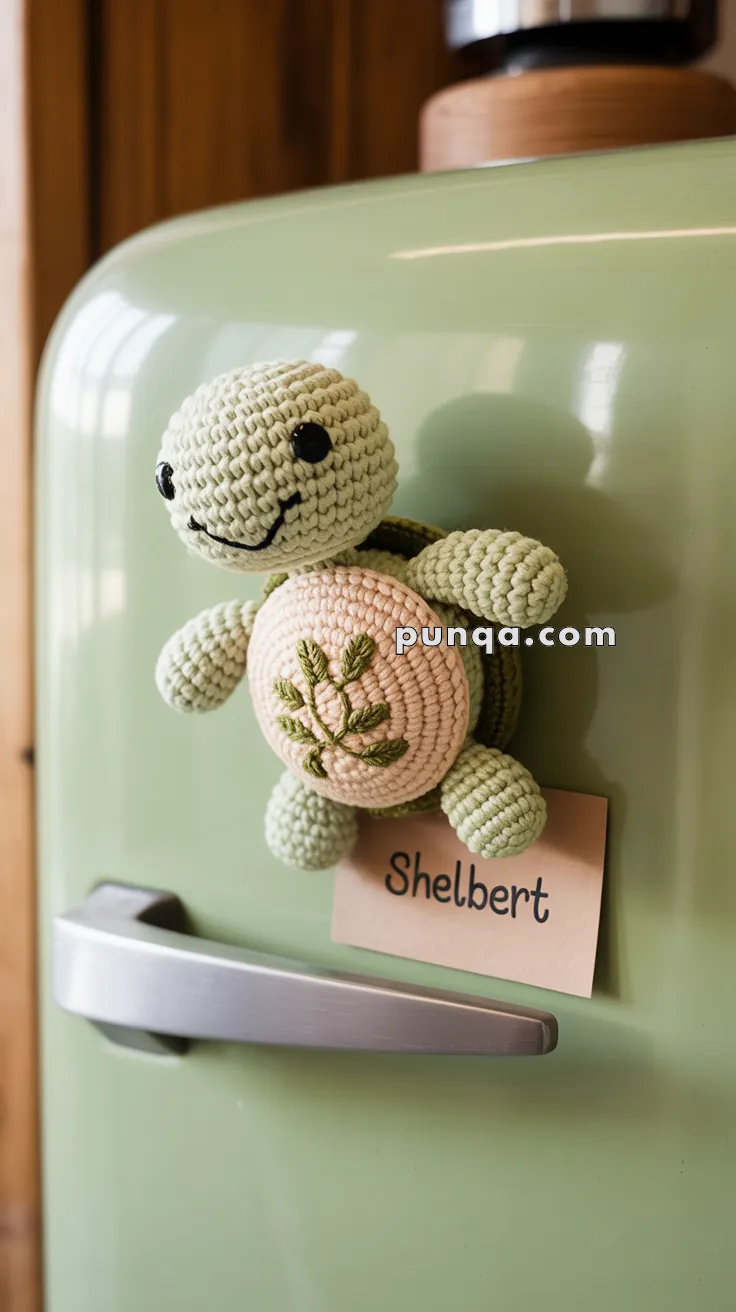
Bring a splash of ocean charm to your fridge with this Amigurumi Turtle Fridge Magnet crochet pattern! Inspired by the gentle beauty of sea turtles, this tiny design captures their round shell, adorable flippers, and sweet expression in every stitch. Whether you’re crafting for marine life lovers, adding a playful accent to your kitchen, or simply enjoy making miniature amigurumi designs, this pattern lets you stitch up a lovable turtle bursting with personality! Perfect for holding notes, photos, or simply brightening up your space, this crochet turtle magnet is both cute and functional. 🐢✨
Designed for customization, this pattern allows you to experiment with different shades of green, embroidered details, or even tiny accessories like a miniature bow or seashell for extra charm. Craft a classic turtle magnet with natural tones, create a pastel version for a dreamy aesthetic, or even stitch up a full set of ocean-inspired amigurumi for a delightful display! Whether gifted as a quirky keepsake, displayed as a charming accent, or made simply for the joy of crafting, this Amigurumi Turtle Fridge Magnet is a fun and creative project—perfect for bringing a touch of handmade marine magic to every stitch! 🧶💖✨
🐢 Amigurumi Turtle Fridge Magnet – FREE Crochet Pattern
Meet Shelbert, the leafy-shelled fridge buddy who’s here to bring smiles and keep your notes in place! This amigurumi turtle fridge magnet is soft, charming, and beginner-friendly, complete with a floral-embroidered belly and strong magnet for sticking to your fridge.
✨ Skill Level
Beginner to Intermediate – Basic shaping, embroidery, and magnet attachment involved.
📏 Finished Size
Approx. 4 inches (10 cm) long using DK weight yarn and a 2.5 mm hook.
🧶 Materials
- DK weight yarn:
- Color A: Light green (head, limbs, tail)
- Color B: Darker green or brown (back shell)
- Color C: Beige or blush (belly shell)
- Color D: Olive green (leaf embroidery)
- Crochet hook: 2.25–2.5 mm
- 6 mm safety eyes
- Tapestry needle
- Stitch marker
- Polyfill stuffing
- Strong round magnet (flat neodymium, ~1 inch diameter)
- Hot glue or craft glue
- Optional: black embroidery thread (mouth)
🧵 Abbreviations (US Terms)
MR – Magic Ring
sc – Single Crochet
inc – Increase
dec – Decrease
sl st – Slip Stitch
FO – Fasten Off
🐢 Head – Color A
- MR, 6 sc
- inc x6 (12)
- (1 sc, inc) x6 (18)
- (2 sc, inc) x6 (24)
5–8. sc around (24)
Insert safety eyes between Rounds 5–6, approx. 6 stitches apart - (2 sc, dec) x6 (18)
- (1 sc, dec) x6 (12)
Stuff head - dec x6 (6)
FO and close
Optional: Embroider a small smile below eyes using black thread.
🐢 Top Shell – Color B
- MR, 6 sc
- inc x6 (12)
- (1 sc, inc) x6 (18)
- (2 sc, inc) x6 (24)
- (3 sc, inc) x6 (30)
6–7. sc around (30)
FO, leave long tail for sewing
🐢 Belly – Color C
- MR, 6 sc
- inc x6 (12)
- (1 sc, inc) x6 (18)
- (2 sc, inc) x6 (24)
- (3 sc, inc) x6 (30)
FO, leave long tail for sewing
🪴 Leaf Embroidery (Optional)
- With Color D (olive green), stitch leaf stems using backstitch or chain stitch.
- Add small lazy-daisy stitches for leaves around center stem.
- Complete before attaching the belly.
🐾 Legs (Make 4) – Color A
- MR, 6 sc
2–3. sc around (6)
FO, lightly stuff and sew two on each side of the belly shell.
🐢 Tail – Color A
- MR, 4 sc
- sc around (4)
FO and sew to center of back side
🧲 How to Attach Magnet
- After sewing all parts, flip the belly piece so the inside of the shell is visible.
- Place the magnet flat against the center of the inside belly piece.
- Apply hot glue around the edges of the magnet and press it gently into place.
- Let dry and stitch or glue the top shell to the belly, closing around the magnet.
- Leave a small opening to adjust placement, then fully close and secure.
✅ The magnet should now be hidden inside the shell, keeping it flat and powerful enough to stick the turtle onto any fridge or metal surface.
✂️ Final Assembly
- Attach the head to the front/top edge of the shell
- Attach legs evenly around the base
- Sew on tail
- Double-check magnet holds weight properly on surface
💡 Customization Tips
- Add a name tag like “Shelbert” under the shell
- Embroider different flower or vine designs
- Use pastel shell colors for a spring version
- Add a loop to hang from keys or bags too!
Now your Amigurumi Turtle Fridge Magnet is ready to stick around and brighten your kitchen with cozy charm! 🐢🧲🌿