Brighten up your crochet collection with this Amigurumi Tulip pattern! Whether you’re crafting for floral decor, thoughtful gifts, or simply love creating charming nature-inspired amigurumi, this free pattern lets you stitch up a delightful tulip bursting with color. With its elegant petals, sturdy stem, and lifelike details, this crochet tulip is perfect for adding a touch of springtime beauty to any space. Whether displayed in a vase, gifted as a handmade bouquet, or used as a cheerful accent, this amigurumi tulip is sure to bring joy—one stitch at a time! 🌷✨
Designed for customization, this pattern allows you to experiment with different petal shades, textured stitches, or even tiny accessories like embroidered leaves or a decorative pot for extra charm. Craft a classic red tulip, create a pastel version for a soft aesthetic, or even stitch up a full bouquet in a rainbow of colors! Whether gifted to a fellow crochet enthusiast, displayed as a lovely home accent, or made simply for the joy of crafting, this Amigurumi Tulip is a bright and creative project—perfect for bringing a touch of floral elegance to every stitch! 🧶💖
🌷 Amigurumi Tulip Crochet Pattern
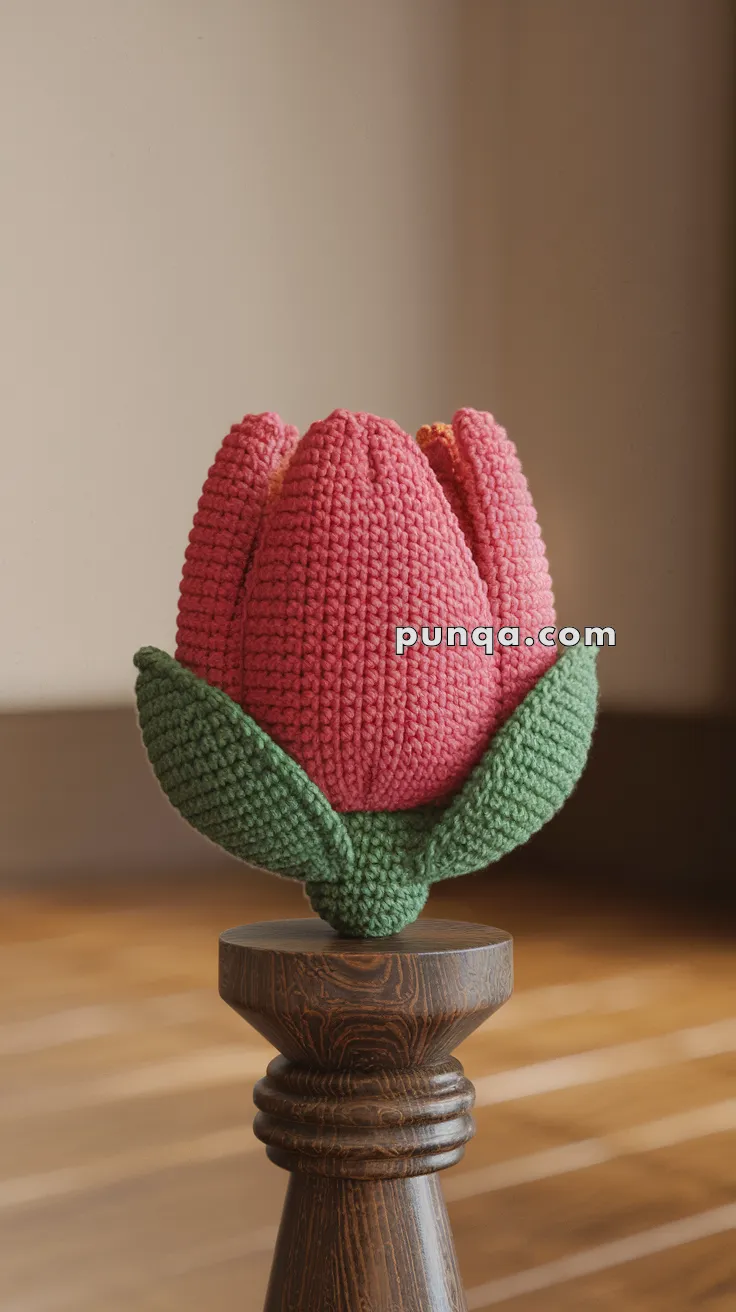
Brighten your day with this charming amigurumi tulip! With softly curved petals and a cozy cluster of green leaves, this crochet tulip is perfect as a desk ornament, spring gift, or floral arrangement that never wilts. Customize the colors to create a bouquet of your favorite blooms!
✨ Skill Level
Intermediate – includes shaping, layered assembly, and curved leaf construction.
📏 Finished Size
Approx. 15–17 cm (6–7 inches) tall using DK yarn and a 2.5–3 mm hook.
🧶 Materials
Yarn (DK or sport weight):
-
Rose pink – petals
-
Green – base and sepals
-
Small amount of yellow or orange – inner detail
Tools:
-
2.5–3 mm crochet hook
-
Polyester fiberfill stuffing
-
Tapestry needle
-
Stitch marker
-
Scissors
🧵 Abbreviations (US Terms)
MR – Magic ring
sc – single crochet
inc – increase
dec – decrease
ch – chain
sl st – slip stitch
FO – fasten off
🌸 Petals (Make 5 – Pink)
Work in continuous rounds. Stuff only the lower half so petals remain firm but flexible.
R1: MR, 6 sc (6)
R2: inc ×6 (12)
R3: (sc, inc) ×6 (18)
R4–9: sc around (18)
R10: (4 sc, inc) ×3 (21)
R11–13: sc around (21)
R14: (5 sc, dec) ×3 (18)
R15: sc around (18)
R16: (4 sc, dec) ×3 (15)
Lightly stuff the bottom half only.
R17: sc around (15)
FO. Flatten gently and shape the top into a rounded point.
Make 5 identical petals.
🌿 Green Base (Calyx)
R1: MR, 6 sc (6)
R2: inc ×6 (12)
R3: (sc, inc) ×6 (18)
R4–5: sc around (18)
R6: (1 sc, dec) ×6 (12)
Stuff lightly.
R7: dec ×6 (6)
FO and close.
This forms the compact green base seen beneath the petals.
🍃 Outer Sepals (Make 2 – Green)
These are the two large curved leaves that cup the bud.
R1: MR, 6 sc (6)
R2: inc ×6 (12)
R3: (sc, inc) ×6 (18)
R4: (2 sc, inc) ×6 (24)
R5–7: sc around (24)
R8: (2 sc, dec) ×6 (18)
R9: (sc, dec) ×6 (12)
FO, flatten and curve upward gently.
Make 2.
🌼 Inner Detail (Optional – Yellow/Orange)
Ch 6
sl st back along chain
FO
This tiny piece peeks slightly between two petals, just like in the photo.
🪡 Assembly
-
Sew the 5 petals evenly around the top edge of the green base, overlapping slightly to form a closed bud
-
Insert the yellow/orange inner detail between two petals
-
Attach the two green sepals on opposite sides of the base so they curve upward and hug the flower
-
Shape petals inward with fingers to keep the bud closed
🌟 Finishing Touches
-
Keep petals tall and close together
-
Leaves should cup the flower upward, not flare outward
-
Do not add a stem
-
Light steam shaping helps set curves
💐 Final Thoughts
This amigurumi tulip bud is a timeless decorative flower that celebrates simplicity and craftsmanship. Whether displayed alone or grouped with others, it brings warmth and elegance to any room — a flower that never fades.
Happy crocheting and enjoy creating your photo-accurate tulip! 🌷🧶