✨ Skill Level
Intermediate
Includes shaping, embroidery, clothing details, and wing support.
📏 Finished Size
Approx. 25–28 cm (10–11 inches) tall when made with DK or worsted yarn and a 2.75–3.5 mm hook.
🧶 Materials
-
Light pink yarn (skin)
-
Yellow yarn (hair)
-
Light blue yarn (top)
-
Green yarn (skirt, shoes, wings)
-
Black embroidery thread (lashes and brows)
-
10–12 mm safety eyes
-
Polyester fiberfill
-
Crochet hook 2.75–3.5 mm
-
Yarn needle, stitch marker
-
Wing support (choose one):
✂️ Abbreviations (US Terms)
MR = Magic ring
sc = single crochet
inc = increase
dec = decrease
sl st = slip stitch
ch = chain
hdc = half double crochet
dc = double crochet
FO = fasten off
FLO / BLO = front or back loop only
Work in continuous rounds unless stated otherwise.
👧 Head (Skin Color)
MR 6 (6)
inc ×6 (12)
(sc, inc) ×6 (18)
(2 sc, inc) ×6 (24)
(3 sc, inc) ×6 (30)
(4 sc, inc) ×6 (36)
Rounds 7–14: sc around (36)
Insert safety eyes between R11–12, about 7 stitches apart.
(4 sc, dec) ×6 (30)
(3 sc, dec) ×6 (24)
(2 sc, dec) ×6 (18)
Stuff firmly.
(sc, dec) ×6 (12)
dec ×6 (6)
FO and close.
👱 Hair Cap (Yellow)
MR 6
inc ×6 (12)
(sc, inc) ×6 (18)
(2 sc, inc) ×6 (24)
(3 sc, inc) ×6 (30)
Rounds 6–11: sc around (30)
FO and sew onto the head.
🌼 Hair Fringe (Yellow)
Attach yarn at the front hairline.
Ch 4, sl st into next stitch.
Repeat across the forehead to form smooth curved bangs.
🌀 Hair Bun (Yellow)
MR 6
inc ×6 (12)
(sc, inc) ×6 (18)
Rounds 4–5: sc around (18)
(sc, dec) ×6 (12)
FO, lightly stuff and sew to top of head.
Make a short blue chain and wrap around the base of the bun as a hair tie.
🧍 Body (Blue then Green)
With light blue:
MR 6
inc ×6 (12)
(sc, inc) ×6 (18)
(2 sc, inc) ×6 (24)
Rounds 5–8: sc around (24)
Switch to green:
(3 sc, inc) ×6 (30)
Round 10: BLO sc around (30)
Rounds 11–12: sc around (30)
Stuff firmly.
FO leaving a tail.
🍃 Skirt Petals (Worked in FLO of Round 10)
For each petal:
Ch 7
Sc in 2nd ch from hook
hdc, dc, dc, hdc, sc in next stitch of base
Repeat around to form pointed leaf petals.
🦵 Legs (Make 2 – Skin Color)
MR 6
inc ×6 (12)
Rounds 3–24: sc around (12)
Stuff lightly.
FO and sew under the body.
🥿 Shoes (Make 2 – Green)
MR 6
inc ×6 (12)
(sc, inc) ×6 (18)
Rounds 4–6: sc around (18)
(sc, dec) ×6 (12)
Round 8: sc around (12)
Leaf edging: (sc, ch 2, sl st) in each stitch around.
FO, stuff lightly, sew onto legs.
💪 Arms (Make 2 – Skin Color)
MR 6
(sc, inc) ×3 (9)
Rounds 3–14: sc around (9)
Do not stuff.
Flatten slightly and sew to sides of body, angled gently forward.
🧚 Wings (Make 2 – Green)
Ch 11
Sc in 2nd ch, hdc, dc, dc, tr, tr, dc, hdc, sc
Continue on the opposite side of the chain with the same stitch order.
Sl st, FO.
This creates a rounded teardrop wing shape like in the doll.
🪽 How to Keep the Wings Upright
To ensure the wings stay standing behind the shoulders:
Option 1: Wire Support (Best Method)
-
Cut thin wire to match the wing outline.
-
Sew or crochet the wing around the wire.
-
Bend slightly into a gentle curve.
-
Stitch wings firmly high on the back.
Option 2: Plastic Insert
-
Cut wing shape from thin clear plastic.
-
Slide inside wing before sewing closed.
-
Attach wings to back securely.
Option 3: Double-Layer Wings
Sew wings high on the back at shoulder level and angle slightly outward.
✏️ Face Embroidery
-
Thin curved brows
-
Long upward eyelashes
-
Small stitched nose
-
Soft smile
-
Optional blush on cheeks
🪡 Assembly
-
Sew head to body
-
Attach legs and shoes
-
Attach arms
-
Add skirt petals
-
Sew hair fringe and bun
-
Insert wing support and attach wings
-
Embroider face details
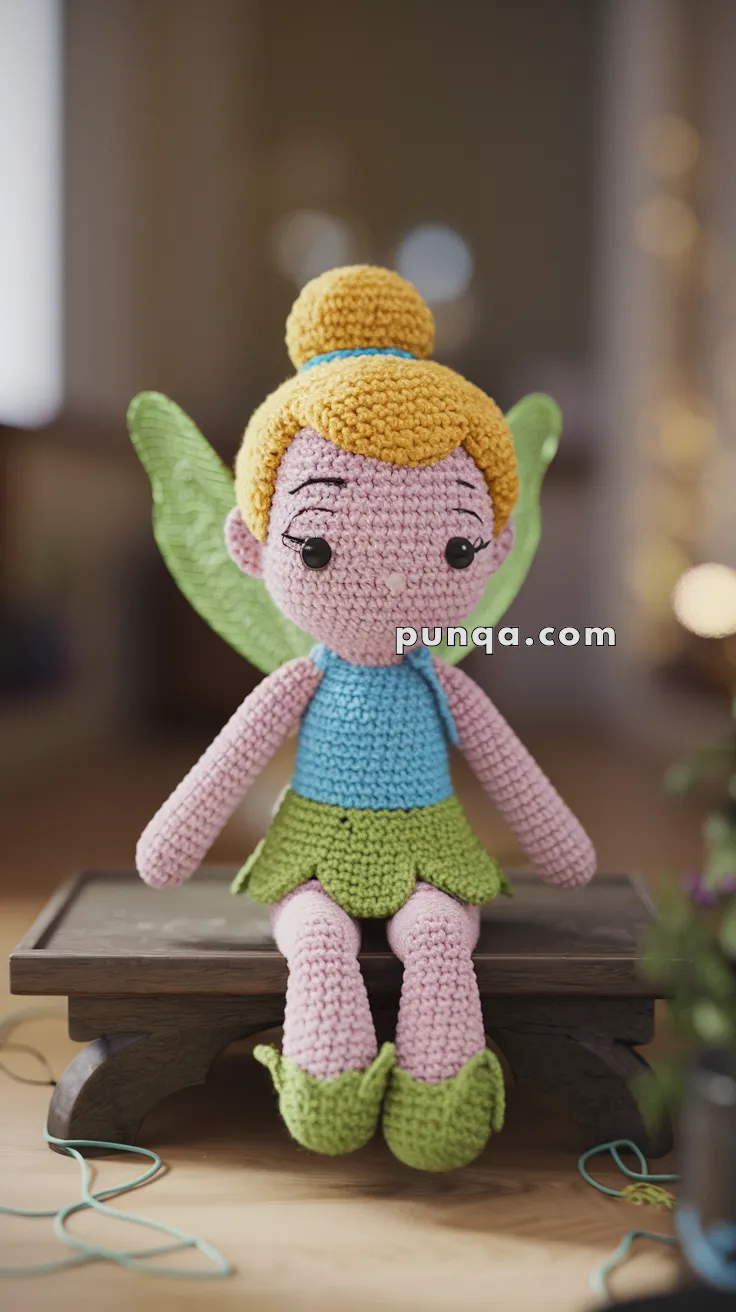
Pose the fairy in a seated position with wings standing upright.
🌟 Finished Fairy Doll
Your fairy doll now features:
✔ Blonde bun with blue band
✔ Light blue sleeveless top
✔ Leaf-shaped green skirt
✔ Long slim legs
✔ Leaf shoes
✔ Upright rounded wings
✔ Gentle facial expression
✔ Seated pose
Perfect for shelves, nursery décor, gifts, or fairy-themed collections.
🧚 Happy Crocheting!
✨ Your magical Tinker Bell amigurumi is ready! With her leafy slippers, petal skirt, elegant lashes, and signature bun, she’ll sparkle as the perfect handmade fairy for gifts, décor, or your own collection. 🧚💫