Welcome to the artistic and contemplative world of amigurumi! 🏛️✨ Today, I’m excited to share my free crochet pattern for an Amigurumi The Thinker Statue—a unique and sophisticated creation perfect for art lovers, philosophy enthusiasts, or anyone who enjoys crafting sculptural and expressive plush designs! 🧶 Whether you love stitching up iconic figures, experimenting with textured stone-like details, or simply want to add a miniature version of Rodin’s masterpiece to your handmade lineup, this pattern will guide you through crafting a beautifully sculpted plush with a thoughtful pose, intricate shaping, and a touch of classical elegance! 🤔
This design embraces rich greys, subtle whites, and precise shaping to bring a refined and intellectual presence to your crochet projects! 🧶✨ I’ve carefully outlined each step to ensure your Amigurumi The Thinker Statue turns out just right—ready to spark conversation in your collection or become a treasured handmade gift! 🎁 So grab your hooks, pick out stone-inspired hues, and let’s stitch up a brilliant Thinker! 🏛️
🧠 Amigurumi “The Thinker” – Free Crochet Pattern
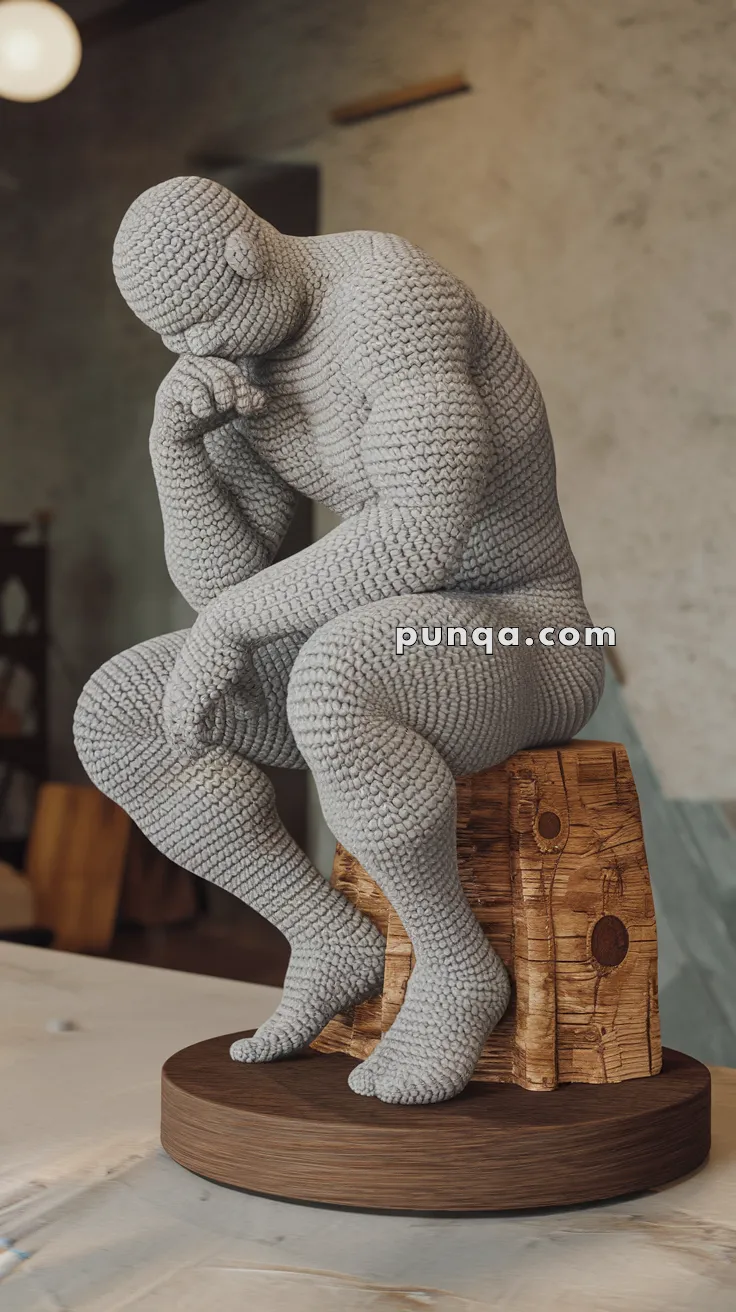
Crochet meets high art in this stunning yarn rendition of Auguste Rodin’s iconic sculpture The Thinker. This advanced amigurumi captures sculptural realism with bent limbs, forward-leaning torso, fists, and a detailed stump base. Perfect as an artistic centerpiece or thoughtful handmade gift!
✨ Skill Level
Advanced – This project involves sculptural shaping, short rows, bent limbs, fists, and careful assembly.
📏 Finished Size
Approx. 12 in (30 cm) tall seated, made with worsted yarn and a 3.5 mm hook.
🧶 Materials
-
Worsted weight yarn:
-
Color A: Stone Gray (entire body)
-
Color B: Brown (stump base)
-
Color C (optional): Dark Brown (surface embroidery for wood grain)
-
-
3.0–3.5 mm crochet hook
-
10–12 mm safety eyes (optional – not used in original statue)
-
Polyfill stuffing
-
Stitch markers
-
Tapestry needle
-
Pipe cleaners or armature wire (optional, for extra limb shaping)
-
Small wooden/plastic round base (optional for mounting)
🧵 Abbreviations (US Terms)
-
MR – Magic Ring
-
sc – Single Crochet
-
inc – Increase (2 sc in same st)
-
dec – Decrease (sc2tog)
-
ch – Chain
-
sl st – Slip Stitch
-
st – Stitch
-
FO – Fasten Off
-
BLO/FLO – Back/Front Loop Only
🪖 Head (Color A)
-
MR, 6 sc (6)
-
inc x6 (12)
-
(1 sc, inc) x6 (18)
-
(2 sc, inc) x6 (24)
5–10. sc around (24) -
(2 sc, dec) x6 (18)
-
(1 sc, dec) x6 (12)
-
dec x6 (6)
Stuff firmly. FO, leaving long tail for sewing.
💪 Torso (Forward-Leaning Chest) – Color A
-
MR, 6 sc (6)
-
inc x6 (12)
-
(1 sc, inc) x6 (18)
-
(2 sc, inc) x6 (24)
5–8. sc around (24) -
(3 sc, inc) x6 (30)
10–14. sc around (30) -
(3 sc, dec) x6 (24)
-
sc around (24)
-
Short Row Shaping (adds chest bulk): Work 12 sc, turn, sc 12 back. Repeat x3.
-
sc around (24)
-
(2 sc, dec) x6 (18)
20–22. sc around (18)
Stuff firmly, heavier at the chest front. FO.
🦵 Legs
Left Bent Leg (Color A)
-
MR, 6 sc (6)
-
inc x6 (12)
-
(1 sc, inc) x6 (18)
4–8. sc around (18) → thigh -
(2 sc, dec) x6 (12) → knee
10–11. sc around (12) -
(1 sc, inc) x6 (18) → calf
13–15. sc around (18) -
(2 sc, dec) x6 (12) → ankle
-
sc around (12)
Stuff and FO. Bend slightly at R9–10 before attaching to torso.
Right Straight Leg (Color A)
-
MR, 6 sc (6)
-
inc x6 (12)
-
(1 sc, inc) x6 (18)
4–10. sc around (18) -
(2 sc, dec) x6 (12)
12–15. sc around (12)
Stuff and FO. Keep straight. Attach leaning slightly forward.
🦶 Feet (Make 2 – Color A)
-
MR, 6 sc (6)
-
inc x6 (12)
-
(2 sc, inc) x4 (16)
4–6. sc around (16) -
(2 sc, dec) x4 (12)
-
sc around (12)
👉 For toes: embroider 3–4 vertical lines across front with same yarn or surface crochet bumps.
Stuff lightly. Sew to leg ends.
💪 Arms
Right Arm (Bent to Chin – Color A)
-
MR, 6 sc (6)
-
inc x6 (12)
-
(2 sc, inc) x4 (16)
4–8. sc around (16) -
(2 sc, dec) x4 (12) → elbow shaping
10–12. sc around (12)
13–15. sc around (12) → forearm
Stuff, FO. When attaching, bend at R9 to bring hand toward chin.
Left Arm (Relaxed on Knee – Color A)
Same as right arm, but keep straight. Attach with hand resting on bent knee.
✋ Hands (Make 2 – Sculpted Fists)
-
MR, 5 sc (5)
-
inc x5 (10)
3–4. sc around (10) -
ch 3, sl st into same st → thumb
-
sc around (10)
-
FO. Stuff firmly.
👉 Add 3–4 small raised stitches across knuckles with same yarn.
🪵 Tree Stump Base (Color B, with optional bark texture)
-
MR, 8 sc (8)
-
inc x8 (16)
-
(1 sc, inc) x8 (24)
-
(2 sc, inc) x8 (32)
5–12. sc around (32)
FO. Stuff firmly.
👉 For bark: embroider vertical lines and knots with Color C (dark brown).
Attach to flat wood/plastic base if desired.
✂️ Assembly
-
Attach legs first: bent leg across straight leg.
-
Sew torso angled slightly forward.
-
Add arms: bent arm with fist touching chin, relaxed arm across knee.
-
Attach head tilted slightly downward.
-
Seat figure securely on stump.
-
Stitch all joints firmly; optional wire can reinforce bent positions.
💡 Customization Ideas
-
Use marble-tone yarn for stone realism.
-
Add embroidered muscle lines for detail.
-
Create a museum-style plaque from felt or clay.
-
Scale down for a mini collectible!
🎉 And there you have it — your very own crochet version of The Thinker! This advanced amigurumi project is not only a test of patience and skill, but also a true piece of yarn art that will spark conversation wherever it sits.
🧵 Whether you keep it as a centerpiece, gift it to an art lover, or display it proudly in your studio, this handmade statue celebrates both creativity and contemplation. Take a step back, admire your work, and enjoy the thoughtful beauty you’ve brought to life in crochet.