Welcome to the sporty and dynamic world of amigurumi! 🎾✨ Today, I’m excited to share my free crochet pattern for a Tennis Racket—a fun and energetic creation perfect for tennis lovers, sports-themed collections, or anyone who enjoys crafting expressive and unique plush designs! 🏆 Whether you love stitching up athletic accessories, creating textured and lifelike figures, or simply want to add a playful tennis racket to your handmade lineup, this pattern will guide you through crafting a beautifully sculpted plush with a sturdy handle, detailed strings, and a touch of game-day excitement! 💖
This design embraces sleek lines, bold colors, and sporty details to bring a lively and competitive presence to your crochet projects! 🧶🔥 I’ve carefully outlined each step to ensure your Amigurumi Tennis Racket turns out just right—ready to serve up some fun in your collection or become a treasured handmade gift! 🎁 So grab your hooks and let’s stitch up a winning tennis racket! 🎾
🎾 Amigurumi Tennis Racket Crochet Pattern
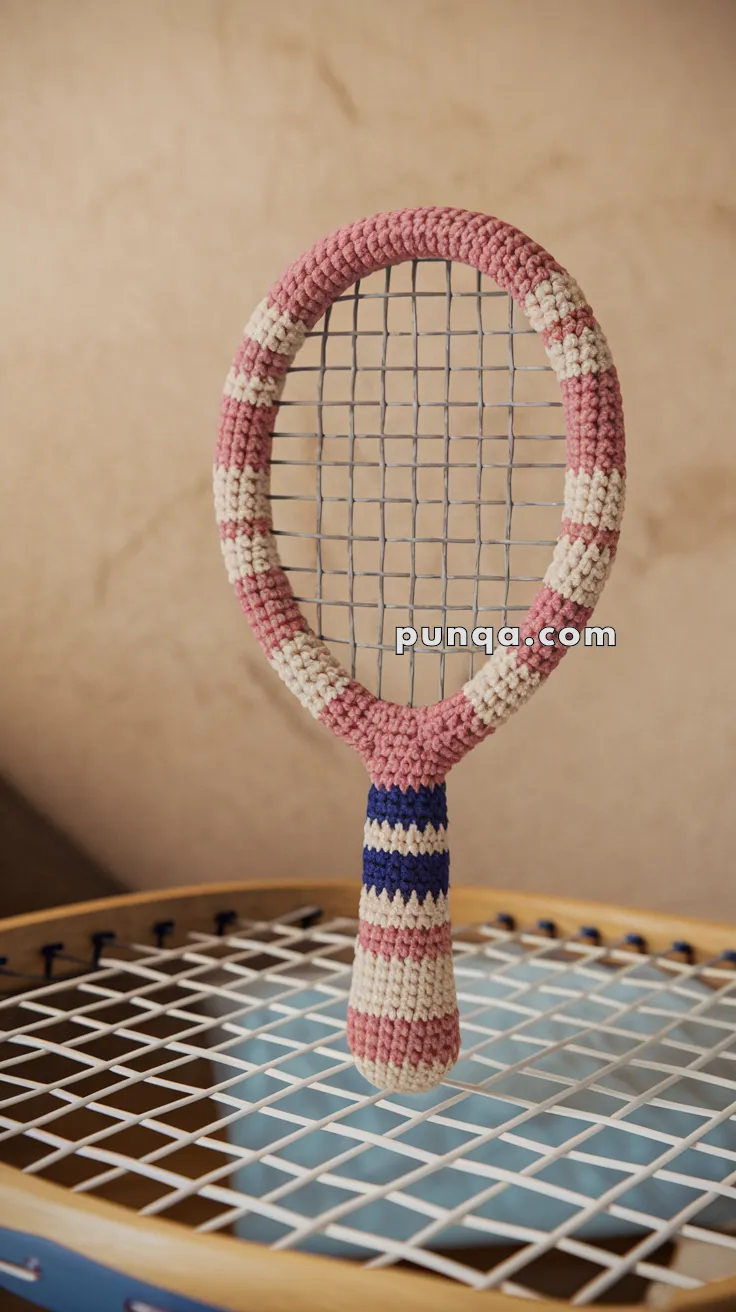
Serve up some cuteness with this crocheted tennis racket! With its striped handle, thick frame, and realistic mesh face, this mini racket is a fun make for sports lovers. It’s great as a plush, a nursery prop, or even a keychain-sized charm.
✨ Skill Level
Intermediate – Involves shaping, color changes, sewing, and inserting a mesh panel.
📏 Finished Size
Approx. 6–7 inches (15–18 cm) tall when using DK yarn and a 2.5 mm hook.
🧶 Materials
-
DK weight yarn in 3 colors:
-
Color A – Pink (main frame stripes)
-
Color B – Cream (frame + handle stripes)
-
Color C – Navy Blue (handle stripe)
-
-
2.5 mm crochet hook
-
Polyester fiberfill stuffing
-
Plastic mesh canvas or vinyl window screen (about 6 × 6 cm)
-
Hot glue or fabric glue (to secure mesh inside)
-
Optional: flexible craft wire for shaping the oval frame
-
Stitch marker, tapestry needle, scissors
🔤 Abbreviations (US Terms)
-
MR = Magic Ring
-
sc = single crochet
-
inc = increase (2 sc in same st)
-
dec = decrease
-
sl st = slip stitch
-
ch = chain
-
BLO = back loop only
-
FO = fasten off
🧵 Pattern Instructions
🪄 Racket Frame (Make 2 identical pieces)
With Color A (pink) and Color B (cream), alternating stripes:
-
MR, 6 sc (6)
-
Inc in each st (12)
-
(sc, inc) × 6 (18)
-
(2 sc, inc) × 6 (24)
-
(3 sc, inc) × 6 (30)
-
(4 sc, inc) × 6 (36)
7–13. Sc around (36) → switch colors as follows:-
4 rounds pink
-
2 rounds cream
-
4 rounds pink
-
2 rounds cream
-
👉 This creates the thicker rim as seen in the photo. FO, leave long tail for sewing.
👉 Optional: Insert wire between the two frame halves before sewing for sturdiness.
🧵 Mesh Insert
-
Cut a rounded oval of plastic mesh canvas slightly smaller than the crocheted rings (about 4.5 in / 11 cm tall).
-
Trim edges until it fits snugly.
-
Place between the two crocheted frame halves.
-
Use whip stitch to sew the edges of the rings together around the mesh.
👉 Secure edges with a tiny amount of fabric glue if needed.
🪶 Handle (with slight taper)
Using Color B (cream), Color A (pink), and Color C (navy):
-
MR, 6 sc (6)
-
(sc, inc) × 3 (9)
-
(2 sc, inc) × 3 (12) → wider at top to match frame
4–5. Sc around (12) [cream]
6–7. Sc around (12) [pink]
8–9. Sc around (12) [cream]
10–11. Sc around (12) [navy]
12–13. (sc, dec) × 4 (8) [cream]
14–16. Sc around (8) [pink]
👉 Stuff handle firmly. FO, close end.
🧷 Assembly
-
Attach the handle securely to the bottom join of the racket frame.
-
Make sure the mesh insert is sandwiched flat and firmly sewn in.
-
Shape the handle so it tapers smoothly from wide (top) to narrow (end).
💡 Customization Ideas
-
Use team colors or your favorite tennis player’s style.
-
Add a mini crochet tennis ball for a cute set.
-
Scale down with sport/baby yarn for a keychain version.
-
Embroider initials or a logo on the handle for personalization.
🎉 Final Look
Your amigurumi tennis racket should now have:
✔ A thick, striped oval frame
✔ A realistic mesh insert
✔ A striped tapered handle just like the real thing
This sporty project is sure to be a hit in any crochet collection! 🧶🎾
Whether you’re crafting a gift for a tennis lover or just adding charm to your amigurumi collection, this miniature racket is sure to be a smashing success! 🧶🎾