Oh, the joy of combining two of my favorite things: crafting and tacos! 🌮 Amigurumi, the Japanese art of knitting or crocheting small stuffed creatures, has captured my heart, and creating a taco fridge magnet is just the quirky project I need. The appeal of amigurumi lies in its adorable and whimsical nature, offering endless possibilities for creativity. Whether you’re a crochet newbie or a seasoned veteran, the process of bringing a tiny taco to life is both rewarding and delightful. Plus, who wouldn’t want a cheerful taco smiling back at them every time they reach for a snack in the fridge? 😊
Starting this project, I gather my supplies: some colorful yarn, a trusty crochet hook, and a strong magnet to bring my taco to life. The steps involve crafting tiny taco components like the shell, lettuce, cheese, and even little tomato slices, all using simple crochet techniques perfect for any skill level. As I crochet each piece, I feel a sense of accomplishment, seeing my creation come together stitch by stitch. It’s all about the details, and adding a little face gives my amigurumi taco a personality of its own. The end result? A magnetic masterpiece that adds a bit of joy to my kitchen decor and serves as a daily reminder of the fun and creativity I’ve invested in this charming little project. 🌟
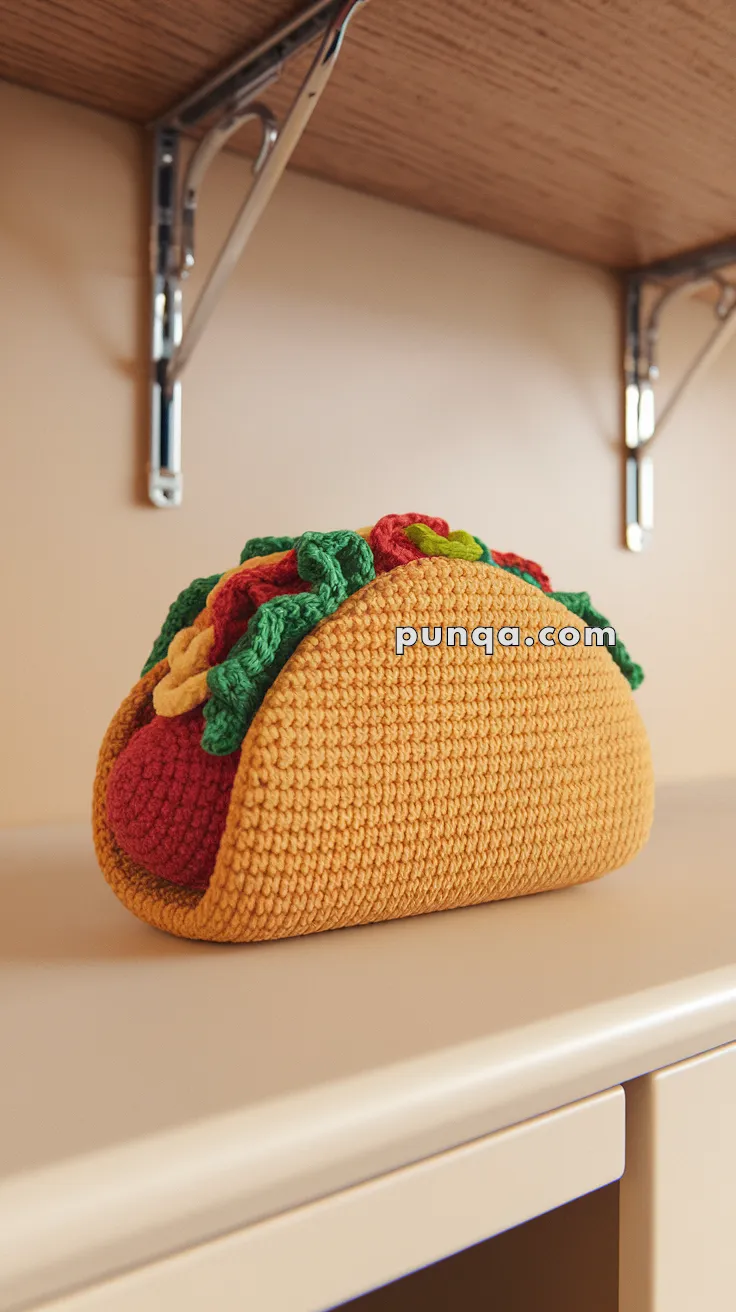
Amigurumi Taco Fridge Magnet Pattern
Skill Level: Beginner
Finished Size: Approximately 3 inches wide
Materials
– Worsted weight yarn in yellow (shell), brown (meat), red (tomato), green (lettuce), and orange (cheese)
– 3.5 mm crochet hook
– Small amount of fiberfill stuffing
– Strong magnet
– Yarn needle
– Scissors
Abbreviations (US Terminology)
– ch: chain
– sc: single crochet
– inc: increase (2 sc in one stitch)
– dec: decrease (single crochet two stitches together)
– sl st: slip stitch
– st(s): stitch(es)
Pattern Instructions
Taco Shell
1. With yellow yarn, ch 2.
2. Round 1: 6 sc in second ch from hook. (6)
3. Round 2: inc in each st around. (12)
4. Round 3: (sc, inc) 6 times. (18)
5. Round 4: (2 sc, inc) 6 times. (24)
6. Rounds 5-8: sc in each st around. (24)
7. Fasten off and leave a long tail for sewing.
Taco Filling
Meat
1. With brown yarn, ch 2.
2. Round 1: 6 sc in second ch from hook. (6)
3. Round 2: (sc, inc) 3 times. (9)
4. Fasten off and leave a tail.
Lettuce
1. With green yarn, ch 10.
2. Row 1: Turn, sl st in 2nd ch from hook, sc in next, hdc in next 2, dc in next 2, hdc in next 2, sc in next, sl st in last. Fasten off.
Tomato
1. With red yarn, ch 2.
2. Round 1: 6 sc in second ch from hook. (6)
3. Fasten off and leave a tail.
Cheese
1. With orange yarn, ch 6.
2. Row 1: Turn, sc in 2nd ch from hook and in each ch across. (5)
3. Fasten off.
Assembly
1. Sew the meat to the center of the taco shell.
2. Arrange the lettuce, tomato, and cheese on top of the meat. Sew each piece in place securely.
3. Fold the taco shell in half and sew the edges together, leaving the top open.
Finishing Touches
1. Lightly stuff the taco with fiberfill to give it a plump shape.
2. Sew or glue a strong magnet to the back of the taco.
Tips:
– Customize your taco with different yarn colors for added fun! 🌮
– Remember, tacos are meant to be playful and delicious, so have fun with it! 😊
Enjoy your cute and quirky taco magnet!
🎉 Your handmade crochet creation for Amigurumi Taco Fridge Magnet Pattern is complete! Enjoy your one-of-a-kind amigurumi masterpiece and experiment with various yarn colors for a personal touch! 🧶✨