Start your crochet morning with something deliciously fun—this Amigurumi Sunny Side Up Fried Eggs pattern is a whimsical way to stitch up a classic breakfast favorite! Whether you’re crafting for food-themed decor, playful gifts, or simply enjoy quirky crochet designs, this free pattern lets you create fluffy, textured eggs with a cheerful golden yolk. Perfect for adding a lighthearted touch to your handmade collection, these cute eggs bring a cozy, homemade feel to any space.
Designed for creativity and customization, this pattern lets you experiment with different sizes, yarn textures, or even playful embellishments like embroidered smiley faces or tiny bacon companions! Make a stack for a quirky kitchen display, turn them into a fun keychain, or craft a set for imaginative play. Whether gifted to a fellow crochet foodie or stitched up just for fun, these amigurumi fried eggs are a quick and satisfying project that looks good enough to eat—one stitch at a time! 🍳🧶✨
🍳 Amigurumi Sunny Side Up Fried Eggs Crochet Pattern
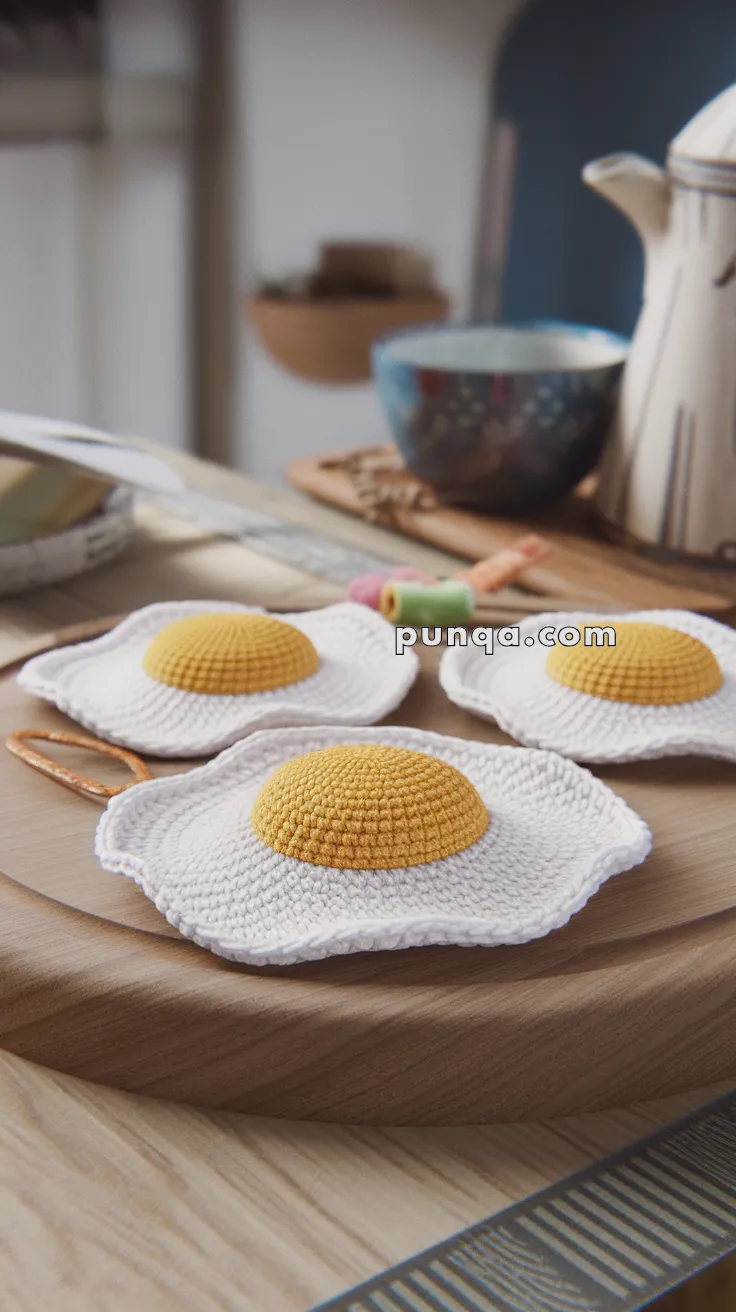
Bring breakfast fun into your crochet projects with this adorable sunny side up egg amigurumi! With its puffy golden yolk and wavy white edges, this whimsical pattern is perfect as a kitchen decoration, a playful coaster, or even a quirky gift. Make a whole batch and serve up smiles!
✨ Skill Level
Beginner – Simple shapes and basic stitching techniques.
📏 Finished Size
Approx. 4–5 inches (10–12 cm) wide using worsted weight yarn and a 3.5 mm hook.
🧶 Materials
-
Worsted weight cotton yarn:
-
Color A: White (egg white)
-
Color B: Golden Yellow (yolk)
-
-
3.5 mm crochet hook
-
Tapestry needle
-
Stitch marker
-
Polyfill stuffing (for yolk)
🧵 Abbreviations (US Terms)
MR – Magic Ring
sc – Single Crochet
inc – Increase (2 sc in one stitch)
dec – Decrease (sc two stitches together)
sl st – Slip Stitch
FO – Fasten Off
🥚 Yolk (Make 1 per egg)
Use Color B (Golden Yellow)
Work in continuous spiral.
-
MR, 6 sc (6)
-
inc x6 (12)
-
(1 sc, inc) x6 (18)
-
(2 sc, inc) x6 (24)
-
sc around (24)
-
sc around (24)
-
(2 sc, dec) x6 (18)
– Lightly stuff the yolk -
(1 sc, dec) x6 (12)
-
dec x6 (6)
FO and weave in the end.
🍽️ Egg White Base
Use Color A (White)
Work in joined rounds.
-
MR, 6 sc, join with sl st (6)
-
ch 1, inc in each st around, sl st to join (12)
-
ch 1, (1 sc, inc) x6, sl st (18)
-
ch 1, (2 sc, inc) x6, sl st (24)
-
ch 1, (3 sc, inc) x6, sl st (30)
-
ch 1, (4 sc, inc) x6, sl st (36)
-
ch 1, (5 sc, inc) x6, sl st (42)
-
ch 1, (sc in next 2, inc, sc in next 4, inc) repeat around, sl st (48+)
-
ch 1, sc in each st around, sl st (creates the wave effect)
FO and weave in the ends.
✂️ Assembly
-
Sew the finished yolk to the center of the egg white using the yarn tail.
-
Flatten the egg white by gently shaping the wavy edge with your fingers.
-
Optional: Add a loop for hanging as a kitchen decor item.
💡 Customization Ideas
-
Make a keychain version using finer yarn and a 2 mm hook.
-
Add a face to the yolk for a kawaii breakfast buddy.
-
Crochet several and join them into a quirky breakfast garland.
This sunny side up fried egg is a quick, humorous, and satisfying project—perfect for gifts, kitchens, or anyone who loves breakfast-inspired crafts! 🧵🍳