Swing into action with this Amigurumi Spiderman crochet pattern! 🕷️✨ With his iconic red-and-blue suit, expressive eyes, and heroic stance, this design brings the beloved web-slinger to life in yarn form. Whether you’re crafting for a comic book fan, a themed décor piece, or simply love character-inspired amigurumi, this FREE pattern is a dynamic addition to your collection.
Designed for intermediate crocheters, this pattern allows for customization in costume details, web textures, and even tiny accessories like a miniature city skyline or a web strand to enhance Spiderman’s adventurous presence. Choose classic reds and blues for an authentic look or experiment with alternate suit colors for a creative twist! Whether displayed as part of a superhero lineup or gifted to a fellow crochet enthusiast, this amigurumi Spiderman is sure to impress. Grab your hook, select your favorite yarn, and let’s bring this legendary hero to life—one stitch at a time! 🧶✨
🕷️ Amigurumi Spiderman Crochet Pattern
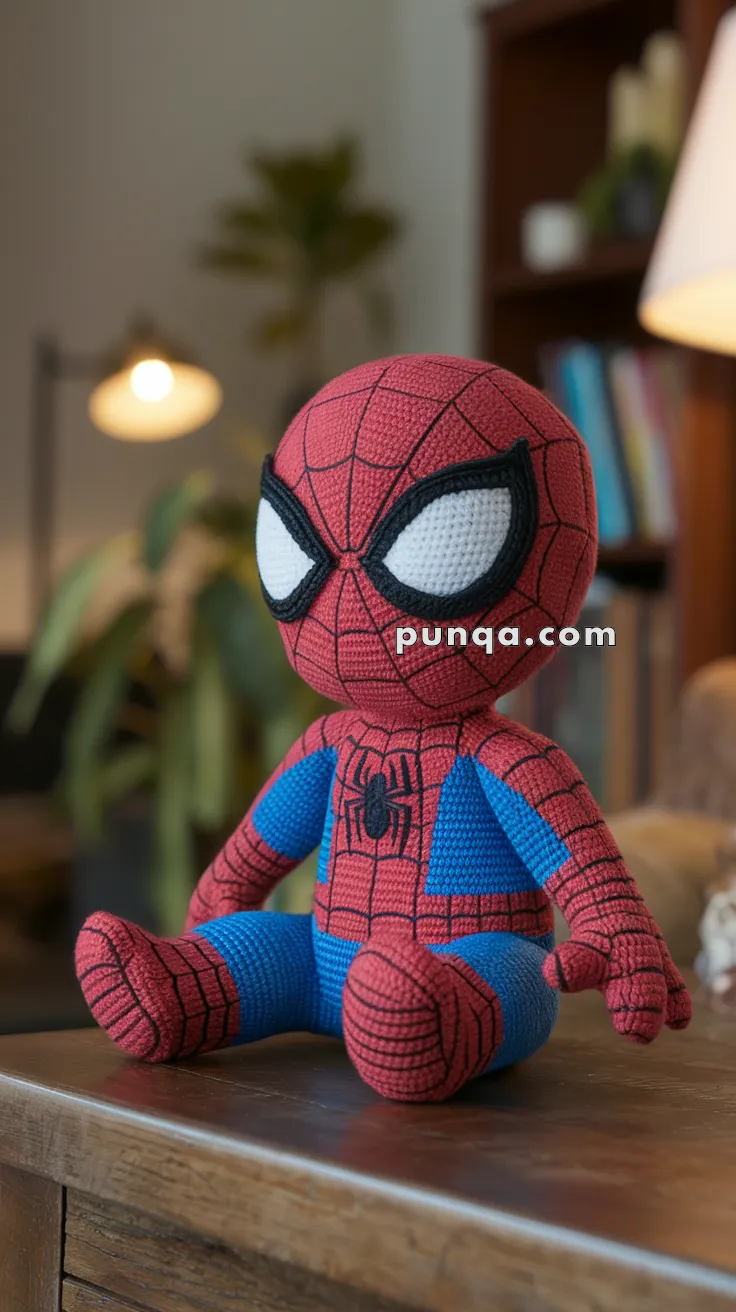
This chibi-style Spiderman features a large but balanced head, compact barrel-shaped body, chunky seated legs, bold white eyes with thick black frames, and crisp embroidered webbing. The red-and-blue suit paneling matches the classic look seen in the photo, making this plush perfect for display or gifting.
🧶 Skill Level
Intermediate – includes shaping, clean color changes, surface embroidery, and careful assembly for a seated pose.
📏 Finished Size
Approx. 22–26 cm (9–10 inches) tall
(using worsted-weight yarn and a 3.0–3.5 mm crochet hook)
✂️ Materials
Worsted-weight yarn
-
Red – mask, chest, gloves, boots
-
Blue – side panels, shorts/hips, thighs
-
White – eyes
-
Black – eye frames, web lines, spider emblem
Notions
-
3.0–3.5 mm crochet hook
-
Fiberfill stuffing
-
Yarn needle, scissors
-
Stitch marker
(Safety eyes are NOT used – eyes are crocheted appliqués)
🧵 Abbreviations (US Terms)
MR – Magic Ring
sc – Single Crochet
inc – Increase (2 sc in one stitch)
dec – Decrease (sc 2 together)
ch – Chain
sl st – Slip Stitch
FO – Fasten Off
( ) – stitch count at end of round
🧠 Head (Red)
R1 – MR, 6 sc (6)
R2 – inc ×6 (12)
R3 – (sc, inc) ×6 (18)
R4 – (2 sc, inc) ×6 (24)
R5 – (3 sc, inc) ×6 (30)
R6 – (4 sc, inc) ×6 (36)
R7 – (5 sc, inc) ×6 (42)
R8–16 – sc around (42)
R17 – (5 sc, dec) ×6 (36)
R18 – (4 sc, dec) ×6 (30)
R19 – (3 sc, dec) ×6 (24)
Stuff firmly.
R20 – (2 sc, dec) ×6 (18)
R21 – (sc, dec) ×6 (12)
R22 – dec ×6 (6)
FO and close.
👁️ Eyes (White with Thick Black Frame – Make 2)
Eye White
Ch 9
R1 – sc in 2nd ch, hdc 2, dc 3, hdc 2, 3 sc in last ch
Rotate underside: hdc 2, dc 3, hdc 2, sc (24)
R2 – inc, sc 6, inc ×3, sc 6, inc ×2 (30)
FO.
Black Frame
Join black yarn around the eye white.
Sc evenly around, adding 2 extra stitches at each pointed end to keep the sharp eye shape.
FO, leave long tail.
Eye Placement
-
Sew eyes high on the face, angled upward
-
Inner tips point slightly toward the center
-
Spacing should feel wide and expressive
🧍 Body (Blue Lower, Red Upper)
Start with blue.
R1 – MR, 6 sc (6)
R2 – inc ×6 (12)
R3 – (sc, inc) ×6 (18)
R4 – (2 sc, inc) ×6 (24)
R5 – (3 sc, inc) ×6 (30)
R6 – (4 sc, inc) ×6 (36)
R7–8 – sc around (36)
Switch to red.
R9–13 – sc around (36)
Stuff firmly, keeping body short and rounded.
R14 – (4 sc, dec) ×6 (30)
R15 – (3 sc, dec) ×6 (24)
R16 – (2 sc, dec) ×6 (18)
R17 – (sc, dec) ×6 (12)
FO and close.
🦵 Legs (Make 2 – Chunky Seated)
Start with red (boots).
R1 – MR, 6 sc (6)
R2 – inc ×6 (12)
R3 – (sc, inc) ×6 (18)
R4–5 – sc around (18)
Switch to blue (thigh).
R6–8 – sc around (18)
Lightly stuff boots, then thighs (do not overstuff).
FO, leave long tail.
Leg Placement
-
Sew legs to front-lower sides of body
-
Feet point forward to create a seated pose
💪 Arms (Make 2)
Start with red.
R1 – MR, 6 sc (6)
R2 – inc ×6 (12)
R3–5 – sc around (12)
Switch to blue.
R6–7 – sc around (12)
R8 – (2 sc, dec) ×3 (9)
R9–10 – sc around (9)
Lightly stuff forearm only, flatten slightly.
FO, leave tail.
Arm Placement
Attach low and forward so hands rest near the lap.
🕷️ Chest Spider Emblem (Black)
Embroider a small spider centered on the chest:
-
Oval body
-
4 short angled legs per side
Keep the emblem no wider than 6–7 stitches total for accuracy.
🕸️ Webbing (Black Embroidery)
Mask
-
One vertical center line
-
4–5 radiating lines from forehead
-
Curved horizontal arcs between lines
Suit
Add light webbing on:
-
Chest
-
Gloves
-
Boots
Keep lines clean and spaced, not heavy.
🧩 Assembly Order
-
Sew eyes to head
-
Embroider webbing on head
-
Sew head to body (slight forward tilt)
-
Attach legs for seated pose
-
Attach arms
-
Embroider spider emblem
-
Add suit webbing
🕷️ Finished Spiderman
Your Spiderman plush is complete!
With its balanced head size, bold framed eyes, compact seated body, chunky legs, and crisp web details, this amigurumi matches the photo’s proportions and charm while remaining fun and approachable.
Perfect for superhero fans, gifts, or shelf display 🕷️🧶