Oh, the joy of creating amigurumi! There’s something absolutely delightful about turning a simple ball of yarn into a miniature work of art. When it comes to crocheting an amigurumi space shuttle, the excitement is out of this world! 🚀 It’s like capturing a piece of the cosmos and holding it right in your hands. Crafting a space shuttle amigurumi combines my love for astronomy and my passion for crochet, making it a wonderfully rewarding project. The fun begins with choosing the perfect colors to bring the shuttle to life, from the sleek white body to the fiery orange of the boosters.
The process of creating an amigurumi space shuttle is an adventure in itself. I love starting with the body, watching as the shuttle slowly takes shape stitch by stitch. It’s all about patience and precision, but the end result is absolutely worth it. 🧶 As I progress, I get to add the little details—each fin and window is like adding a touch of personality to the shuttle. And when the final stitch is in place, there’s a moment of pure satisfaction, knowing I’ve crafted something truly special. Whether it’s a gift for a space enthusiast or a whimsical decoration for my own space, this tiny shuttle is a charming reminder of the wonders beyond our atmosphere.
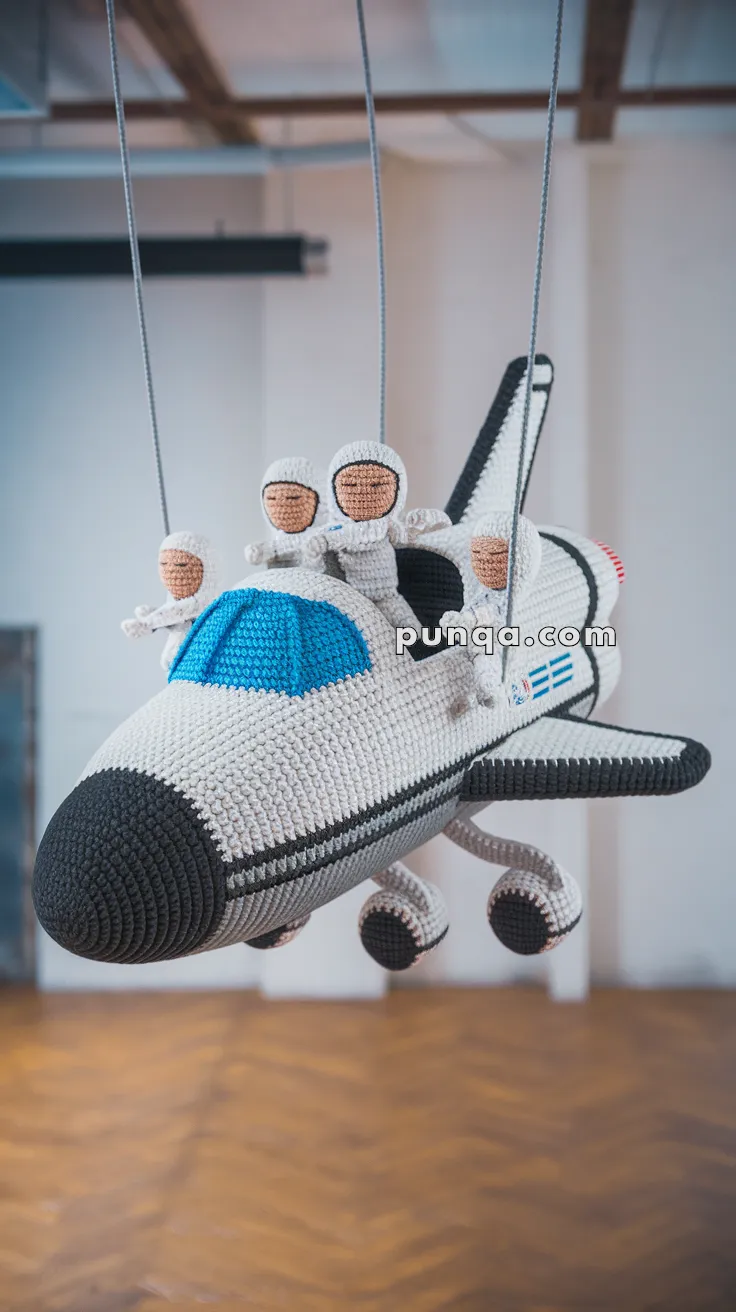
🚀 Amigurumi Space Shuttle with Astronauts – Free Crochet Pattern
🧶 Skill Level: Intermediate – Advanced
📏 Finished Size: ~40–50 cm long
🧵 Materials
-
Yarn (Worsted Weight or similar):
-
White (main body of shuttle)
-
Black (nose, wings, windows, details)
-
Blue (cockpit window)
-
Red (rear engine details)
-
Skin tone (astronaut faces)
-
Gray (suits, engines)
-
-
Crochet hook: 2.5 mm – 3.5 mm
-
Safety eyes (6 mm) for astronauts or embroidery thread
-
Fiberfill stuffing
-
Yarn needle, stitch marker, scissors
-
Optional: wires or dowels for wing shaping, clear thread for hanging
🧷 Abbreviations (US terms)
-
MR – Magic Ring
-
sc – Single Crochet
-
inc – Increase
-
dec – Decrease
-
sl st – Slip Stitch
-
ch – Chain
-
FO – Fasten Off
🛰 Shuttle Body (White)
-
MR, 6 sc
-
inc x6 (12)
-
(sc, inc) x6 (18)
-
(2 sc, inc) x6 (24)
5–10. sc around (24) -
(3 sc, inc) x6 (30)
12–16. sc around (30) -
(4 sc, inc) x6 (36)
18–40. sc around (36) -
(4 sc, dec) x6 (30)
-
(3 sc, dec) x6 (24)
-
(2 sc, dec) x6 (18)
-
(sc, dec) x6 (12)
Stuff and FO
🔘 Nose Cone (Black)
-
MR, 6 sc
-
inc x6 (12)
-
(sc, inc) x6 (18)
4–7. sc around (18) -
(sc, dec) x6 (12)
-
dec x6 (6), FO
Sew to front of shuttle
🔷 Cockpit Window (Blue)
-
ch 9, sc across (8)
2–4. sc across, shaping as a slight curve
Sew to top front, embroider black outline
✈️ Wings (Make 2 – Black & White)
Base (White):
-
ch 12, turn
2–4. sc across (12), dec each row at edge to create triangle shape
FO and make black border; sew to bottom sides
🔘 Rear Engines (Make 3 – Gray)
-
MR, 6 sc
-
inc x6 (12)
3–6. sc around
FO and stuff lightly
Attach 2 small and 1 larger engine to rear bottom
👨🚀 Astronauts (Make 3–5)
Head (Skin Tone)
-
MR, 6 sc
-
inc x6 (12)
3–5. sc around
Add safety eyes or embroider -
dec x6 (6), FO
Helmet & Body (White)
-
MR, 6 sc
-
inc x6 (12)
3–5. sc around
Insert head into top opening and stitch in place
6–12. continue sc for body
Add small arms (ch 6, sc back, sew on sides)
Legs: ch 6, fold in half, sc, and sew under body
Optional: embroider small flags, patches, or stripes on suits
✍️ Details
-
Embroider thin black lines for cockpit framing and wing edges
-
Add space decals or flag with surface crochet
-
Optional: Attach with clear fishing line or string to hang from ceiling